| |||
 |
 |  | |
 |  | ||
 |  | ||
 |  | ||
 |  | ||
| |||
|
|
| | |
| | ||
| | ||
| | ||
| | ||


|
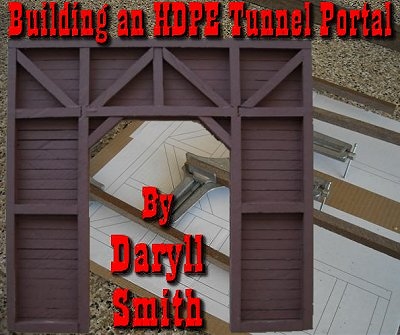
Editor's Note: Reader and contributor Daryll Smith recently built a garden railroad using Bill Logan's HDPE Flexible Roadbed method. He decided he liked working with HDPE, and began building other infrastructure from it, including the tunnel portal described in this article. Though Daryll originally sent me information for another article, I thought that an article about his tunnel portal construction might be a good place to start. Yes, you could use "real" lumber to build the same project if you wanted, but the HDPE has the advantage of being impervious to weather of any kind. - Paul Building an HDPE Tunnel PortalWhen you build your railroad from HDPE, you will probably have some odd pieces left over. I decided to try using them for items like bridges and tunnel portals that you might ordinarily use "real" lumber for.Cutting the HDPEThe tunnel portals are made from the "plastic" deck lumber cut into 1/2" x 1/2" pieces for the frame work and 1/2" x 3/8" pieces for the lathing. To cut the HDPE, I use a 10" Craftsman table saw with the following blades:
HDPE generates a lot of "saw dust" and the plastic content makes the blade heat up, so the fewer teeth get a better bite when ripping and allow the blade to dissipate heat better. Also, a blade with fewer teeth doesn't get "loaded up" with "saw dust" as quickly as a finer-tooth blade does. All of these blades cost under $14 at Home Depot; spending much more money won't necessarily buy you better operation. The Portal PlansI made my 15-1/4 inches wide by 15-inches tall -- the opening is 7-1/4 x 11. On the plans, the portal is 14.5" wide by 14" tall, which should provide about 10" of clearance, large enough for anything other than a very large 1:20.3 locomotive (like the Bachmann K27)
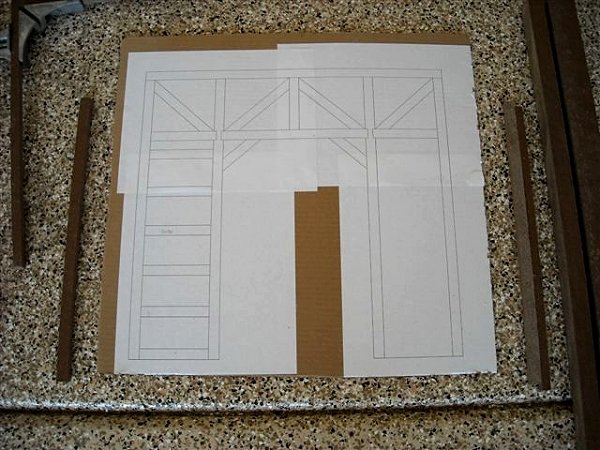
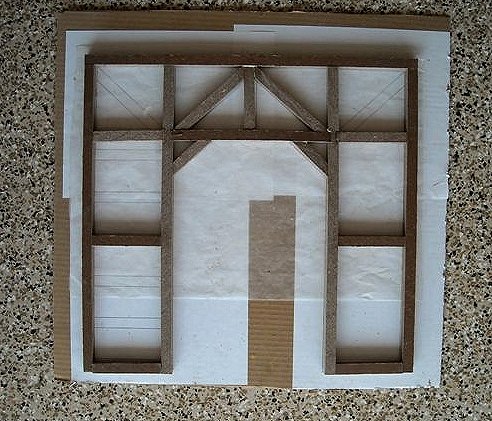
At Paul's request, I have created a PDF file that includes reduced and full sized plans. If you print the last four pages of the PDF file, you can put the plans together the way they are shown in the photo above. To download the plans, click here. When you print the plans, make certain that buttons that say "scale to fit" or "scale to printable size" or the like are NOT checked, so they print at the correct size. On the other hand, if you NEED a different size, you can scale to fit. If you want more than 10" clearance, print at 105%. For 1:32 try printing at 75%. For O scale, you should be able to simply print the first two pages (and use 1/4" stock instead of 1/2"). Assembling the FrameTo fasten the pieces together, I used Titebond glue and 18 gauge wire nails. (3/4" long for building the frame and 5/8" long for attaching the lathing - O scale should use 1/2" max, 3/8" is better, if your brad gun will fire them.). The only thing remotely complex was "notching" the two inside vertical timbers to accept the short cross-pieces. When using decking lumber, the longer pieces can bend slightly during the initial assembly of the frame. I used a 7-1/4 inch spacer (1/2 x 1/2) near the bottom of the two up-rights to maintain an even opening while I attached the lathing strips. The final assembly is pretty sturdy. The pictures below show the assembly process. Click on any photo to see a bigger version.
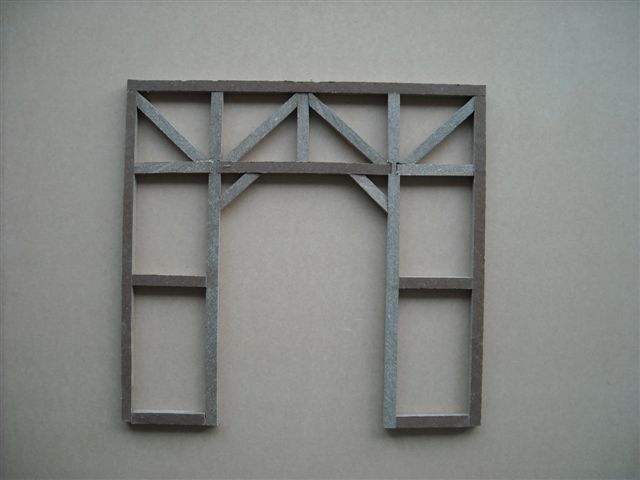
Finishing the PortalWhen the frame was complete, I attached the 1/2" x 3/8" lath pieces to the "back" of the frame using Titebond glue and 5/8" 18-gauge wire nails (for O scale use 3/8" wire nails if your brad gun will fire them). To paint the final assembly, I used Krylon Red Primer spray paint. (If you wish to finish with another color, you should still start out with a primer.) In the photos you can see that the plastic deck lumber shows the saw blade swirls from ripping which looks like rough-cut lumber from a saw mill which the paint highlights. The last photo shows the initial installation of the tunnel with a bit if cribbing added. ConclusionIn the meantime, the Turkey Creek railroad has lots of other things going on, such as a pondless water feature being installed this month (by a professional - I know my limitations). I have also built a second portal, but don't have it installed yet.If you have any comments or questions about any of my projects, please contact Paul and he will forward me your comments.
|


|
|
| 
|
 |
 |
|
 |
 |
Note: Family Garden Trains?, Garden Train Store?, Big Christmas Trains?, BIG Indoor Trains?, and BIG Train Store? are trademarks of Breakthrough Communications (www.btcomm.com). All information, data, text, and illustrations on this web site are Copyright (c) 1999, 2000, 2001, 2002, 2003, 2004, 2005, 2006, 2007, 2008, 2009, 2010, 2011, 2012, 2013 by Paul D. Race. Reuse or republication without prior written permission is specifically
forbidden.
Family Garden Trains is a participant in the Amazon Services LLC Associates Program, an affiliate advertising program designed to provide a means for sites to earn advertising fees by advertising and linking to amazon.com.
For more information, please contact us

 |  |