| |||
 |
 |  | |
 |
 | ||
 |
 | ||
 |  | ||
 |  | ||
| |||
|
|
| | |
|
| ||
|
|
| ||
| | ||
| | ||
| Written by Paul D. Race for Family Garden Trains(tm) |
 |

|
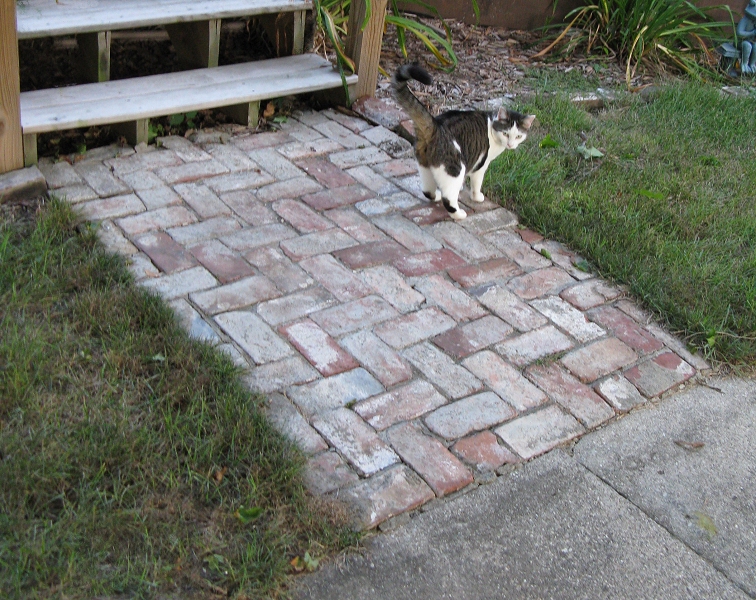
Dry-Setting a Paver PathAlthough we only live on about one acre of our two-acre lot, there are still a lot of places to walk. When we moved in there were probably about 150 feet of sidewalks, some in great condition, some needing help.I dabbled with adding walkways a few places, more for show than functionality.
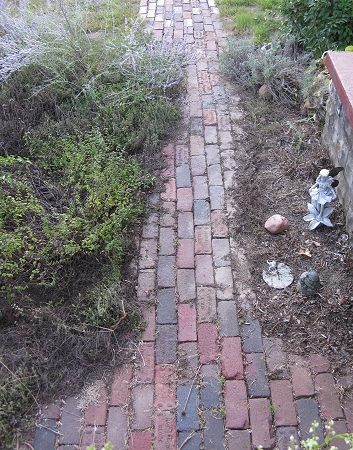
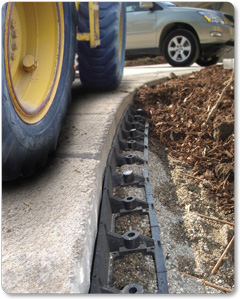
So you can see, after living here almost 20 years, I had laid about 30' worth of paver or brick sidewalk and laid and taken up about 9' of fake rock sidewalk. In the meantime, some of our real sidewalks were starting to look bad. Then a fellow at a local garage sale was selling a bunch of pavers he had bought for some project and never got around to it. The price was right: $32 for a big pile, worth over $150 by any calculation. When I got them home I counted and realized there were a few over 400. I "did the math" and figured out that we could build a very small patio with them or redo most of the front walk - neither aspect seemed compelling unless I could find a source to buy more of the pavers if I needed them. And I couldn't find an exact match. So the pavers sat in a very nice pile for several years. Finally the sidewalk in front of the house - the one that ran from the front porch to the street - began disintegrating more rapidly than it had been. There was a little 40"x48" "slab" at the foot of the steps that looked like it was maybe 6" deep. But the 26'-long sidewalk between the slab and the driveway looked like it was only an inch or two thick. And if the ivy and dandelions could bust through it, so could I. Time to do the Math - The original sidewalk was 3' wide, and I wanted to keep it at least that wide. (For one thing, that's a good width for walkers, and we're not getting any younger.) So lets say 3'x30' is 90 square feet, plus another 1 1/3 square feet for the extra "bump out" on the little "slab." Say 92 square feet overall to be on the "safe side." Because the pavers were 4" wide, I knew I could put them nine across to get my 36" width, so the only waste would be at the ends of the sidewalk. If your project requires some width that's not divisible by the width of a paver, you could wind up with a great deal of waste, though. Now here's where it gets interesting. Each of these pavers is 4"x8", a very common size. 4"x8" is 32 square inches. Each square foot is 144 square inches, so 144/32 meant that I would need 4.5 pavers per square foot. 92 square feet of sidewalk times 4.5 pavers meant that I would need 414 pavers minimum to finish the job. Counting my stack of bricks, I estimated that I had about 410, and knew that some of those had bad chips or corners knocked off, etc. Finding Enough Pavers to Finish the Job - The "home supply" places did not have any pavers in the same configuration. Plus mine were made of fired clay, like bricks, and the home supplys' pavers were all made of colored concrete - I didn't think they would hold up as well or look right with the fired pavers. A local brick and stone supplier, Snyder's, had fired clay pavers that were the same size but different colors. The base color of the offering they had was a "brick red," which wouldn't have been a problem, but my pavers were more terra cotta in color, and I didn't think a true "brick red" would look right with them. I had mixed paver and brick colors before and thought it was a nice, vintage effect. So I got about 20 of the darker, brownish-gray color that came in the same offering. All 4"x8" Pavers are Not Created Equal - While I was picking out pavers, I noticed that some of the ones I was tempted to pick out were smaller than the rest - turns out that there is a so-called "modular" version of the 4"x8" paver that is actually about 3 7/8" by 7 3/4". These were designed to work with mortar, in which case they would take up the same amount of space as the 4"x8" paver. If I hadn't already had about 400 of the true 4"x8" pavers, the "modular" pavers would have done just as well, but I had to be careful not to mix sizes. PreparationI wanted to "mark" where the original sidewalk was in case demolition made too big a mess of things. First I took a hedge-trimmer, held vertically, to the ivy that was constantly growing out over the old sidewalk and cut it back an inch or so from the edge. Then I took a power edger along both sides of the sidewalk. That way, I should be able to judge approximately where the new sidewalk could go.Cutting Half-Bricks - When I used antique pavers and bricks, I never had to worry about find half-bricks to fill in the odd corners, because they broke so easily. But the kiln-fired paver didn't tend to break, and they never broke evenly. So I put a masonry blade in my 7.5" circular saw, marked several bricks a the half-way point using a carpenter's square, laid each brick across two others on a solid sidewalk, got Shelia to run water slowly over the brick as I cut, and cut about six bricks in half. That would give me more than I would probably need, but I had purchased a few extra and I didn't want to have to set up for this exercise again in the middle of a job. DemolitionI had an axe but not a sledge-hammer, so I borrowed one from a friend and started slamming. If you've never used a sledge-hammer, the trick is to start the thing's motion with a downward shove at shoulder height, but be holding it loosely in your hand by the time it actually makes contact. If you're still holding the thing tightly when it hits the concrete, you will feel a bone-jarring shock to your wrist, elbow, and shoulder. Let the tool's weight and momentum do the work.About an hour after I started, I had broken up the slab, which was about 6" deep. I had started moving the chunks back to the "back forty" with a wheelbarrow, when some friends showed up. Shelia handed Derrick, a teenager who is bigger than me, the sledgehammer, and Derrick started on the first piece of sidewalk. An Unwelcome Surprise - To our astonishment, Derrick's pounding did not crack up the 1"-2"-thick rectangle of sidewalk. Rather the whole rectangle sort of bounced, no matter where he hit it. Derrick tried from several angles, and finally got it to break up. But when we pulled out the top inch or two of "sidewalk," we discovered that there were still several inches of concrete underneath. Apparently the original, 1930's-era sidewalk had been 4"-6" deep (going all the way to 8" at the driveway end). And sometime in the 1960s or 1970s, the previous owner had "fixed" the cracks in the sidewalk by knocking off the top inch or two, building new forms, and pouring a 1"-2" top coat" right on top of the old, disintegrating concrete. No wonder the dandelions weren't having any trouble busting up the "sidewalk" - they were only busting up a cosmetic top layer, which was not generally even adhering to the big heavy layer underneath. During the ensuing demoliton, I figure we broke up and hauled about 36 cubic feet of concrete - and that's a lot of stuff to move. If I had realized that the whole sidewalk was 4"-8" thick, I would definitely have come up with an alternate plan. This certainly influences my thinking regarding any MORE sidewalks we are considering replacing. Planning the New BaseOur house is surrounded by tightly-packed clay, most of which hasn't been disturbed since the 1930s. The two paver/brick paths I have laid so far were laid in a shallow bed of sand - I was confident that the clay underneath them wasn't going anywhere, or at least going very far. Yes, the bricks/pavers squeegee around a little, but for the most part it just adds to the "vintage" look of those paths. However, I wanted the front sidewalk to be more solid. I could have/should have backfilled half of the "ditch" with sand before I started using anything heavier, but where I live, sand is about as expensive as concrete unless you buy it by the truckload. So I elected to backfill with concrete, with about an inch of "sand mix" on top. This would provide a solid base while I was laying the pavers, and would get a lot more solid when I was all done laying pavers and soaked it down. If, thirty or forty years from now the next guy tries to dig up the sidewalk again, he'll probably be just as upset with me as I was with the previous homeowner, but I can live with that.Other Options to considerWhat About a Solid Concrete Base? - I have seen professional bricklayers who started making a "brick" sidewalk by setting forms and pouring a traditional concerete sidewalk a couple inches lower than the final sidewalk would be. Then when the concrete sidewalk was done, they'd pull up the forms, lay the bricks in a thin layer of sand or dry mortar right on top of the sidewalk, and mortar between them. (The sand or dry mortar compensates for the inevitable minor differences in the depth of the bricks.)This is especially useful for steps and porches. When you pour the concrete steps, you pour a brick-wide "lip" on the ground around the perimeter that the first course of bricks will sit on. You have to measure carefully, though, taking the width of the mortar into account as you're calculating how many "bricks high" each step will be. I didn't go this way because I wasn't going to do steps, I wasn't going to use real mortar, and I didn't want to mess with forms and wet concrete. I'm pretty good at dry-setting pavers, and felt more confident about that than about casting concrete, etc. What About Edging?
I considered using ordinary landscaping vinyl edging, installed low enough to "disappear" when I backfilled. but then again, I wanted to be able to "edge" the sidewalk in a few years when the grass starts overgrowing it, and the vinyl edging would have been in the way. Finally, the reason I didn't feel I needed to worry too much about edging was that I was installing the paver path where a sidewalk had been - a sidewalk we had dug out without significantly disturbing the packed clay along either edge. In this case, I felt like once the concrete underneath the pavers had cured, and I had packed soil back in alongside the pavers, they would have nowhere to go anyway. And in years to come, the grass and ivy lining the path would further stabilize the soil. If you have softer soil, or if the ground where you want to build your path has been graded or otherwise disturbed within the last 40 years, you should investigate the use of forms or edging for your project. Dumping and SettingWear very old clothes when you work with concrete of any kind, but sand mix is especially bad for giving off dust that clings to everything. You should wear a mask, too, especially when you're dumping the stuff out of bags, because that's when it's the worst. Leaving the doors and or windows open on that side of the house is also a bad idea. Quickrete comes in 80lb bags, and Quickcrete sand mix comes in 60lb bags. I started with about eight of the former and three of the latter. I also started at the "slab" end of the sidewalk, because I was more concerned about the installation looking good where it hit the steps than I was about how evenly it hit the driveway. I dumped enough concrete to bring the level for the whole "slab" area up to about 3" below the final level. I then dumped a bag of sand mix about a foot from the "starting point." Then I smoothed it out to about an inch below the final level. Note: - If you're using this method, it is possible to use only concrete mix. In fact, dry concrete mix is firmer when packed than dry sand mix. I prefer to use sand mix for top layer because, (a) I'm used to it, (b) it gives me more microscopic control over the exact setting of each paver, and (c) if you get a little sand between pavers, it's no big deal, but when you're working with ordinary concrete mix, you sometimes get pebbles in between pavers, and you have to reset them to get the pavers to fit together as they ought. I put the first paver at the corner of the step and pressed down until it felt reasonably "firm" and the top of the paver was about the height I wanted. If you are working with sand mix, you will pretty much have to put each paver where you want it, then push it down hard to "pack" down the sand mix, then pick it up, add a little more mix to bring it up to the right height and set if for "good." As I went, I checked each paver's "end-to-end" slope with a small level. After I was satisfied that I was off to a good start, I laid the next paver that would go along the step and checked its level as well. A paver can seem level but be higher or lower than the adjoining pavers. You can remove or add sand mix to adjust either the height or the level. However, the paver should feel "firm" in the sand mix before you go on to the next paver. Next I added the half-paver adjacent to the first paver I laid. Using a carpenter's square, I made certain that the edge of the "slab" area would be perpendicular to the bottom step of the porch. I added the long paver that would lie adjacent to the first paver I laid, then checked the level of the whole assembly so far. On the "slab" part of the sidewalk, I also checked the level across the pavers carefully, because I wanted there to be a very slight slope from the front steps to the soil. From that point on, I worked my way "outward" in both directions. If you've set each stone properly, on firmed-up, packed-down sand mix, once you have about four courses laid inward from the end of the project, you can kneel on the part you have already laid as you work your way down the path. Don't kneel on on the outside edge, unless you've used a rigid edger or some such to keep the pavers there from sinking down and away from the rest of the path. If you feel a paver give under your knees more than it ought, you may have to re-lay it. However, if a lot of them give way when you kneel on them, it means you're not setting them Once I finished the "slab" area, I incorporated a gradual narrowing to the sidewalk width. I could have done it in a nice square, but I felt the way I did it would provide more stability for the edge of the path in the transitional area. Also, the ivy will cover that part in a matter of weeks, anyway, so details along that edge aren't necessarily that important.
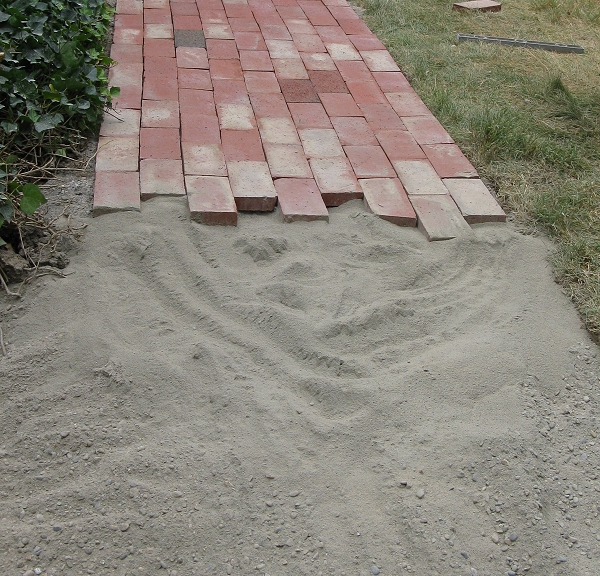
Saturating the "Base"Your pavers can still be kicked out of alignment, or a very heavy person can still cause them to sink here and there until the concrete mix and/or sand mix underneath them has hardened. With a stiff-bristled broom, get as much sand mix off of the surface of your pavers as you can. Then set your garden hose to the gentlest setting and saturate the sidewalk, then saturate it again. Fresh concrete or sand mix will draw water through itself like a wick as long as you keep giving it a drink, so don't assume you're done when the first puddles form. Once you've saturated the sidewalk, let it dry overnight, and test it in the morning. USUALLY you'll be surprised how firm it seems, even though a paver here and there may still have some "wobble left." Don't worry about that - you'll deal with that later.What if You Have to Stop in the Middle? If you have to stop in the middle on a patio, good luck. However, stopping in the middle of a paver sidewalk is possible. When I realized that I was going to need to stop, I made certain that the last course I laid was good and solid. Then I added another "course" that would just be a "placekeeper" to make certain my last "good course" would stay where it needed to. In the photo to the right you can see that there is no sand mix, only concrete mix under the last course of pavers. In fact, you can see where (wearing gloves) I pulled the concrete down from the last course of pavers. Needless to say, when I soaked the "finished" parts of this sidewalk, some water ran down and cured the concrete under the last course of pavers, but they were "hanging out" enough that I could pop them off after the concrete had started to set. Then, when I got back to it, I picked up where I left off.
Finishing the Basic Path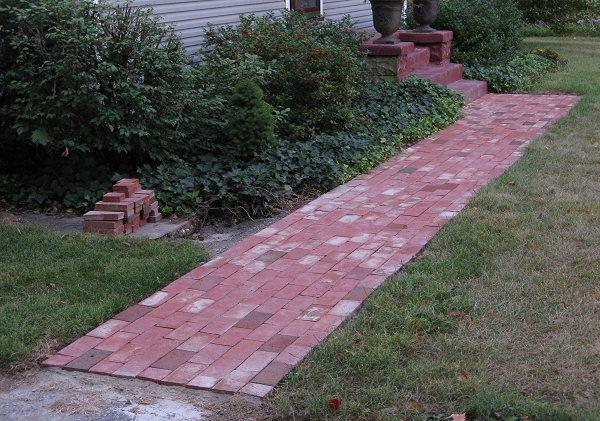 As you can see, a sidewalk that met the sidewalk I was replacing also underwent partial demolition. I couldn't decide at first how to finish that part, and I was by no means certain that I would have enough pavers to fill the gap. So before I "wet down" the section adjacent to the "gap," I piled up concrete along that edge, trying to make certain it did not protrude above the baseline of the pavers. As you can see, a sidewalk that met the sidewalk I was replacing also underwent partial demolition. I couldn't decide at first how to finish that part, and I was by no means certain that I would have enough pavers to fill the gap. So before I "wet down" the section adjacent to the "gap," I piled up concrete along that edge, trying to make certain it did not protrude above the baseline of the pavers.
Once I had the main part of the sidewalk finished, though, I had enough useful pavers left to finish the little "jag" as well. Sand Topping To get a "mortar" effect and to lock the pavers together more solidly, I waited until a very dry day. Then I poured a pile of sand topping mix on top of the installed pavers. I used a broom to push as much of topping into the cracks as I could. Believe it or not, it doesn't take that much to fill in all of the cracks if you use this kind of paver, ten pounds or so did over half of the sidewalk. To get a "mortar" effect and to lock the pavers together more solidly, I waited until a very dry day. Then I poured a pile of sand topping mix on top of the installed pavers. I used a broom to push as much of topping into the cracks as I could. Believe it or not, it doesn't take that much to fill in all of the cracks if you use this kind of paver, ten pounds or so did over half of the sidewalk.
You have to do this on a very dry day, because if there is any moisture to speak of in the air, the "dusty" part of the sand topping mix will start bonding to the top of your pavers. This is especially true if your pavers are porous, like the ones made of molded concrete. Once you're satisfied that you have filled in the gaps, use a very stiff broom to get as much of the dust off of the paver surfaces as possible. Then, using a hose on a very gentle setting, wet down the sidewalk again. It helps if you have two people so one person can be doing the "wetting" while the other continues to work the brush to keep the sand mix from sticking to your pavers. After the sidewalk has completely dried, you'll notice that it feels much more solid to walk on. |
|
| 
|
|
 |
|
 |
 |
Note: Family Garden Trains?, Garden Train Store?, Big Christmas Trains?, BIG Indoor Trains?, and BIG Train Store? are trademarks of Breakthrough Communications (www.btcomm.com). All information, data, text, and illustrations on this web site are Copyright (c) 1999, 2000, 2001, 2002, 2003, 2004, 2005, 2006, 2007, 2008, 2009, 2010, 2011, 2012, 2013 by Paul D. Race. Reuse or republication without prior written permission is specifically
forbidden.
Family Garden Trains is a participant in the Amazon Services LLC Associates Program, an affiliate advertising program designed to provide a means for sites to earn advertising fees by advertising and linking to amazon.com.
For more information, please contact us

 |  |