|
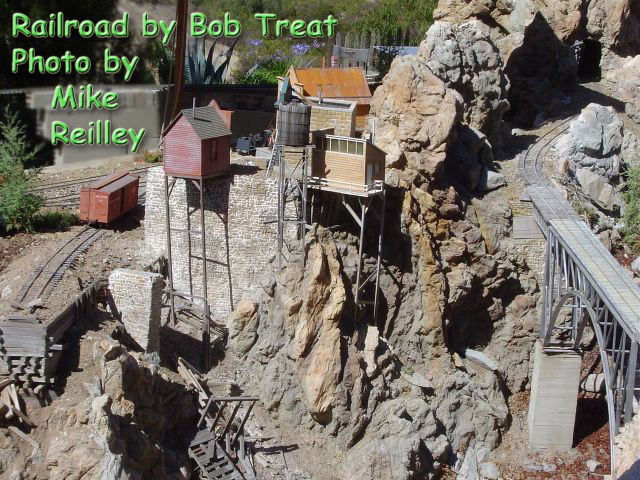
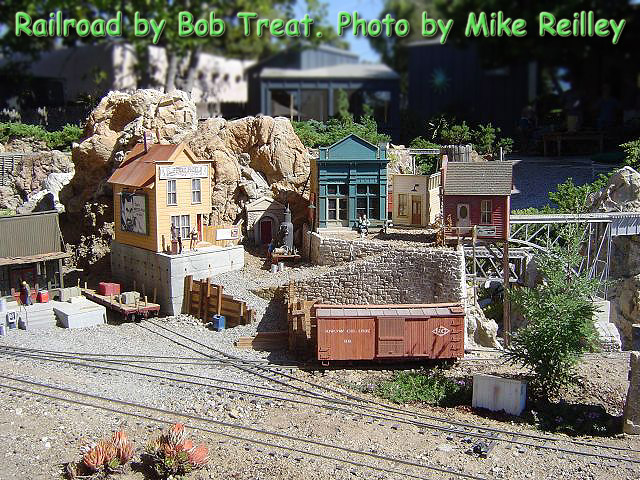
In the 1990s, a San Diego-area garden railroader named Bob Treat experimented with, showcased, and explained a valuable technique for making weather-resistant rock faces and cliffs, using few tools and a few simple steps. Bob also uses real stone around planted areas. But he likes "the drama and control of the cast [stones] over 'stacking' real ones." This technique has proven especially helpful for people who are pressed for space or for whom real rocks are hard to come by (like the folks in London who've been using chicken-wire-and-concrete construction). Other benefits include:
 It offers almost an infinite variety of looks, versus what you may be able to achieve with the rocks that are plentiful and affordable in your area. It offers almost an infinite variety of looks, versus what you may be able to achieve with the rocks that are plentiful and affordable in your area.
- It allows you to incorporate a great deal of vertical dimension into your railroad without having to buy and move tons of rocks (a plus if you don't have a backhoe or you may need to move the thing in a few years).
- It's quite inexpensive, as you'll see (most people can "try this out" for the cost of a bit of cement and fine sand, since they tend to have everything else on hand).
- Finally, it's the sort of technique that works for people like me who are "all thumbs" when it comes to construction projects.
In their August/September 2001 issue, Garden Railways published a detailed, well-illustrated article on this topic called "Make natural-looking rocks from concrete." Before you plan to do an entire railroad with this technique, you should get a copy of this article and see how Bob describes the process, including many details and tips. However, if you want to try the process out for yourself in the meantime, the basic steps shown in this article should give you a taste of what is involved.
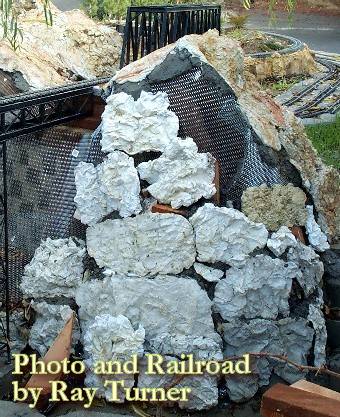
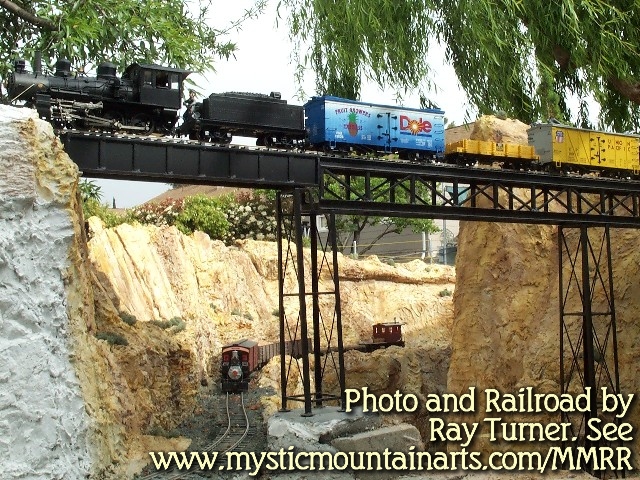
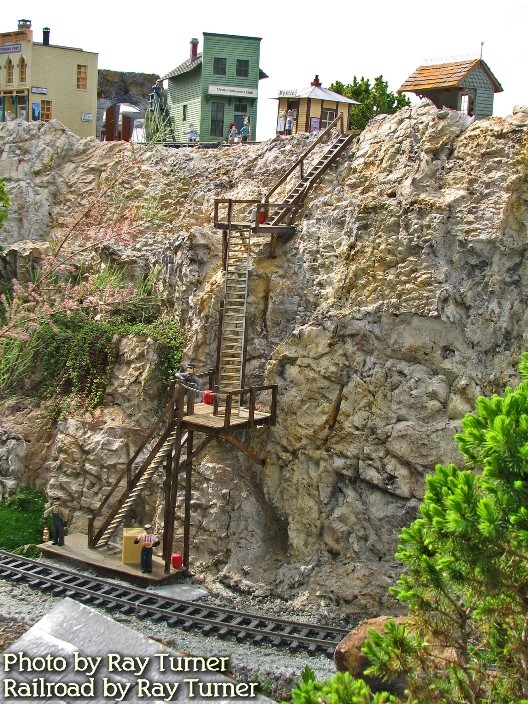
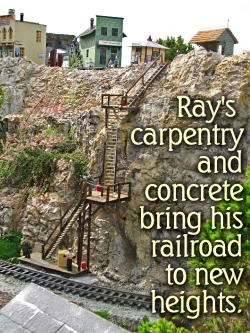
Update for 2007 - Some time back, Ray Turner, whose extensive railroad is called the Mystic Mountain railroad sent me some photos to help fill in the gaps in this article. I've just incorporated four of them that should give some idea of how Ray goes about applying this technique. If you want to see more, check out Ray's site after you've had a look here. I've also added a link to an article from T.J. Lee who uses a different technique but which may give you some ideas.
- Start collecting pump spray bottles from Windex, etc.
- Dummy up a wood form or whatever you plan to use to support the "rock wall" or "cliff wall" you're going to build. A frame of treated wood is one possible approach. (Some folks would staplegun hardware cloth or chicken wire to the frame to provide extra adhesion, but Bob feels that it would make it harder to arrange the rocks dramatically.)
 Buy fine sand and some cement (Portland, plastic cement, or block cement), a can of Pam or other spray oil, and a roll of heavy-duty aluminum foil. (Bob says that commercial concrete mix has too much large "aggregate" to mold right. Bob prefers using a fine sand, which gives you smoother and more realistic rock surfaces.) Buy fine sand and some cement (Portland, plastic cement, or block cement), a can of Pam or other spray oil, and a roll of heavy-duty aluminum foil. (Bob says that commercial concrete mix has too much large "aggregate" to mold right. Bob prefers using a fine sand, which gives you smoother and more realistic rock surfaces.)
- Tear a large sheet from the aluminum foil. Crumple it, then un-crumple it. This will become the mold for your first effort.
- Mix up about a half-gallon worth of concrete, following the instructions on the cement. It should be the right consistency for pouring, not for patching. If you make too much trying to get the mix right, don't worry, you can make another mold in a hurry.
- Lay the "mold" in your back yard somewhere it can lay for several hours, preferably in the shade.
- Spray the "inside" of the mold with the Pam (or whatever you bought).
- Dump the wet concrete mix into the mold. If you have too much concrete, make another mold. Don't worry about the overall shape of the thing you're pouring - it's supposed to be irregular.
- According to Bob, your mix will take from six to twelve hours to set up enough to remove from the mold. Eventually it will reach a point where it is solid enough to hold its overall shape, but still moist enough on the surface to carve with a screwdriver. This state is called "green." When the concrete reaches this state, turn the mold over and peel the alumimum away from the concrete. If you used enough Pam, it should come off easily.
- If you wish, you may use a screwdriver or other device to cut some striations into the "face" of your rock. Rub the "rock" lightly to remove any "fuzz" that forms as you do this. Or you may want to let this one dry as is, and experiment with effects later.
- Make some more. Experiment by bunching the aluminum foil up differently next time. Sometimes a sort of irregular "accordion fold" can give a nice sense of strata. Once you've created a few "rock" pieces, and they've hardened enough that you don't have to worry about hurting them too much, try arranging them in different arrangement to see how they'll go together the best.
|
| -
 Then go back and "touch up" with your other colors. Experiment with spraying different "outcroppings" and "strata" different colors. Don't be shy or afraid that you'll do it "wrong." For one thing, the coat you're putting on now will gradually fade over a couple years, so you can do the whole thing over again later, if you don't like the look you're getting at the moment. It's worth mentioning that Bob lives in a desert, so your colors may fade faster than Bob's, even if your stain is made from paints that are supposed to be "waterproof" after they dry. Bob has lately been experimenting with artist oils diluted with turpentine (no smoking or barbecuing, please, while you try this). He says he can get "richer colors" and that the rocks seem to hold their color better, although he hasn't had any section painted with oils long enough to know for certain. I'll update this article as more information is available. Then go back and "touch up" with your other colors. Experiment with spraying different "outcroppings" and "strata" different colors. Don't be shy or afraid that you'll do it "wrong." For one thing, the coat you're putting on now will gradually fade over a couple years, so you can do the whole thing over again later, if you don't like the look you're getting at the moment. It's worth mentioning that Bob lives in a desert, so your colors may fade faster than Bob's, even if your stain is made from paints that are supposed to be "waterproof" after they dry. Bob has lately been experimenting with artist oils diluted with turpentine (no smoking or barbecuing, please, while you try this). He says he can get "richer colors" and that the rocks seem to hold their color better, although he hasn't had any section painted with oils long enough to know for certain. I'll update this article as more information is available.
 I know several other folk who've dabbled with this technique, and I'd be glad to add to our "rogue's gallery." If you have any images you'd like to share or any tips or other things I've left out, please get in contact, and I'll publish whatever you have. I know several other folk who've dabbled with this technique, and I'd be glad to add to our "rogue's gallery." If you have any images you'd like to share or any tips or other things I've left out, please get in contact, and I'll publish whatever you have.
Best of luck,
Paul D. Race, Editor for Family Garden Trains
Reader Feedback
 T J Lee has used a different method to create concrete for his railroad - something like the paper-mache over chicken-wire mountains we used to use indoors, only TJ uses burlap and concrete. Still, his ideas for framework are applicable to Bob Treat's method as well. T J Lee has used a different method to create concrete for his railroad - something like the paper-mache over chicken-wire mountains we used to use indoors, only TJ uses burlap and concrete. Still, his ideas for framework are applicable to Bob Treat's method as well.
T J says:
I've use concrete to create scenery for my layout with some sucess. There is a PDF . . . with pictures and a write up of the specific techniques involved.
Note: Tj's PDF on the subject is good reading with nice photos, but it is huge (about 36 meg). If you want to download it on a dial-up line, do it sometime when you can start the download and do something else for a week.
| Home Pages |
Reading Index Pages | Buyer's Guide Pages |

| 
|
 |
 |
 |
 |
 |
Note: Family Garden Trains?, Garden Train Store?, Big Christmas Trains?, BIG Indoor Trains?, and BIG Train Store? are trademarks of Breakthrough Communications (www.btcomm.com). All information, data, text, and illustrations on this web site are Copyright (c) 1999, 2000, 2001, 2002, 2003, 2004, 2005, 2006, 2007, 2008, 2009, 2010, 2011, 2012, 2013 by Paul D. Race. Reuse or republication without prior written permission is specifically
forbidden.
Family Garden Trains is a participant in the Amazon Services LLC Associates Program, an affiliate advertising program designed to provide a means for sites to earn advertising fees by advertising and linking to amazon.com.
For more information, please contact
us


|