| |||

|
 |  | |
 |
 | ||
 |
 | ||
 |  | ||
 |  | ||
| |||
|
|
| | |
|
|
| ||
|
|
| ||
| | ||
|
| | ||

Low-Voltage LED Garden LightingFor the first ten years or so of my garden railroad's existence, I seldom ran trains after nightfall, and when I did I was usually satisfied to see locomotive and passenger car lights circling the track. However, a few years ago, I started experimenting with various kinds of lighting, and the experiments intensified when I started having after-dark "open railroads." This is a record of my experiments with a new variation on various garden lighting approaches - one that combines 12-volt lighting (from low voltage sets) and LEDs (popular in solar lighting).Motivation and Early AttemptsIn 2007, we hosted a teenager's birthday party that went well after dark, and the pavilion we set up blocked all light from the house from getting to the railroad. I was surprised at how dark everything looked without the stray porch lighting, etc., filling in.Never one to trust manufacturer claims, I started experimenting with solar lights to see if they would provide enough light to make the railroad look "operational" after dark. Some were inadequate, but some were useful, and some could be made useful. For a history of those experiences, click here. In 2008, I tried those 12-volt garden lighting sets, starting with a cheap set then supplementing it with a Malibu-brand set that was better in some (but not all) ways. I also went from sticking the light fixtures under the buildings to buying sockets and screwing them into certain of the buildings, a much "cleaner" way to do things. For a history of those experiences, click here. The "360-degree" incandescent lighting products in these lines work pretty much as advertised. However, I was disappointed in the flood lights. The stock bulbs gave the area they were supposed to be illuminating only a dull glow. And if I had used higher-wattage bulbs, I would have had to reduce the number of light fixtures per circuit. Then, in early 2009, I saw a new line of products which seemed promising. WalMart (the only big store I can get to and back on my lunch break) carried a Brinkmann line of powered LED garden lighting. One package had four "flying saucer" lights (the kind they call "tiered") and two spotlights, and one package had six spotlights. I didn't need any of the "flying saucers," having no place to put them, really. But I thought the "spot lights" seemed promising, so when WalMart marked them down in late summer, I bought a set. Looking Inside A week later, I had time to pull the set out of the box and experiment with it. A week later, I had time to pull the set out of the box and experiment with it.
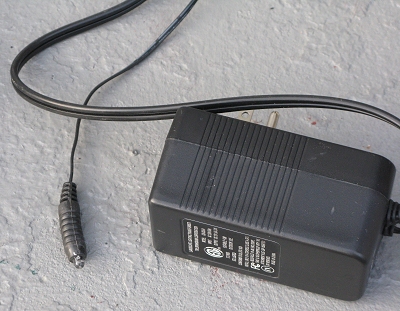
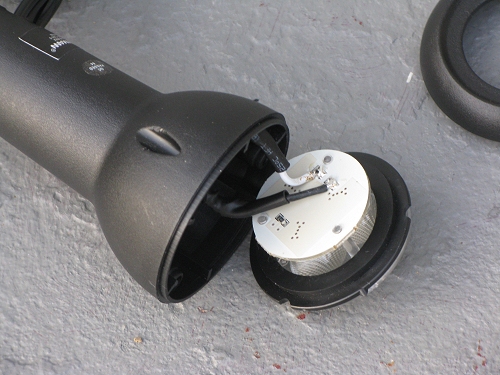
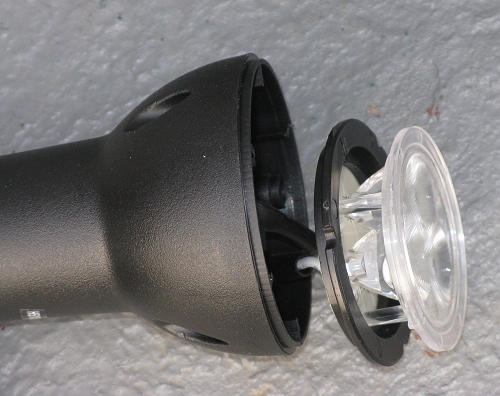
Power Supply - Although the power supply is rated similarly to my other garden lighting power supplies, it weighs much less, and, frankly, doesn't seem quite so sturdy. You can see that, except for its small size, the 12-volt, 20-watt power supply looks pretty much like any other 12-volt power supply except for the electric eye that is attached by a cord, presumably to let you fasten it up in the sunlight somewhere. I could do that, but most of my railroad lighting "electric eyes" are actually buried in the foilage somewhere because I want the lights to come on at twilight, not after dark - it gives a very nice effect. I put the Brinkmann's electric eye under a hosta clump so the spotlights would come on when the rest of the railroad lighting does. Now that I've had the lights hooked up for a few days, though, The 12-volt line coming from the power supply is at least ten feet long, and has a special plug on the end. More about that later Spot Lights - The spot light fixtures are compact, and more solid than the "flood lamp" fixtures that came with my "ordinary" incandescent 12-volt garden lighting sets. A peek inside shows that each fixture holds three LEDs wired to a tiny circuit board and stuck into a clever lens-diffuser molding with a sort of fresnel-lens pattern on the face.
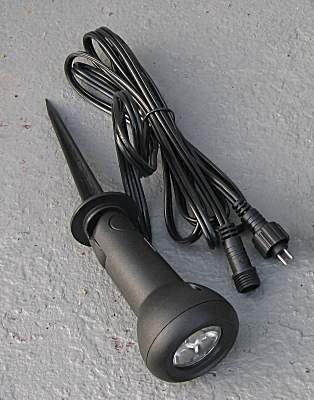
Most LED's I've experimented with topped out about 7 volts, so I wondered if they were wiring the fixtures in a series and or putting a resistor of some sort in the line to get these to behave on a 12 volt circuit. I can't tell for certain without pulling the fixture apart, but it sure looks like there are two tiny resistors on the circuit board. Presumably, the electronics of each fixture "step down" the voltage going to each LED to keep from blowing them out. Externally the fixture are obviously meant to be strung along a single linear circuit. Two five-foot long wires come out of the fixture. One has a "male" two-conductor plug on the end, and the other has a "female" plug on the end. In theory, since there are six spot lights in the box, you should be able to stretch them out across a 50-foot area (only the 10'-lengths of wire between the spotlights count in this math. The Wiring - Each plug on the wiring has a notch that keeps you from sticking I got six spotlights in my "starter set," and that turned out to be at least six fewer than I will need for a permanent installation of this product. In my first experiments, I behaved myself and did not figure out what would really happen if I sliced and diced the wiring setup for my purposes. If I accidentally wired one backwards and it really did cause a burnout, or global warming or some such, I'd have been be down to five fixtures, even fewer than I "needed." (Later, I did hook a "generic" 12-volt DC power supply to one of the spotlights. As I had figured, electricity going one way lights the thing, electricity going the other way has no effect. I went back and forth a few times to make certain my "abuse" didn't cause the circuit board to fail or some such. But the thing kept working fine, as long as I had the electricity going the right direction. Ooops - this probably means that I could have just bought the fixtures and added them into one of my existing 12volt systems. But this way I got to review the whole package.) Brinkmann's attempts to make this set "idiot-proof," then letting people like me buy it reminds me of the old engineering axiom, "If you design a product to be 'idiot-proof,' the first person to come along will be a more ingenious idiot."
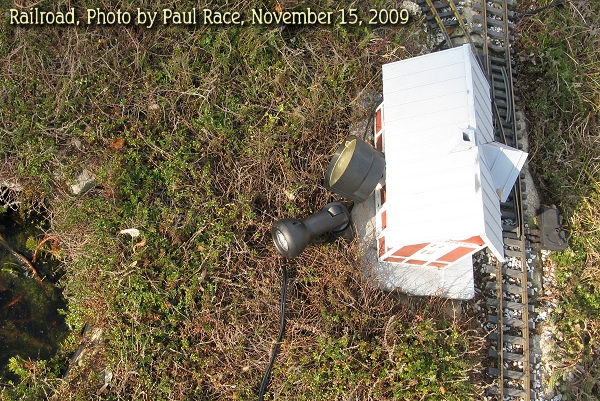
At first, I liked the physical form factor of the spot light fixtures. Unlike most solar lights, the fixtures are small enough either to be hidden or at least not to take over the landscape. The photo to the right shows a Brinkmann LED spotlight next to a lit incandescent floodlight from a "traditional" 12-volt set.
|
 |
The only additional issue I had, as I dodged my last mosquito and went indoors was that these things sit so low that even my creeping thyme was blocking the light from hitting some settings properly. Worse yet, the foilage in front of the spotlights was lit much more brightly than the area I was trying to light - something that wasn't so obvious when I was fiddling with the things.
In fact, from a few yards away, the area illuminated looked rather like I had tried to light my railroad by laying six very bright flashlights on the ground ten feet apart. So I will have to figure out a way to set the fixtures a little higher. Also, the light fixtures don't bend more than 90 degrees, so it you want them to shine "down" at all (or even "straight across"), you need to stick the stake parts in at an angle.
Experimenting again with the Brinkmann spotlights, I found a few more places where I could hide spots to provide lighting on a few features. However I still had two issues:
Finally I gave up on the idea of concealing all of the spotlights at least for this exercise. After all, I was going to be stringing lights in the conifers as well, so realism wasn't the ultimate goal at the moment.
 To get rid of the "flashlight in the grass" syndrome in a couple places, I "borrowed" some posts and "ground stakes" from a set of solar lamps that don't do me much good in the winter anyway, then I installed several of the spots on the posts.
I also installed several spots that shown almost "sideways" on the railroad so they would light fixtures near the "front" edge of the railroad from the side.
To get rid of the "flashlight in the grass" syndrome in a couple places, I "borrowed" some posts and "ground stakes" from a set of solar lamps that don't do me much good in the winter anyway, then I installed several of the spots on the posts.
I also installed several spots that shown almost "sideways" on the railroad so they would light fixtures near the "front" edge of the railroad from the side.
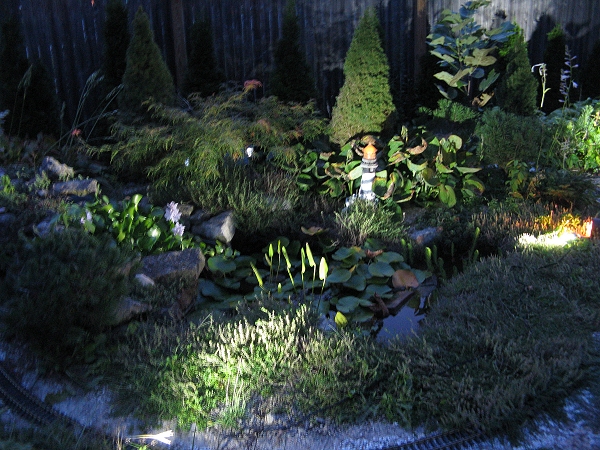
In the photo to the right, one spot illuminates the farm scene (which was in the dark otherwise), and the other illuminates the New Boston station from the side. (New Boston is the station in front of the pond.)
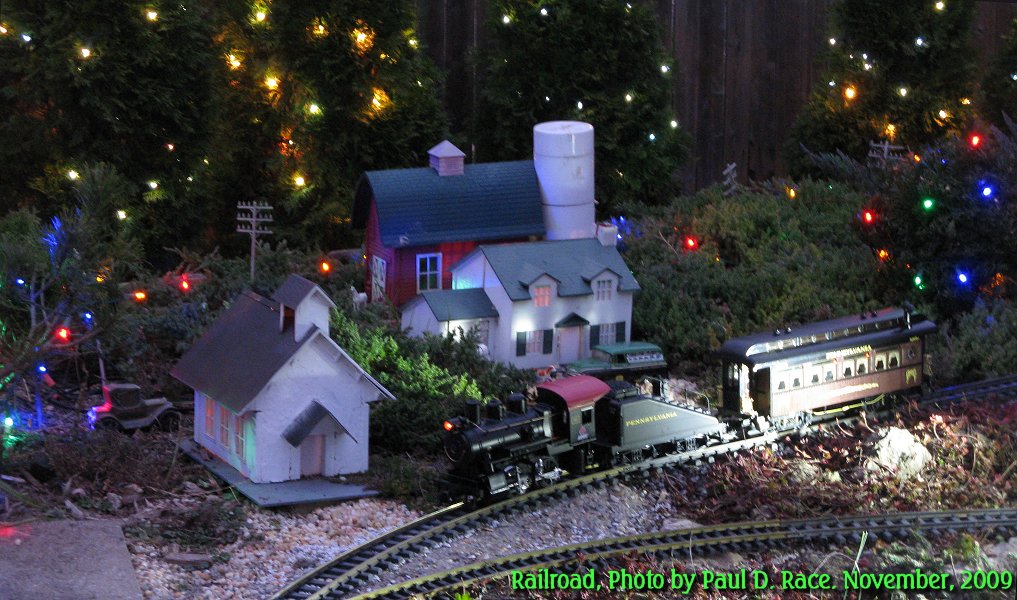 Silly as they may look in the photographs, these lights weren't all that obnoxious, especially after dark. What was most obnoxious was the cables, which I tried to camouflage by settling it into the groundcover, since this wasn't a permanent installation. I was going to dump mulch for extra camouflage, but ran out of time. Now I realize I don't have a very good night-time photo of the New Boston station showing the effect of the side lighting. But I did get a good photo of the farm scene - it's photo to the right.
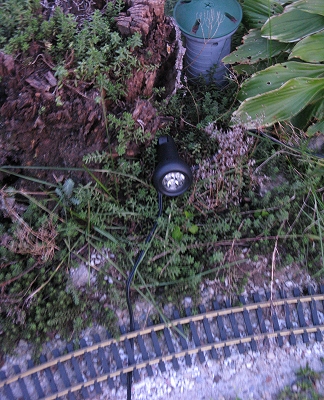
 As you've seen above, I had experimented with putting a lamp behind an old walnut stump to illuminate New Boston from across the pond. But the "Stubby Fingers" sedum near the stump and the Creeping Thyme at the edge of the pond got far too much light that way. In preparation for the NMRA open house, I experimented with putting the spot on a borrowed post, but finally wound up sticking it right into the rotten wood at the top of the stump. This allowed me to get the downward angle I wanted, reducing both the "flashlight in the grass" effect and the amount of stray light hitting the privacy fence unnecessarily.
The photo on the right shows the nighttime effect of having two lights hitting the the New Boston 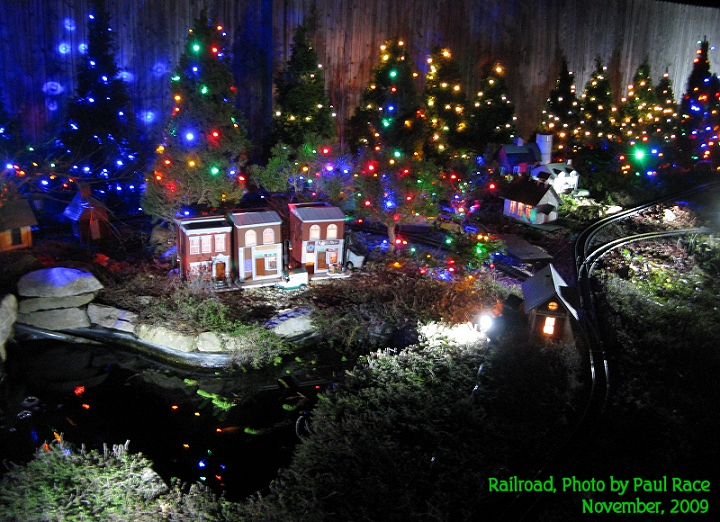 buildings:
Though the incandescent floodlight is much closer than the LED spotlight, it's beam is much softer, so it fills in the shadows cast by the spotlight.
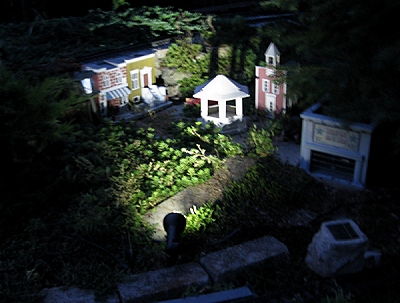
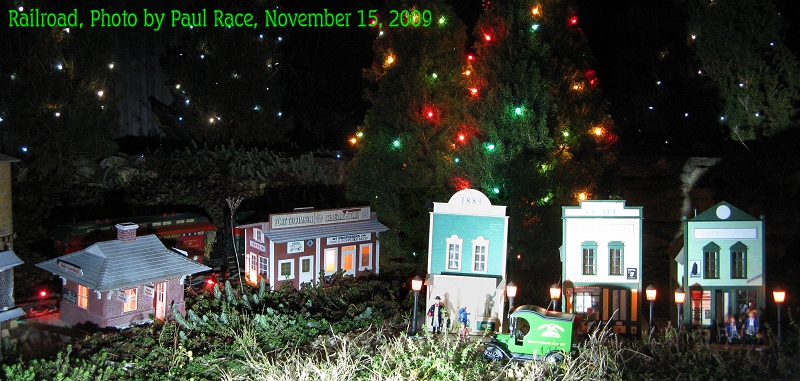
 Also, above, you've seen my attempt to light the village of Donnels Creek with one spot. For the NMRA open house, I chose to use two spots. They are pretty bright and fairly close, but with two spots, at least there aren't so many glaring shadows. Again, I was going to dump mulch over the cords to camouflage them, but I ran out of time. If I use these in a permanent setup, I'll hide the wiring better. Looks like I need to get an "after" photo of this, but it did look pretty nice after dark during the open house.
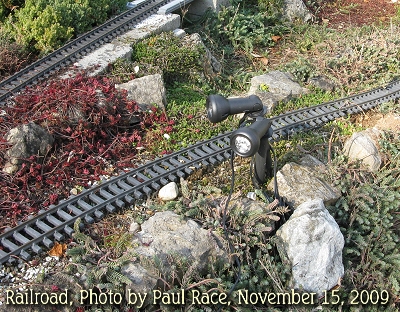
The photo to the left below shows one of the few spots I was able to conceal from an "ordinary" viewing position.
It is aimed a little trestle, which gets harder to see every year in daylight because of the fir tree that divides the railroad. At night, after dark, it used to be completely invisible. The photo to the right shows the effect of that hidden spotlight after dark now.

| 
|
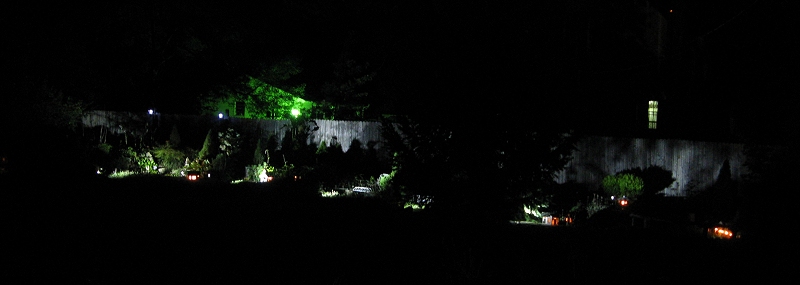
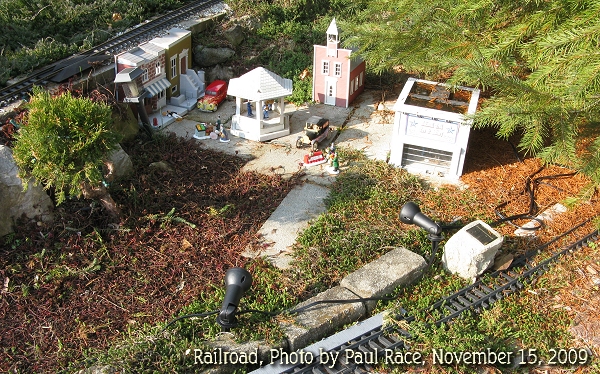
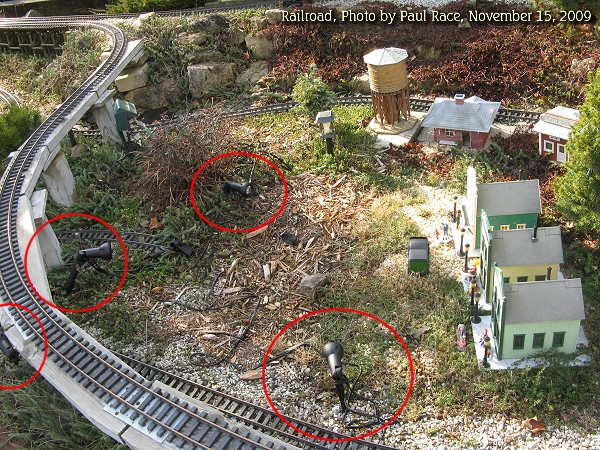 My most extreme use of the spotlights was in illuminating the features around the north loop. In the photo to the right, you can see two spots targeting the old Western-style village of Fort Tecumseh. The spot at the lower center of the photo is aiming upward at Rocky River station (just out of the frame behind the elevated track.) The spot in the lower left corner is shooting sideways toward the Donnels Creek station.
Once again, I had planned to dump mulch over the cables, but I ran out of time before the open house. On the bright side, I think it might be possible to fasten most or all of the spotlights in this photo to the underside of the raised roadbed, which would reduce both their visibility and the "flashlight in the grass" syndrome.
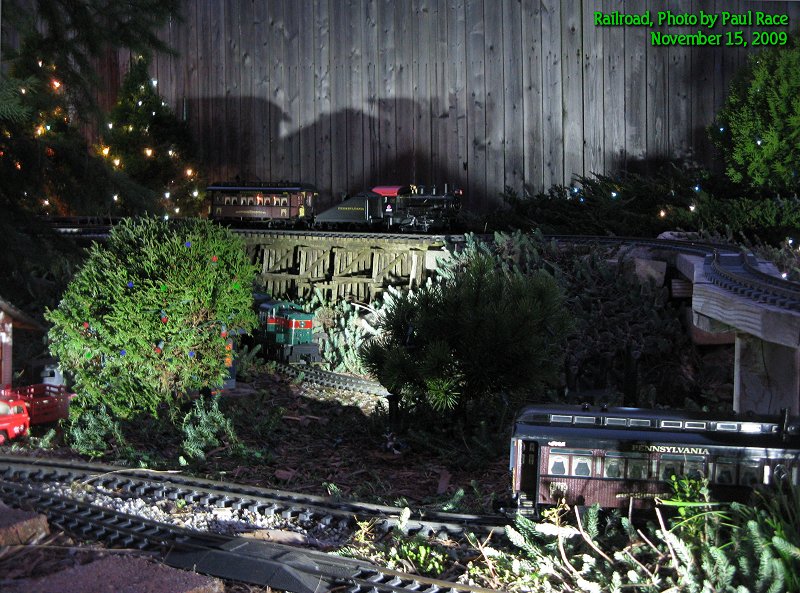
The next photo is from about fifteen feet farther back than the daylight photo above. The little Rocky River station in the upper right corner is lit by the floodlight in the center of in the photo above.
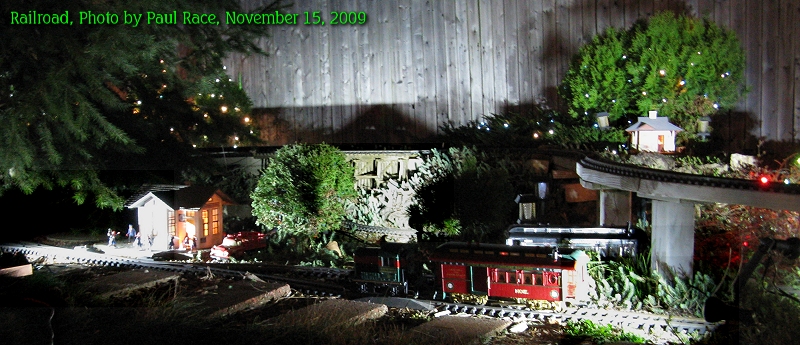 |
Below is a photo of Fort Tecumseh village at night, as it appears lit by the two criss-crossing floods.
 |
The lighting was a little bright on some villages, but not so glaring your eyes couldn't adjust. And, best of all, these spots allowed me to focus attention on features that were just plain invisible the last time I had an after-dark open house. In the context of a Christmas-themed display, they added quite a bit to the "magic" and, frankly, the professional appearance, of the whole event.
This technology is still a bit expensive for what you get (unless you get it at the end of the season). But it is a big step up from the average low-voltage lighting technology. If Brinkmann continues to carry and expand the line, there may be many more options next year.
I now have many ideas for installing at least some of these spots in better-hidden, more permanent positions. So I'll be sure to update this article with anything important I discover during that effort.
Also, if you try out something similar and have any feedback at all, please get in touch and let us know what works and what doesn't work for you.
Above all, enjoy your trains, and any time you have with your family in the coming months.


|
| 
|
 |
 |
|
 |
 |
Note: Family Garden Trains?, Garden Train Store?, Big Christmas Trains?, BIG Indoor Trains?, and BIG Train Store? are trademarks of Breakthrough Communications (www.btcomm.com). All information, data, text, and illustrations on this web site are Copyright (c) 1999, 2000, 2001, 2002, 2003, 2004, 2005, 2006, 2007, 2008, 2009, 2010, 2011, 2012, 2013 by Paul D. Race. Reuse or republication without prior written permission is specifically
forbidden.
Family Garden Trains is a participant in the Amazon Services LLC Associates Program, an affiliate advertising program designed to provide a means for sites to earn advertising fees by advertising and linking to amazon.com.
For more information, please contact us

 |  |