| |||
 |
 |  | |
 |
 | ||
 |
 | ||
 |  | ||
 |  | ||
| |||
|
|
| | |
|
|
| ||
|
|
| ||
|
| | ||
|
| | ||
Written by Paul D. Race for Family Garden Trains(tm)
 and and  BIGIndoorTrains.com BIGIndoorTrains.com |
|
Note from Editor: - Since I wrote this article, Colorado Model Structures has shut down, apparently for good. Though the particular product we selected for this article has been discontinued, the principles we describe apply to any plastic structure that comes in pieces. - Ed. Prepping a Plastic House for Year-Round ServiceSince I wrote my original article on Painting Plastic Structures I've learned a few lessons. I've also been very pleased with the longevity of the model structures that I took the the time to do right. That article is daunting to some folks though, so I've also take to writing articles about individual "entry-level" structures, including the Piko Gingerbread house and the CMS tower. For this article, I've chosen the Colorado Model Structures Cascade Summit "Dispatch Office." It is inexpensive (less than $25 as of this writing), fits almost anywhere and can be finished any number of ways. It also makes a great example because 95% of the instructions I include here apply to most other Colorado Model Structures buildings. In fact 75% of the instructions apply to any plastic kit you want to set outside, even the expensive ones that are supposedly UV resistant out of the box.* The original is patterned after the dispatch or telegraph offices that used to grace rail yards in the golden age of steam. But it could be a small house, or a small store or a real estate or used car lot office. Note About the Level of Detail - Please don't be put off by all the little steps in our kit-painting/assembling articles. Most kit instructions assume an experienced user, so they leave out minor, but important steps that experienced kit-builders do without even thinking about them. We just want to make sure you have a painless experience, especially if this is the first building kit you've ever painted and assembled. We also want you to be very satisfied with the finished result. If we leave out a bunch of steps to make you think that kitbuilding is a breeze, you will not be as satisfied as you could be. Once you've done a couple kits according to our instructions and seen the results, you'll be doing all of those minor, but important steps automatically, too, whether you have access to specific instructions or not. Note About Goofs and Glitches - It seems like every project I do either has something that didn't turn out the way I expected it to or something I wound up rethinking and doing a different way. This project had both. But truth be told, this sort of thing happens to everybody - the "experts" just don't tell you about their goofs and glitches. No, you won't run into the same goofs and glitches that I do. But I hope that by being a little more honest than the average "how-to" writer I can encourage you to keep going if you hit a snag or something goes "sideways" on you. It happens to all of us, really. What You NeedIn addition to the kit you are going to prep, paint, assemble and glaze, you should have the following tools and supplies onhand. (My guess is that you already have almost everything you need.)
How to Get This BuildingOur Buildings for Garden Railroads buyer's guide on our Garden-Train-Store.com site lists most Colorado Model Structures kits, along with similar kits from other manufacturers. At this time, CMS kits are only available direct from the manufacturer. The
Buildings for Garden Railroads page has links to the pages you need to see and order these kits. Buildings for Garden Railroads buyer's guide on our Garden-Train-Store.com site lists most Colorado Model Structures kits, along with similar kits from other manufacturers. At this time, CMS kits are only available direct from the manufacturer. The
Buildings for Garden Railroads page has links to the pages you need to see and order these kits.
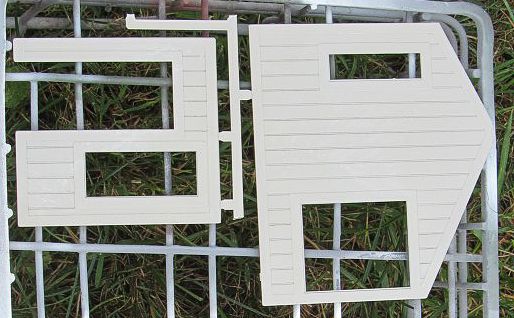
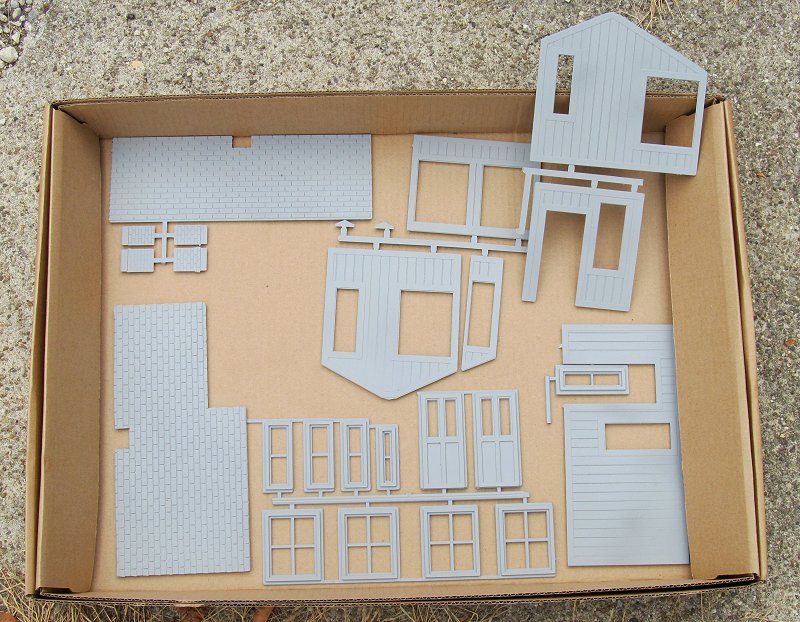
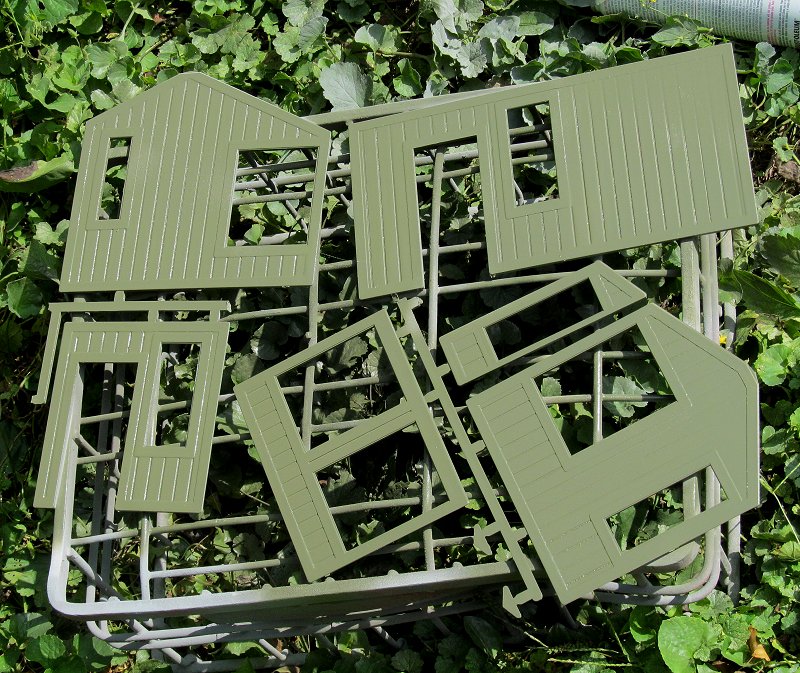
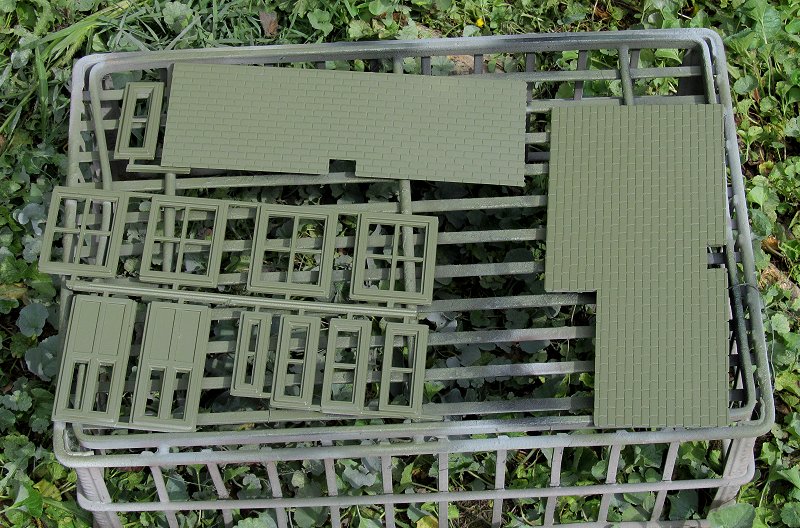
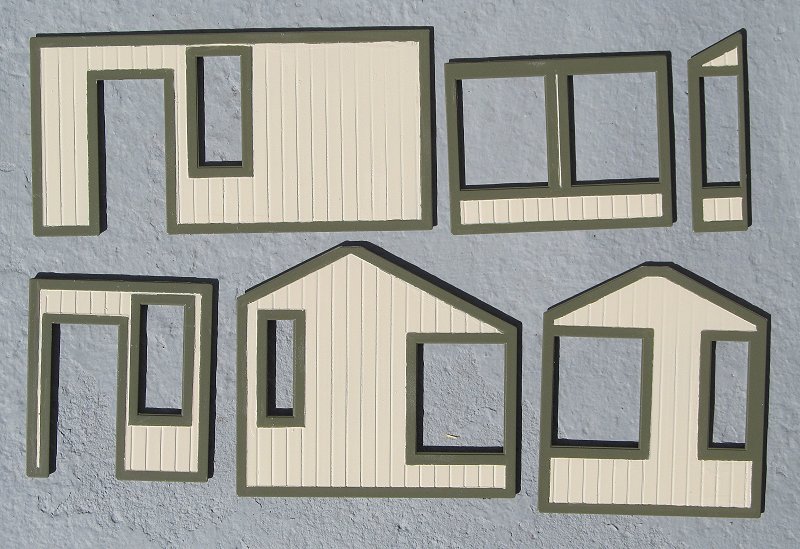
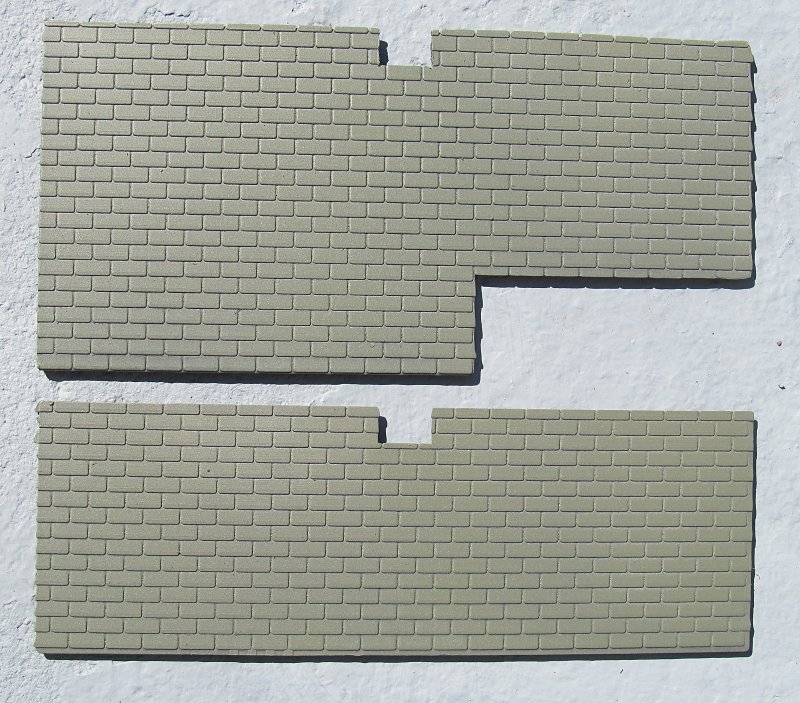
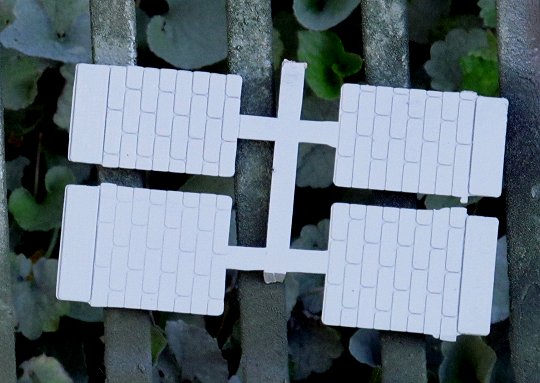
What You Get When You Order This BuildingIf you're used to bulky 4-colored cardboard boxes that look good on hobby shop shelves, you may be surprised when your kit arrives in a big, relatively flat cardboard envelope. You get an instruction sheet, and several pieces of gray and brown plastic. The detail is molded into the pieces, but it's not very deep, so your building will look lots better if you paint it in a way to make the detail stand out.Examine the SpruesEvery plastic model has places where the bit you need was attached to little "trees" or "pipes" that you don't need. These are called the "sprues." They're there because the mold has channels where the plastic is forced through the mold. In some cases, small parts are still stuck to the sprues when you get the model. In other cases, the sprues have been cut off, but a rough place remains that you will need to trim and or file. plastic model has places where the bit you need was attached to little "trees" or "pipes" that you don't need. These are called the "sprues." They're there because the mold has channels where the plastic is forced through the mold. In some cases, small parts are still stuck to the sprues when you get the model. In other cases, the sprues have been cut off, but a rough place remains that you will need to trim and or file.
The Colorado Model Structures Cascade Summit Dispatch Office that I received has the doors and most of the windows on a single sprue. Note I much prefer to have parts like windows and doors on separate sprues - it makes them easier to paint a contrasting A couple of the walls may be attached to the sprues as well - I usually leave those attached while I prime and paint, since it makes it easier to handle pieces without contaminating the surfaces once they're cleaned up. However, if a sprue attaches where it will be inconvenient to remove it after painting, I may remove it before priming.
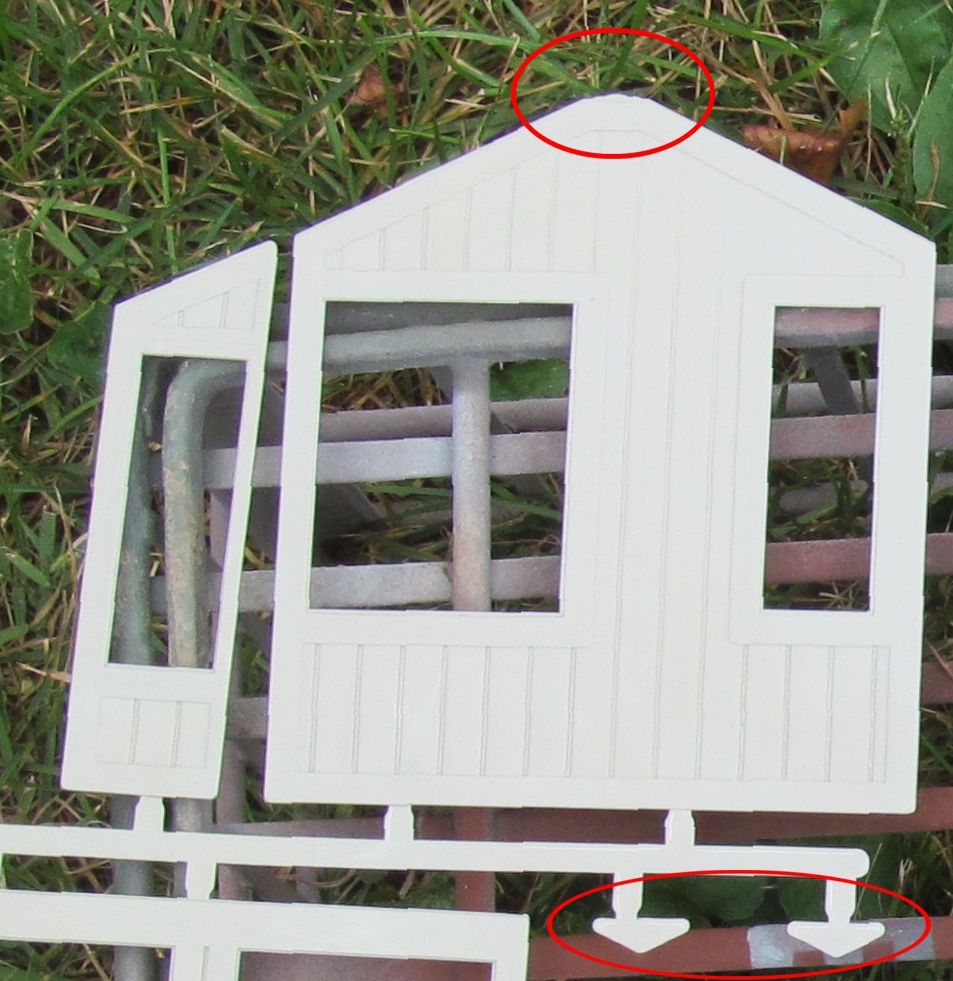
By the way, the chimney pieces are attached by a sprue to one of the roof pieces. I left them on the sprue until I primed, then cut the sprue to separate them from the roof piece.
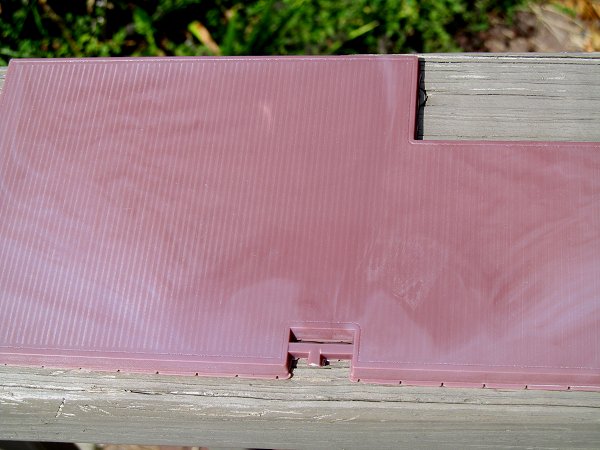
Trim the FlashSome CMS models have places where a tiny bit of the shingle or brick pattern "leaks" out past what should be the edge of the piece. Most models by most companies have places where a little bit of plastic extends out from the mold line.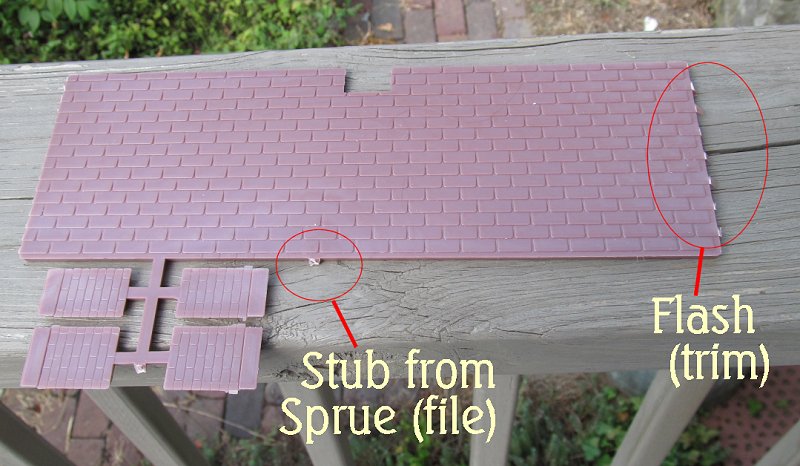 This is called "flash," and should be trimmed before you clean, prime, and paint. This is called "flash," and should be trimmed before you clean, prime, and paint.
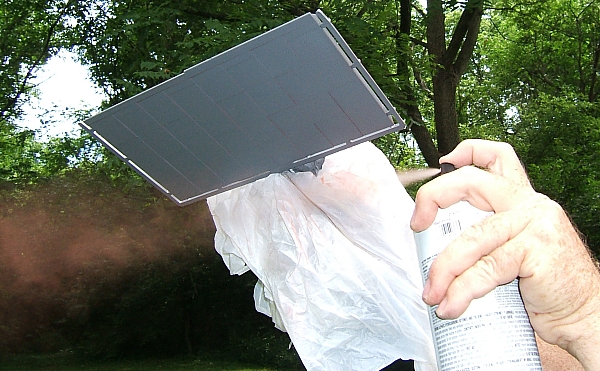
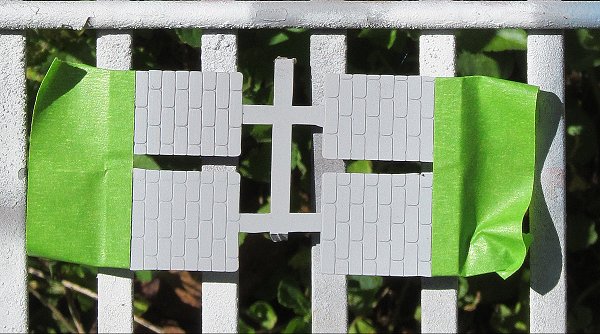
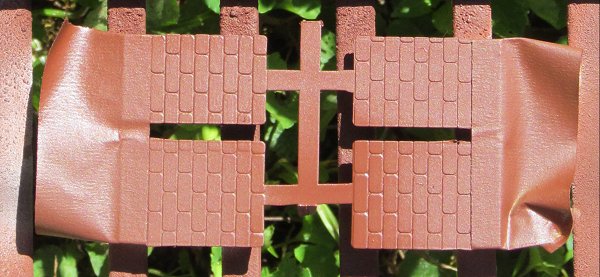
The photo to the right shows the flash from the shingle pattern on the roof, as well as the stub from a sprue that has already been removed. I used a knife to carve off the flash and my flat file to smooth off the stub from the sprue. I could have removed the chimney sprue from the roof sprue at this time, but decided to wait until after priming. Decide Where to PaintIt's possible to spray paint stuff on newspaper in the driveway, if you have no wind to speak of (in Ohio, I mostly wait between gusts of wind, since it's almost never entirely calm). In cold or inclement weather, you can cut the top and one side off an appliance box to create a temporary "paint booth," but you need to set the thing where there's lots of ventilation, no open frames, and nothing nearby that could be damaged by overspray.I've also discovered that spray paint covers better when the object is NOT laying flat on another surface. The vaporized paint can work its way "around" the object better when it doesn't have to work against a cushion of static air near the surface of the cardboard or newspaper. That's why I use the old milk cartons you see in so many of my photos. You could stretch hardware cloth across a wooden frame and get the same result. Get Ready for Prime TimePrimer is a flat neutral color that is theoretically formulated to stick to the surface better than colored paints. Its flat finish helps most "top-coat" colored paints to stick better than if you tried to use them directly. By the way, there are several brands of paint that now advertise they are formulated to work directly on plastic. My sense is that they may stick well to the plastic, but they won't provide the extra UV protection that a good coat of primer does.I use Walmart's Gray Primer, usually available for $1.30 or so a can. You can use more expensive primer if you want, but this does the job for me. If the final building is going to be "brick-colored," I may use a "rust primer" instead. Don't bother with "white primer," even for pieces that you are going to finish in white. It makes no difference in how many topcoats you need, provides much less UV protection, and leaves the buildings translucent instead of opaque - a problem when you add internal lighting. I actually prime almost every model I paint, even pieces that technically may not need it. There is an admittedly subjective aspect to this. Priming:
Before you paint any plastic model piece, use Glass Plus, Fantastic, or some other cleaner that doesn't leave any residue to speak of to wipe it down carefully. Then use a clean, lint-free cotton towel without nap (no flannel or terry cloth) to dry the pices off thoroughly, getting into all the cracks. Then let the piece dry for a half hour or so just to be sure (more on a muggy day). This process does two things:
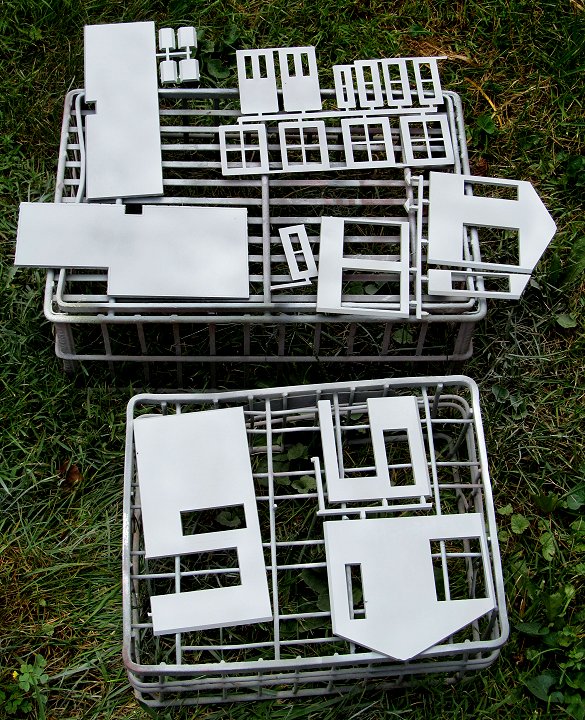
Once you have cleaned the plastic, treat it as you would a photograph (remember those?), handling it only with clean hands, and only by the edge. If you have pieces that are still on a sprue tree, handle them only by the sprue. The photos below show the kit pieces set out and ready to prime. Since they're all going to start out with gray primer, it's more efficient to prime them all at once.
By the way, after I took this photo, I turned the pieces over, because I wanted to prime the back (or inside) of each piece first. PrimeBy the way, priming is something that takes a bit of time to do right, but most of the work is "hurry up and wait." So if you can prime several pieces at the same time, that's not a bad thing. I would encourage you to keep "extra" gray primer on hand. There's no precise measurement, but I would say I tend to get about one building per new can of primer. You might get less, especially when you're starting out, so save yourself a trip to the store and pick up more cans than you expect to need while you're there.Most spray paints work best over 60 degrees Farenheit. Start with the "back" side of each piece. Believe it or not, sealing the plastic on both sides will help longevity, plus it will help keep your walls and roof from glowing when you add lighting. If possible, arrange your pieces at a slight slope, especially large flat pieces (most spray cans can't spray well straight down). Shake the primer can until you can hear the little ball rolling freely. Do NOT aim the can at your piece until after you've pressed the button. Instead hold the can off to one side about 8" away from your piece. Press the button and bring the spray pattern all the way across the piece and off the other side before you release the button. Otherwise, you'll wind up with a circle of extra paint where you started or stopped spraying. The whole process should last two or three seconds. By the time you've bent over to take a look at the surface of your piece, the paint should already be drying or dry. If there are any drips or even any shiny spots, you moved too slowly.
You don't need perfect coverage of the back, but it helps if you get the inside of the windowframes from a couple angles - as long as you don't saturate or cause drips or runs. The photo to the right shows the back/inside surfaces of the building primed. Like almost all of the photos on this page, you can click on it to see a bigger photo. Once you feel like your coverage is "pretty good," let the back dry for an hour or so, then turn the piece over and start on the front, using the same technique to avoid oversaturating or creating drips or runs. You may not have 100% coverage from your first coat of primer. Don't try to "fix that" by saturating the paint on the piece. Even if you don't get any drips or runs, you'll create areas with uneven coverage, and possibly fill the lines between the "boards" of your "siding" or hide shingle detail. In twenty or thirty more minutes, come back and look closely at the piece to see if you need to hit it from another angle. If so, hit it again. The detail on these pieces is not molded very deeply, but it's still possible to get just, say, the top and left edge of each windowframe and not hit the bottom and right edge until you come at it from another angle. Again, take "baby steps" so you don't accidentally leave so much paint that you hide the details.
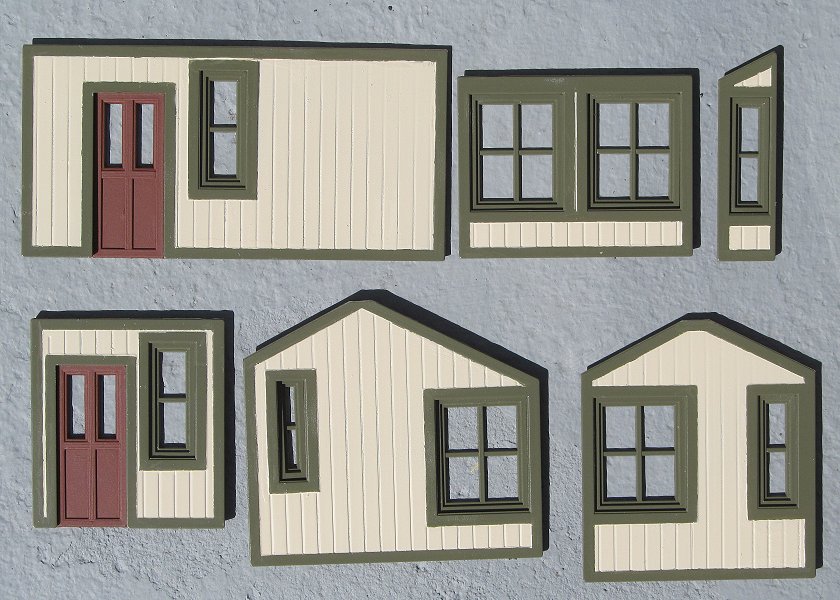
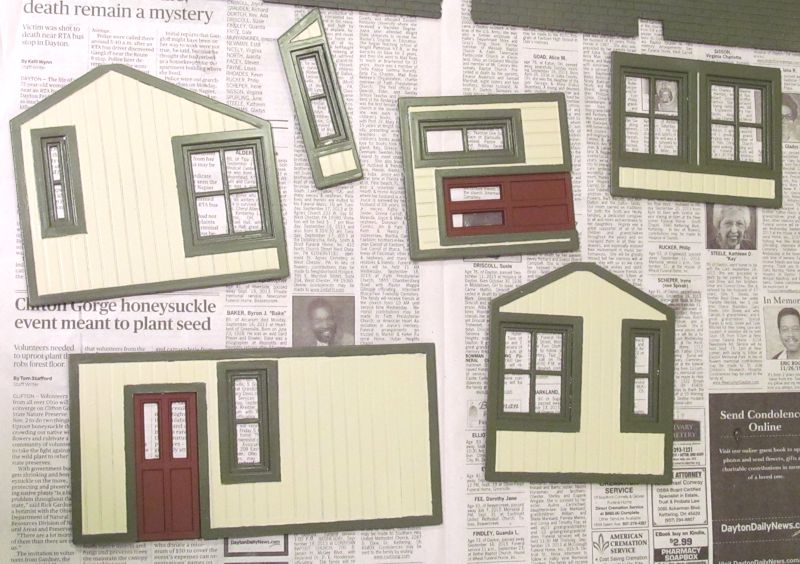
Even after the primer coat is thoroughly dry, continue handling these pieces like photos - only with very clean hands and only by the edges. This is a good time to remove the chimney pieces from the sprue, since you're not going to paint it the same color as the walls or trim. I should have removed the doors as well, since I decided to paint them a different color later. Decide which Parts to Paint Next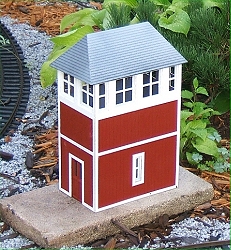 If I was painting this to be a "dispatch office," I would have used the "rust-red with white trim" scheme that I used on my New Boston station and switch tower. But I decided I wanted to make it a house. If I was painting this to be a "dispatch office," I would have used the "rust-red with white trim" scheme that I used on my New Boston station and switch tower. But I decided I wanted to make it a house.
So far I have two houses on my railroad that are white with green trim (the standard paint color for frame farmhouses in the midwest a century ago) and one that is blue with white trim. The way these are built, you could easily paint the windows and doors a different color, also. To be authentic for our first house the windowframes needed to be the same color as the trim, so I figured I'd start with that and decide whether they blended in too much. Although I often paint the doors a contrasting color, I thought I'd try with them the trim color first. Note: If you're in a real hurry with this building and you won't have time to mask the trim, etc., you could consider just painting the windowframes a contrasting color from the walls and setting it out that way. It won't be as effective, but will get the job done. As far as I can tell from my visits to other railroads, that's how most of the now-discontinued Korber structures got painted, and nobody died.** The chimney should almost always be a different color, though. After priming, I cut the sprue that held the chimney pieces away from the roof piece it was attached to and filed the roof piece carefully where the sprue had been attached. If you want the doors to be a different color, cut them off of the sprue before next step as well. Or you could do what I did, paint them the trim color, then decide you want them another color. Ooops. In my case, since most of the pieces were going to start out in Dark Olive "trim" color, I decided to paint those pieces that color first, then mask where necessary before painting the Almond "base coat." Painting the Trim and Roof ColorWhen I was sure the primer was completely dry (overnight again), I laid the pieces out and sprayed them lightly with the Dark Olive. After that coat had dried for a few seconds, I moved to another angle and sprayed them again. I did this two more times, so that I could be sure I had hit every inside edge of every windowframe and doorframe, without depositing so much paint that it obscured the detail.Then I let it dry in the sunlight for several hours, and hit it one more time to be sure. After that coat had started to dry, I brought the pieces back inside.
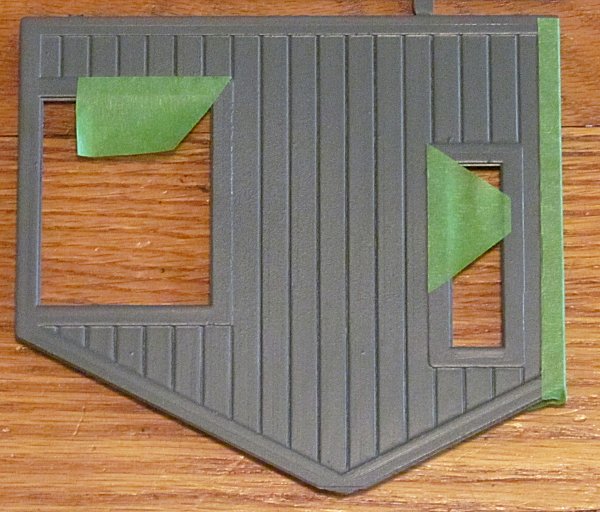
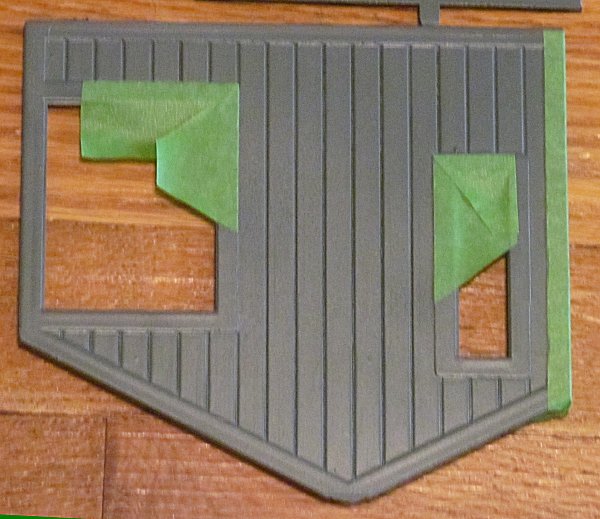
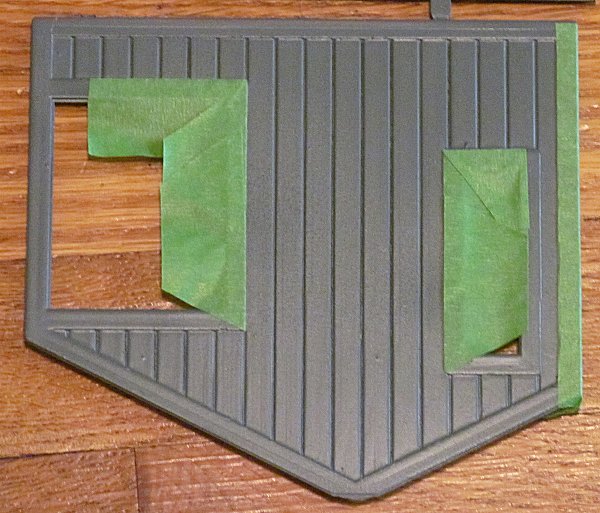
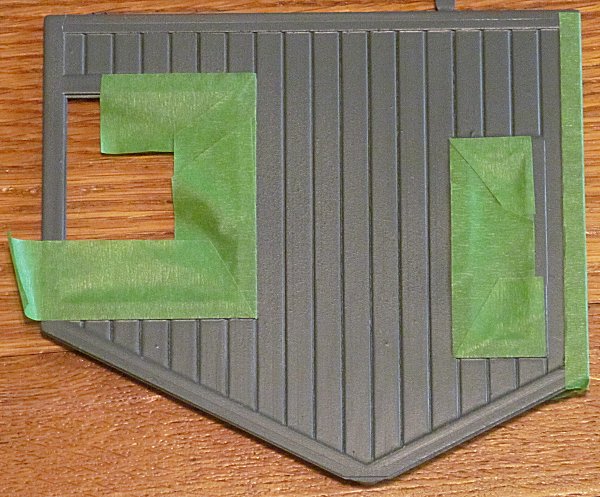
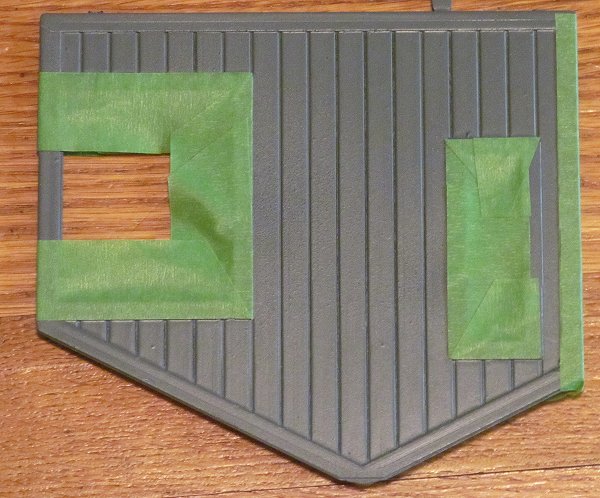
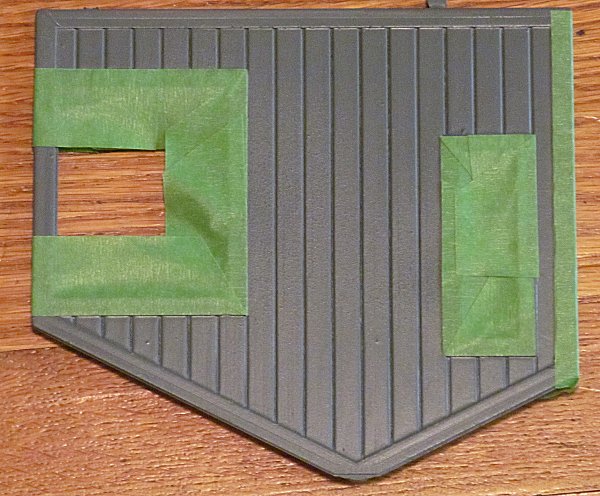
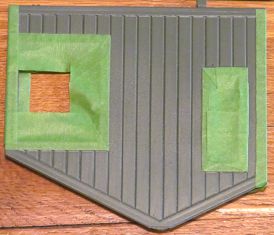
With almost the whole building painted Dark Olive, it looked a little like a pile of "army men." The military look was not what I was going for. Hopefully once I'd tweaked the roof color and painted the base color on the walls, the thing would look more like a residence and less like a military office. Mask the TrimThis building requires relatively little masking, compared to many others. But masking the trim before you add the base coat will make the trim really stand out.For this stage you need a roll of masking tape. You also need a pair of scissors and a comfortable place to sit with good lighting. Your piece should have dried overnight, at least - the last thing you want to do is pull the paint back off when you remove the masking tape later. Note: For this project I promised a friend I'd try FrogTape, which is supposed to help you get really good edges. It also is notorious for pulling off the paint that you masked over when you remove it. So if you are going to use FrogTape, be certain that the paint where the tape will be going is "stuck good" and very dry. In this case, I had several "irons in the fire," so the Dark Olive paint had a chance to dry for about a week before I taped over it. Masking Rectangular WindowsOn this building, the windowframes are large and relatively easy to mask. However, I want to get as fine a line as possible, so I took some care, and I want to demonstrate a technique that works on even the most difficult windowframes.
The series of graphics below tell the visual progression of this process. (Click on any of the photos for a blow-up.)
Painting the "Base Coat"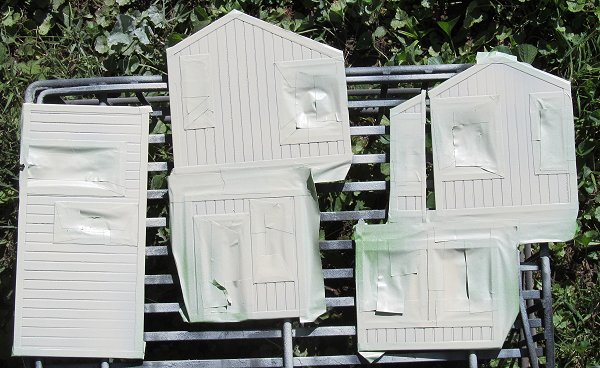 Unless you have a really complicated color scheme in mind, the next color you paint will usually be the last for this building. I would recommend lightly dampening a lint-free cotton cloth with Glass Plus or Fantastic or similar cleaning solution, then wiping off the areas that you will be painting, in case you've left fingerprints. Then let it dry thoroughly. Unless you have a really complicated color scheme in mind, the next color you paint will usually be the last for this building. I would recommend lightly dampening a lint-free cotton cloth with Glass Plus or Fantastic or similar cleaning solution, then wiping off the areas that you will be painting, in case you've left fingerprints. Then let it dry thoroughly.
The spraypainting process is exactly the same as the priming process was - multiple light coats from different angles. Do not try to get the whole thing covered the first time - you'll create runs, drips, splotches, and missed edges. Once the top coat seems dry, you may be tempted to rip the masking tape off and see the final result. Don't. The paint needs to be completely dry, including any tiny "pools" of paint that take extra time to dry. Otherwise, any undried paint will get where you don't want it. Unmask In my clinics I call this the "magic trick." When the group is small enough, I pass around the masked-and-topcoated piece and let each person tear off a little bit of tape. By the time it's done, I have a two-color building front that looks almost as good as any model you can buy. I say almost, because there is inevitably some little place where the last color leaked through or under the tape, or where the last color didn't cover, or - very rarely - where the masking tape took off the under coat. The "Touch Up" section below addresses those problems. In my clinics I call this the "magic trick." When the group is small enough, I pass around the masked-and-topcoated piece and let each person tear off a little bit of tape. By the time it's done, I have a two-color building front that looks almost as good as any model you can buy. I say almost, because there is inevitably some little place where the last color leaked through or under the tape, or where the last color didn't cover, or - very rarely - where the masking tape took off the under coat. The "Touch Up" section below addresses those problems.
Back to the Frog Tape that I had promised a friend to try. One provision I made was making certain that the trim color was really, really dry before I began masking. What I didn't take into account, or even think about, was that I seldom paint over one satin color with another. As it turned out, the Almond paint didn't stick to the Dark Olive as well as I expected. So when I took the masking tape off, I had to be careful to keep the top coat from coming off with the tape. In the photo, you can see several places where the Almond color came off when I removed the tape - if I hadn't been very careful once I saw this happening, it would have been worse. Ironically - this is not a masking tape failure, it's a paint failure. So I can't really say the FrogTape had a fair test. Removing the Sprues From the Wall PiecesAt this point you need to remove the sprues from the walls at least. Try to get a smooth separation, say, with a knife or razor saw. If there is any roughness where the sprue was, apply the flat file.Don't forget to save the little tips that will go on top of the gables. Touch UpA decade ago, I bought one of those kids' paintbrush packages where I got 30 brushes for a dollar or two. I'm still using those instead of expensive brushes, because brush-painting with spray paint does a number on brushes. You are going to be using a super-cheapy brush to apply "spray paint" manually, then throwing it away, since it's not worth the cost of paint thinner to clean the brush.Determine which color or colors you need to touch up. Take those spray cans outside or to a very-well-ventilated spray-paint safe location. Wear old clothes or roll up your sleeves. When you're ready to start, take the cap off of the first color you want to use, hold it upside down at arm's length, and spray some of the color right into the cap. Overspray will go everywhere when you do this, which is why want to do it at arm's length in a safe, well-ventilated location. You'll notice that the paint you sprayed into the cap stays liquid for a few seconds. Set the can down, dip the cheap brush into the paint, and touch up any areas that need this color. You may have to repeat the "spraying into the cap" move more than once if there is a lot of touchup to do. Light colors (like white) may need to be hit two or three times. This is one case where you don't necessarily have to wait until the area you're painting is completely dry before you hit it again - if you wait too long, your brush will dry out and you'll have to start another one.
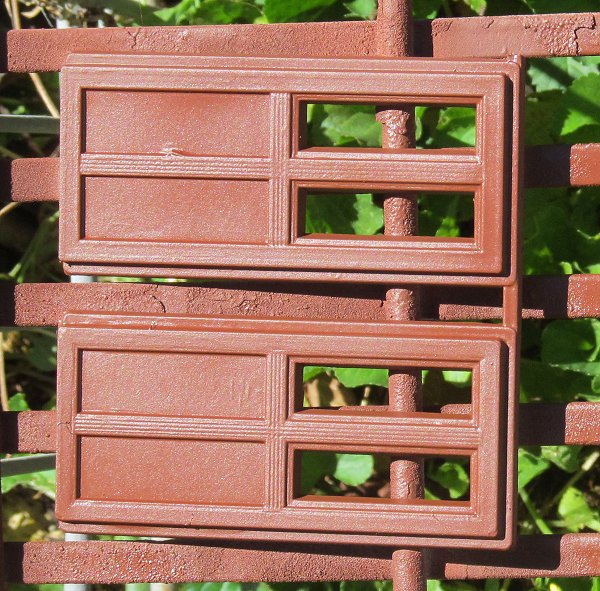
When you're done, be sure to handle the building fronts carefully (usually by the edges) because spray paint applied this way may take hours to dry completely. Dispose of the brushes, and put everything away. The DoorsWhen you remove the doors from the sprue, the bottom edge of the door may be a little rough. Use the flat file on it before you paint on the final coat. If you've already painted the "final coat," follow the "touch up" instructions above to touch up the doors before you glue them in place.You may like your doors to be the same color as the walls or as the trim, but they'll stand out more if you choose a contrasting color. Once I had painted the doors on this structure the same color as the trim, I remembered that the doors on the real house I was paying tribute to with this project were a dark red. So I used rust/red primer as a "topcoat" on the doors. That meant I had an extra coat of paint on the doors, which ordinarily I would try to avoid. But it wasn't enough to obscure the detail.
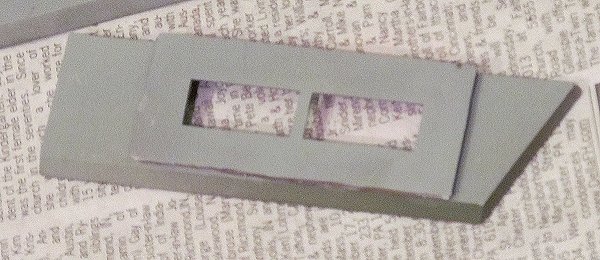
The photo to the right shows the doors after the bottom sprue has been carved off and the doors have been painted what will (hopefully) be their final color. The other sprue is located where the stub won't show once it is detached. Each door has a flange around it that allows it to be "dropped" right into the finished wall once you're ready to install it, so they're relatively easy to handle and drop into place once they're ready. By the way, some folks wish the doors on these buildings would open like they do on the European kits. These tend to be people who have never had wasps nest in their buildings, or who don't light their buildings' interiors. And let's face it, how many houses do you drive by in a day that have their doors standing open? The WindowsYou may like your windowframes to be the same color as the walls or as the trim, or you can choose a contrasting color.
In this case, I set the windows and doors in place and decided that they looked fine the way they were. Like the doors, the windows have flanges around them that allow you to drop them into the finished wall once you're ready to install them. So they're relatively easy to handle and drop into place once they're ready.
If you painted the roof the color you want it period, you're done with that. In my case, I wanted to add depth and texture to the color I chose.
|
 |
 |
 |
 |
 Then if you want to paint the "mortar," water down some white acrylic paint and flow it on so it goes into the cracks, then wipe if off the face of the "bricks."
In the photo to the right, you can see that some of the "whitewash" stuck to the surface of the "bricks." In Ohio, this will usually wear off after several months real exposure to the weather, but if you live in a desert or you want to get back to a brick color right away, wait until the "whitewash" dries thoroughly, then buff it out. If - worst case - you wind up removing the "whitewash" from the mortar lines, what's to keep you from trying this part again?
Note that some of the windows have a flange only on three sides. Make certain that the side without the flange goes toward the corner.
 Also, on shortest wall, it looked like the flange would protrude far enough out to interfere with the wall pieces meeting up, so I trimmed it a little before gluing it in place.
In addition, if there are any rough places where the sprues came off, turn the windows so those places are away from what will be the corners of the building. If for some reason you can't, make sure any leftovers from the sprues are trimmed off.
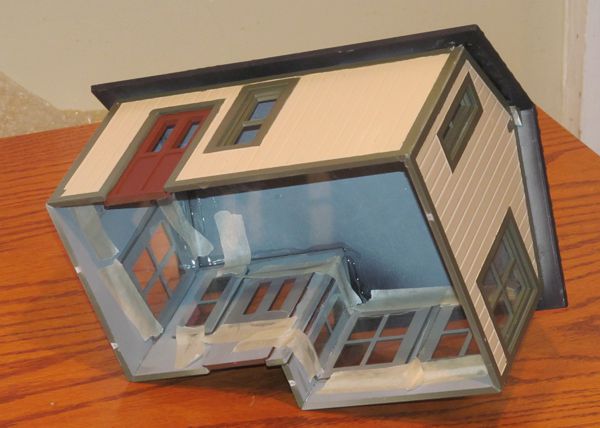
The photo to the left below shows the windows and doors glued in place from the back. The photo to the right shows them after they've dried thoroughly and been flopped over. This starting to look like a building. Click on either photo to see a blowup if you want.
 |
 |
On a rectangular building, it may be possible to glue all four sides together at the same time and just use masking tape or a loose rubber band to hold them together until they dry. In an L-or T-shaped building without internal bracing, I prefer to glue two walls together at a time.
However, you do this, it's important to get the walls glued together at a 90-degree ("right") angle. Since I usually work over a newspaper, I may find an advertisement with a strong rectangular pattern to build my structure over (though I may "test" the angle with a sheet of typing paper or something to be sure it isn't distorted). In this case I had an expired Kohls ad that was printed on shiny card stock. The advantage of this was that I could turn it around on my work surface to attack the building from various angles as I was gluing it together.
Years ago, I used "Superglue" (cyanoacrylate) for this stage of construction. The advantage was that I could hold the pieces together for a minute or so and they'd usually set enough to move onto the next bit. So I could work very fast. However, I've discovered since that cyanoacrylate turns brittle after a few years outside. Several of my friends report that they use cyanoacrylate for initial assembly, then follow up by adding silicone to every joint. In damp Ohio, though, silicon can fail in a few years as well. (So do several expensive glues that my desert-region friend have recommended.)
Recently, I've been experimenting with a noxious, but flexible glue called Fix-All that I've been getting from Big Lots for $1 or $1.50 a little tube. Fix-All takes much longer to set/dry than cyanoacrylate, but once it's dry it seems to hold better than cyanoacrylate in the long run. It's also a little bit flexible so your building's walls shouldn't just snap apart under pressure like "superglued" buildings can. The packaging says "water resistant," not "water proof," but I usually have it on the inside of buildings only, plus I make sure my buildings have good drainage. I suppose I could use it the way my friends in dry climates use silicon, to reinforce "superglued" buildings. But I structured this project so I can work a little at a time, then do the next bit a day later. 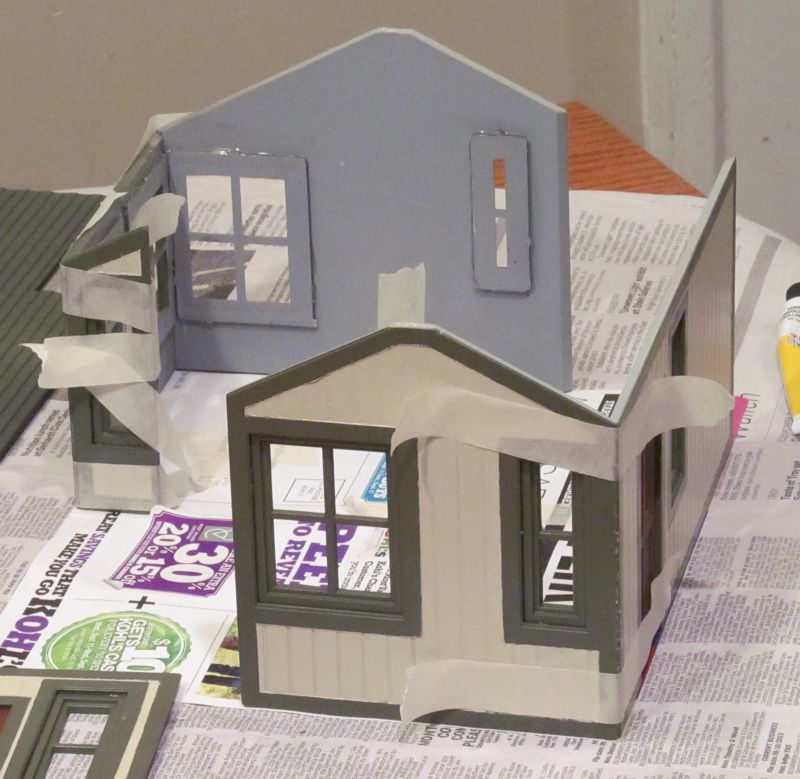 Unfortunately, it will be three or more years before I am absolutely certain that this glue is up for "long term" outdoor plastic building applications. And if you're in a hurry, you can probably put this building together in one evening with cyanoacylate (and reinforce the joints with something else later). So your mileage will vary.
In this case, I carefully aligned the right end wall and back wall over two sides of the Kohls ad, glued them together, and used masking tape to hold them in place until the glue dried. Then I rotated the Kohls ad and did the same with the left end wall and the short front wall that needed to attach to it. Finally I added the little short wall. Then I waited overnight before joining the whole thing together. Again, if you're using the "superglue" shortcut, you could probaby come back in twenty or thirty minutes. But this way I was certain that the outer corners of the building were at precise right angles. For one thing, if your building isn't precisely square, the roof won't fit on right. This is true of any kit, by the way. 
The next morning, I detached the back and right side wall subassembly from the Kohls ad and moved it to where I could attach the right front wall on a right angle.
 That night, I detached everything from the Kohls ad, and moved it again to be sure that the yet-unglued left rear corner was at a right angle. Then I glued the last two corners together and masking-taped everything into place. Again, if I'd been using superglue, I could probably have done this effort in one evening. But I have plenty of other projects to work on, so leaving the thing to set overnight again and again was no hardship.
Notice that there are now six joints that are connected only by glue along the corners. Engineering-wise, this is a relatively unstable structure. The roof will add stability to this structure eventually, but in the meantime, avoid putting diagonal pressure on the corners, which could cause the building to flex out of square.
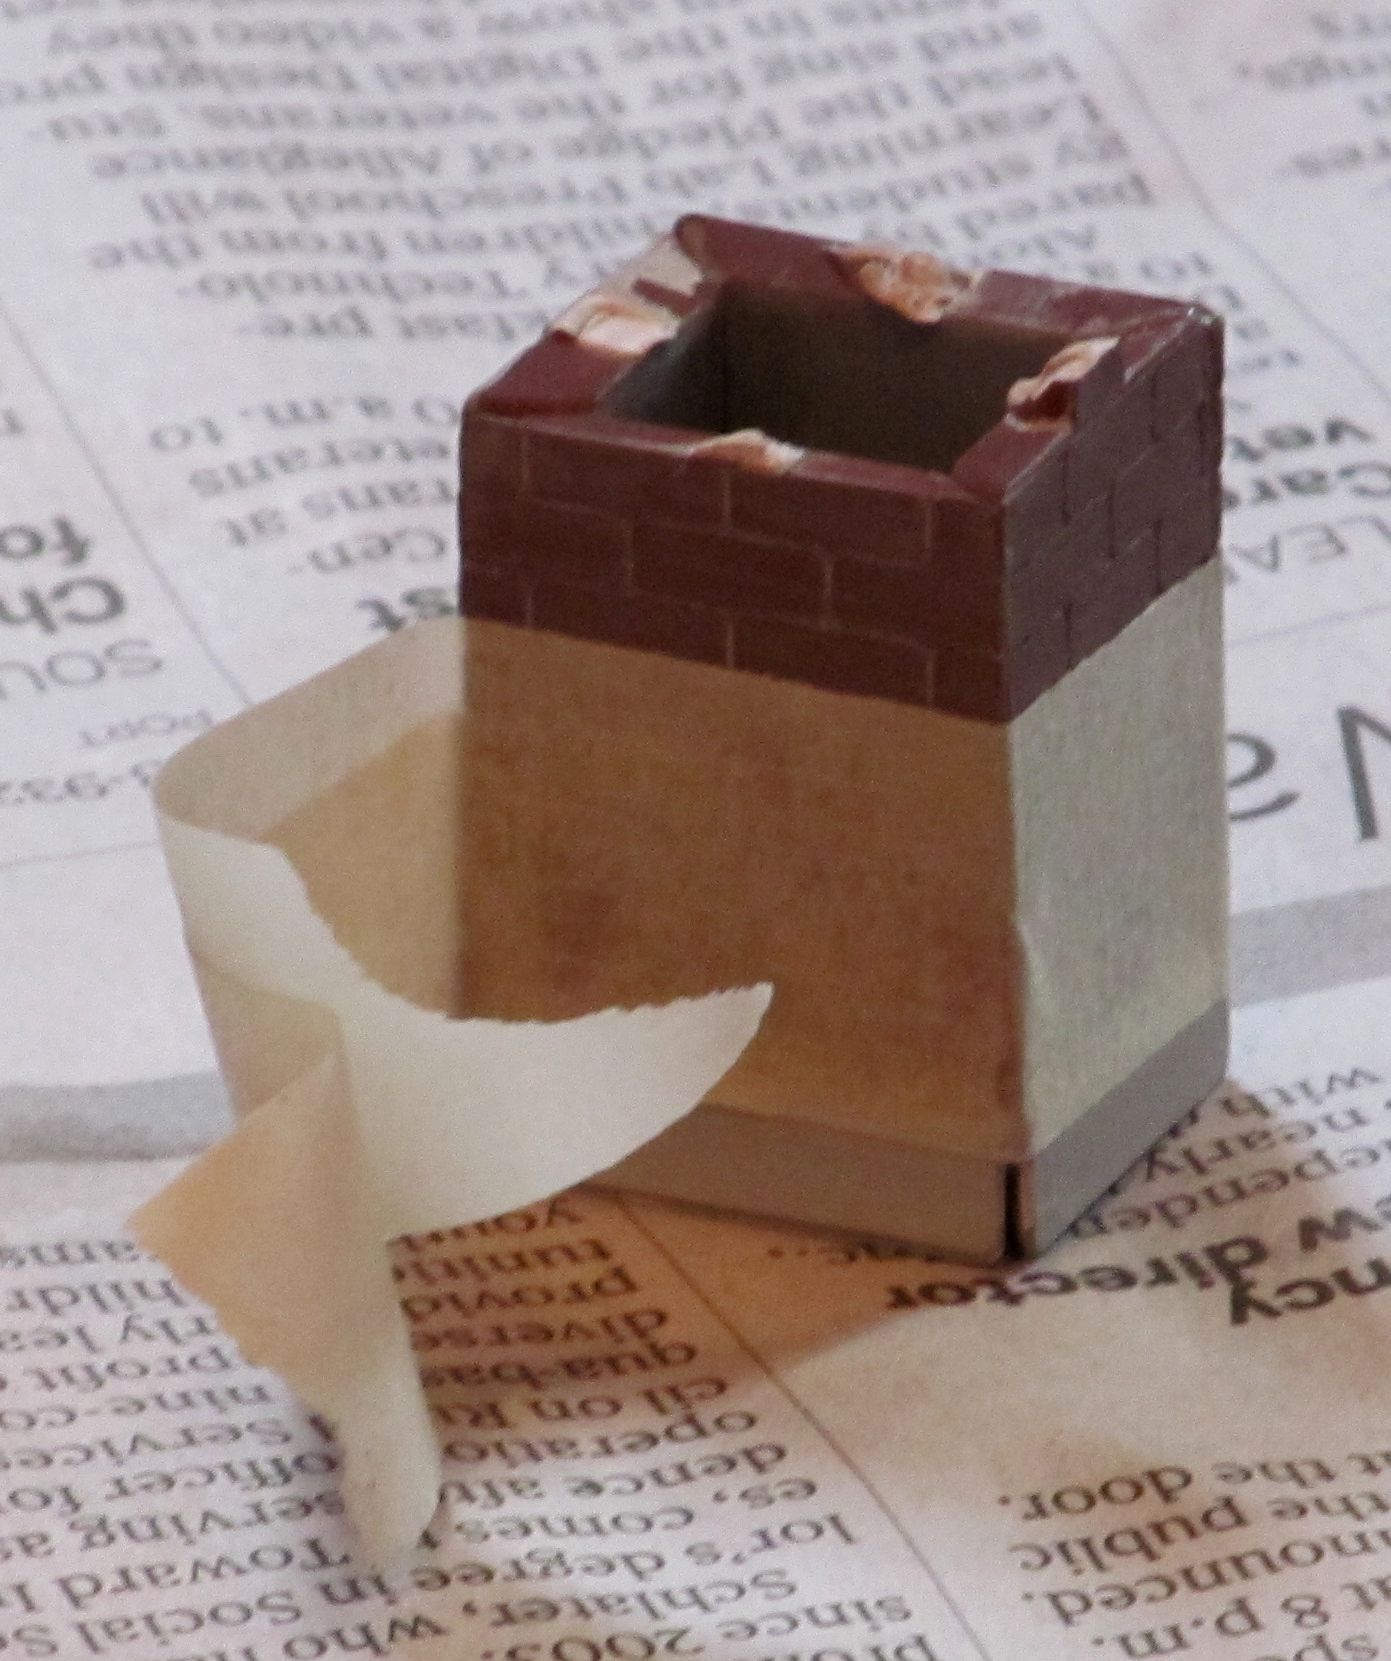 It occurred to me (fortunately) to check the fit of the chimney into the roof pieces before I glued them on, so I also glued the chimney together at this time, using masking tape to hold the pieces together tightly until they set. As it turned out it was a good thing I did. The chimney is about 1/8" too fat to go into the slots on the roof pieces. So I took a hacksaw and widened the slots on the roof pieces before I glued them on. I didn't get a photo of me sawing the chimney holes in the roof pieces larger - sorry - but I needed both hands to do the work.
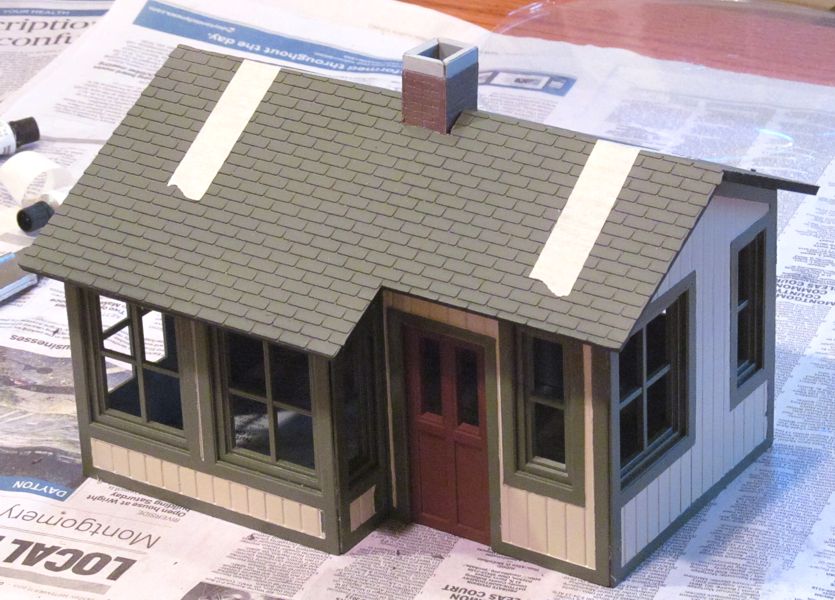 So I arranged the roof as best as I could, making sure that the little row of "half-shingles" on one piece covered the edge of the other piece where they met to provide a finished appearance.
At first I just glued the roof pieces to the gables and let that dry. Aftward, I pulled the chimney out, lay the building upside down, and ran beads of glue where the roof pieces met each other and where the front piece of the roof met the edge of the front walls. Once all of these joints had dried overnight, the building felt much more solid.
On most buildings I glaze the windows before I put the thing together. But on this one, some of the windows were so close to the corners, I wanted to make certain that my glazing didn't interfere with the building going together.
If you're new to this whole process, consider using the glazing that CMS supplies as an optional add-on when you order your kits. It's very stable and easy to use. I prefer using 1/8" clear Lucite (Plexiglass) - it is very durable and adds strength to the structure itself.
 One reader uses clear PETE packaging to glaze her windows - the stuff that prewashed salads and deli trays come in for example. I've used that for other things but not for glazing. Because I needed to get this project "done" and get some other things done before our next open railroad, I "cheated" and tried this method, cutting up the clear plastic top of a package that a fancy pastry came in, and using only light dabs of glue to hold the plastic bits in place (in case they don't work out). Unlike the Lucite(r) I usually use and most PETE packages, this piece had a very slight rippling. But I'm modeling an older home, on which the window glass has begun to settle, so the look is appropriate. I'll let you know how well it holds up to Ohio weather.
 The photo to the right shows the PETE "glazing" glued into place, with masking tape holding it in place until the glue dries. By the way, I've used Fix-All with PETE and had good results. If you're using some other glue or some other plastic, test it first. (Once when I needed translucent windows, I tried using the Testor's non-toxic glue with milk-carton plastic (HDPE), and it made the stuff curl up into the most interesting shapes.)
If you want to to use the most reliable glazing, refer to our article on using Lucite to glaze your buildings.
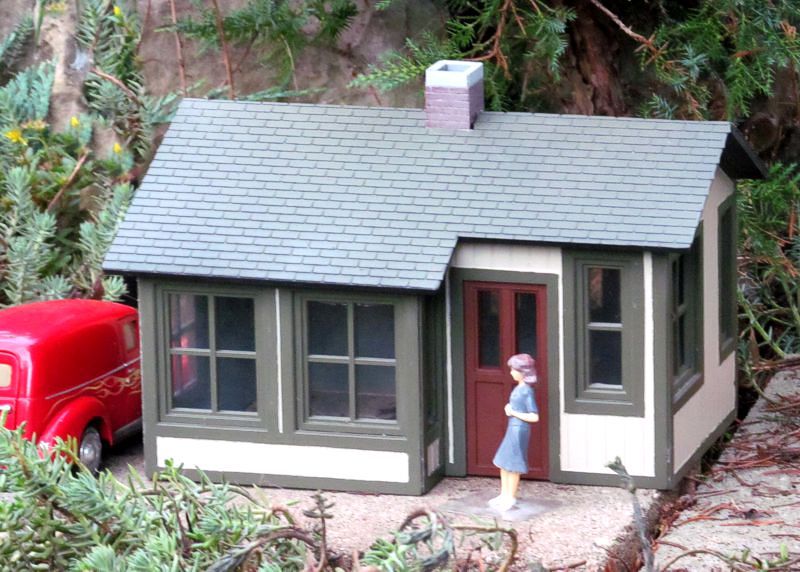 Once the "hard parts" of any building assembly are done, I'm always tempted to find a place for the building, set it out, and let it go. In fact, the photo to the right shows just that, since I have other projects to get done. But you can add additional charm with a few simple considerations.
One fellow left the front windowframes out of this building and put a tiny model railroad in the windows, so the building would look like a hobby shop.
In addition, if you are using this building as a yard office or some such, you can add authenticity by adding exterior lighting, as suggested by Wil Davis' article here
If you don't have time for that, consider getting one of those 2"x8"x16" landscaping blocks to set the building on. Use fine gravel or "paver base" to level the block first.
If you have a structure tip or project you'd like to tell other garden and model railroaders about, please contact me with the details, and I'll be glad to pass them on, giving you full credit, of course.
* - Some kits come with molded-in color and clear plastic windows that glue in easily, so you can, technically assemble them and set them out without painting or glazing. But the "UV-resistant" plastic is only good for a few summers outdoors before the buildings fade and turn brittle and the plastic windows yellow and crystalize. If you have an indoor railroad, that's not a problem. But if you have an outdoor railroad and you hope to use your buildings on it, you will need to prime and paint them with outdoor-rated paint, and to glaze them with real glazing material like Lucite/Plexiglass (or glass). And it's a lot easier to do that before you've glued them together rather than afterwards. That's why I have written articles on Painting Plastic Structures, Glazing Windows with Lucite, and Painting a Piko Gingerbread House.
Click here to return to the text.
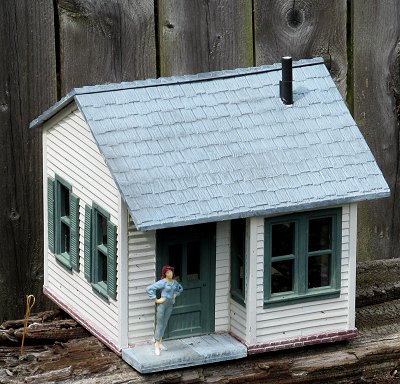
** - Korber was a "cottage industry" product that tried to fill the gap in the early days when you couldn't get US-style buildings. They were made very similarly to CMS structures, but they tended to be very small. For example, the little green and white house on this page was one of Korber's largest structures, labeled as "Centerville Station." If you come across a Korber structure, almost every tip in this article applies to them as well.
Click here to return to the text.


|
| 
|
|
 |
|
 |
 |
Note: Family Garden Trains?, Garden Train Store?, Big Christmas Trains?, BIG Indoor Trains?, and BIG Train Store? are trademarks of Breakthrough Communications (www.btcomm.com). All information, data, text, and illustrations on this web site are Copyright (c) 1999, 2000, 2001, 2002, 2003, 2004, 2005, 2006, 2007, 2008, 2009, 2010, 2011, 2012, 2013 by Paul D. Race. Reuse or republication without prior written permission is specifically
forbidden.
Family Garden Trains is a participant in the Amazon Services LLC Associates Program, an affiliate advertising program designed to provide a means for sites to earn advertising fees by advertising and linking to amazon.com.
For more information, please contact us

 |  |