| |||
 |
 |
 | |
 |
 | ||
 |
 | ||
 |  | ||
 |  | ||
| |||
|
|
| |
|
|
| ||
|
| ||
| | ||
| | ||
| Written by Paul D. Race for Family Garden Trains(tm)
and New Boston and Donnels Creek: |
 |


|
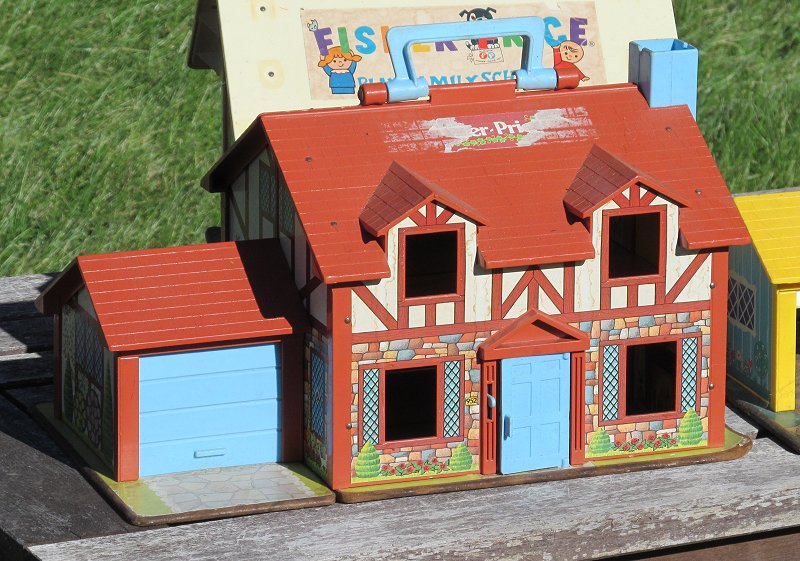
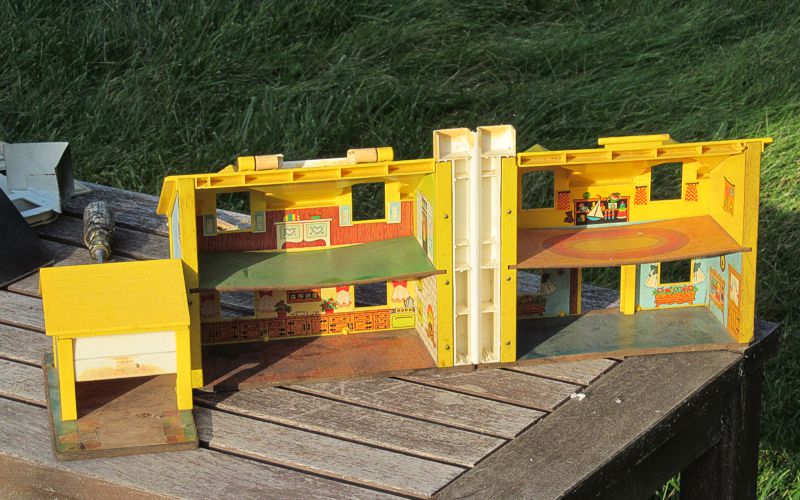
Trashbashing a Fisher Price Cape Cod ("Play Family" House)Longtime readers know that back when I got interested in garden railroading, only two companies were making US-style buildings in scales that looked good with my trains - Fisher Price and Playskool. Current Fisher Price and Playskool buildings are much flimsier and much more toy-like, but some of their classic pieces are still around. I would not recommend spending $60 on a collectible-quality set, then pulling it apart to repaint it - you can get a variety of house kits on our Houses for Garden Railroad Page, and the CMS structures on that page are relatively inexpensive. But every time I go to a really big flea market I see at least one beat-up-but-usable Fisher Price or Playskool structure for a few dollars. Although this is technically named the "Play Family House," I call this a "Cape Cod" because it's obviously patterned after the story-and-a-half houses that are called by that name wherever they are found in the United States. The Fisher Price Cape Cod has one of the most distinctive and accurate rooflines of any Large Scale building. I converted my first one back in the 1980s, and didn't take photos. After a decade outside, the glue has loosened in a couple of places, and the roof could stand another layer of paint, so I figured I'd take photos during the rework and put them in a sequence anyone could use to convert their own. Some of the steps you will have to do still have no photos, though. Sorry about that. Nevertheless, I think you'll get enough information from our explanation to do this project yourself if you decide to take it on. What is Out ThereThe Fisher Price Play Family House was built in two versions, a yellow and blue version and a "Tudor" version. The construction and all of the parts are exactly the same - the only difference is the color of the plastic and the design on the stickers.
The house is sliced down the middle, with the "attached garage" glued to the "back" half. The plastic chimney acts as a hinge, and the handle has little hooks that keep the building closed when you pick it up, so it acts as a carrying case for the contents - most of which will be gone long before you see one of these. I realized recently, when working on one of these, that the garage is not all that well attached and could be pulled off if you'd like. For a more authentic "prewar" look, the garage could be put in the back yard, with the garage door facing an alley. I may do that if I bash another one of these.
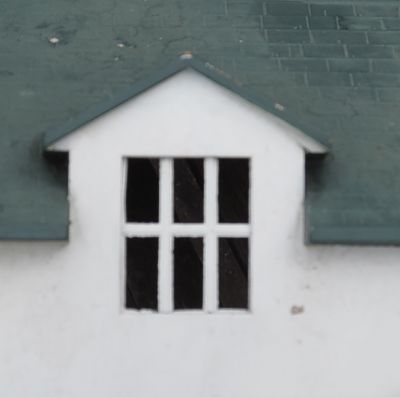
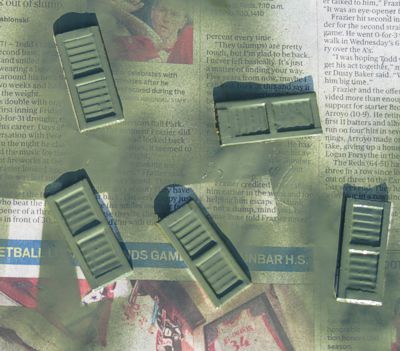
Decide to DetailThe building has no windowframes, mullions or shutters, so it can look pretty "naked" once the stickers are removed. There are other details that could be added. Here is how I addressed the issue - your mileage will vary.Shutters I had leftover shutters from another project. They were part of a vacu-formed styrene sheet made by Precision Products In fact, I always save this sort of thing from one kit or project to the next - you never know when some "extra" part you got in one kit will be just the piece you need for your next project. Mullions Whenever I get a throwaway plastic "basket" with a criss-cross pattern, I chop it up for future use as windowframes. The "mullions" for this project came from a grocery-store strawberry container I had saved some time before. Now I realize that such containers are fairly rare. Other folks have had good results with "hardware cloth," or laying thin automotive pinstriping tape across the glazing material. When you install the mullions depends on whether you want them to be the same color as the base color of your house. I did, so I installed them before I painted. The bit of fruit container in the photo to the left below was installed at one time, but came loose, so I figured I'd photograph it before gluing it back into place. The photo to the right below shows what these pieces looked like once the building and the "mullions" were sprayed.
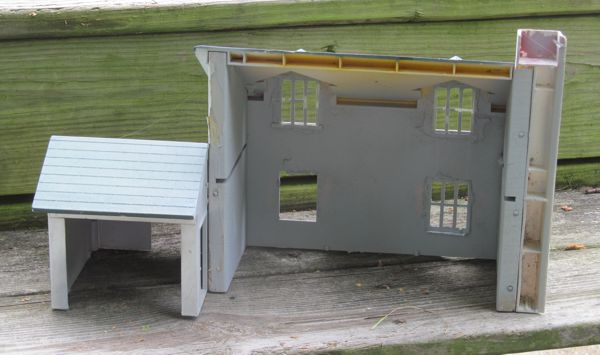
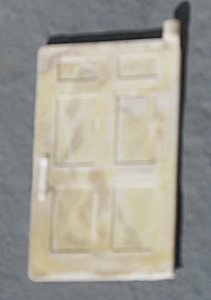
In retrospect, it might have been nice to add windowsills or frames around the window. I didn't do that, but you could. Doors - Often these are missing doors. Mine was missing the door originally, so in the first iteration, I glued a piece of white plastic in behind the doorway. I'm sure there are better detailing options than that, but it's what I did. When I was rebuilding this one, I came across a door in a box of loose parts, so I added it back in. Glazing - I added Lucite glazing after all the painting was done. But it's something to think about while you're planning your project. Preparing to PrimeRemoving the Handle I use a hacksaw for this, then file down any pieces that stick out where they shouldn't. Removing the Base - The base and the second-story floor are Masonite, which will break down or mildew eventually if you don't remove them. I replace the base with a piece of scrap plexiglass and leave the second-story floor out, since I put curtains in the windows instead of detailing the interior. This way one lamp can light all the windows in the house. I also made the base a little larger than the original. There's no reason you couldn't add several inches and attach accessories like swing sets or pumps or doghouses or . . . ? At any rate, the base is either tacked or screwed to the wooden ends of the house. It is fairly easy to remove. Removing the Stickers - The stickers on the outside have to be removed for cosmetic reasons. You should remove the stickers on the inside for health reasons (unless you like the black mold they will eventually grow if you leave them in place and set this structure outside). If this model was entirely plastic, you could just soak it in a barrel for a week and pull the stickers off. But you don't really want to soak the wood ends, not for long anyway. One way to loosen the stickers is opening the building up, laying it down on your kitchen counter, and putting a wet wash cloth over the stickers. Add a few drops of water every so often, and the stickers will somewhat dissolve. You made need to scrub with an old toothbrush or plastic "chore ball" to get all of the goo off, but it will come off eventually. The stickers on the wood, though, present a bigger problem. You might be tempted to try to removing the wooden parts, but if the plastic is at all brittle, the roof may break when you do. Though it's a little more time-consuming, consider soaking each surface of the wood for a few minutes at a time with a wet rag so that the sticker gets most of the moisture. During this stage, I try not to break the "hinged" chimney, but if you do break it and wind up with two separate building halves, nobody is going to die. Cleaning - Before you get out the paint, use a cleaning spray that leaves virtually no residue (like Fantastic or Glass Plus) to wipe down the whole structure. This will get rid of any oils your fingers may have deposited. From that point on, handle your project only by the edges - otherwise your fingerprints can cause the paint to cover unevenly. PrimingPrimer prepares the surface of your building to accept the colored paint you choose. For model buildings I usually use the cheapest gray primer from Wal-Mart. In past projects, I have used wood primer on the wooden surfaces, but I'm not sure it makes much difference.You can spray outside on a warm, calm day. If you can't spray outside, try to create an environment away from anything that could be damaged by overspray inside. Make sure there's plenty of ventilation and no open flames (this includes furnace and water heater pilot lights). I like to use an appliance box that has the top and one side cut out as a painting booth. That said, it's usually easier for me to wait for a warm, calm day than to move stuff around in the basement or garage. You don't need to mask anything on the model before you prime, because you're going to be priming the whole thing inside and out. Priming inside may seem like a waste, but it will help protect the plastic. And it will help keep your house looking like it's glowing in the dark when you add internal lighting. Most spray paints work best over 60 degrees Farenheit. For most projects I start on the inside of the building, but as you'll see quickly, spray paint doesn't like settling on deeply concave surfaces like the inside of the Fisher Price Family Play House. So you might want to take a couple passes on the inside to get started, then move to the outside. Shake the primer can until you can hear the little ball rolling freely. Do NOT aim the can at your piece until after you've pressed the button. Instead hold the can off to one side about 8" away from your piece. Press the button and bring the spray pattern all the way across the piece and off the other side before you release the button. Otherwise, you'll wind up with a circle of extra paint where you started or stopped spraying. The whole process should last two or three seconds. By the time you've bent over to take a look at the surface of your piece, the paint should already be drying or dry. If there are any drips or even any shiny spots, you moved too slowly. Make several quick, light passes, allowing a few seconds in between. This helps you avoid the danger of drips or runs and helps provide a more even coverage in the long run. You probably won't get 100% coverage from your first coat of primer. Don't try to "fix that" by saturating the paint on the piece. Even if you don't get any drips or runs, you'll create areas with uneven coverage. After you have 80% or greater coverage, walk away and let things dry. In twenty or thirty minutes, come back and repeat the same pricess from another angle. Then walk away again.
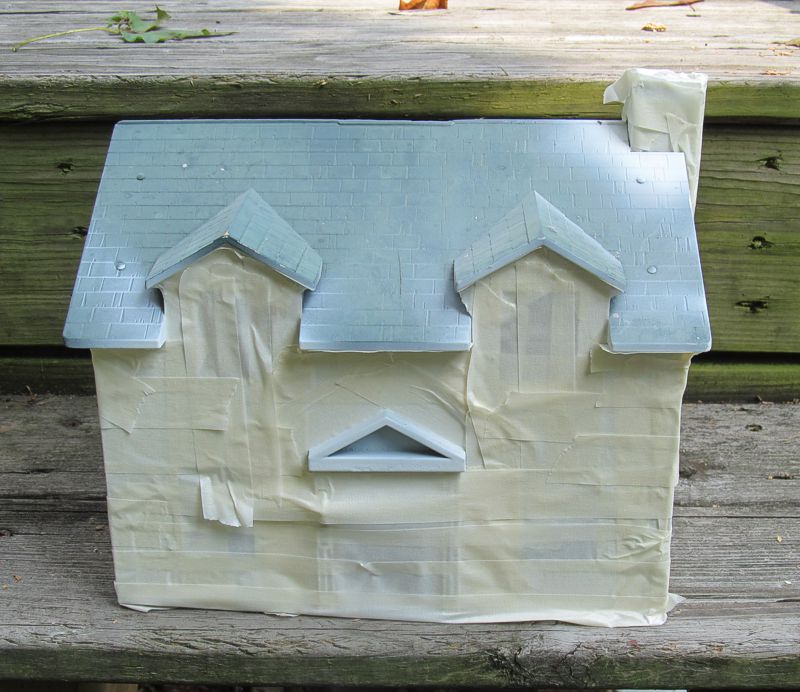
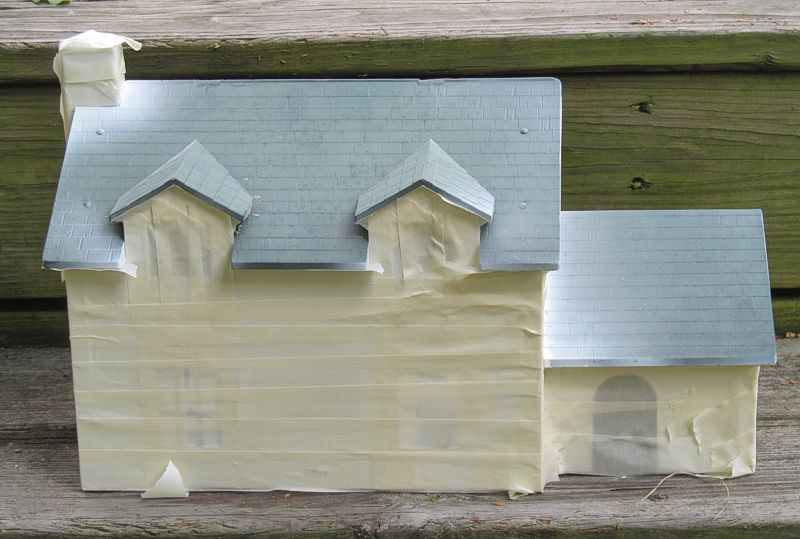
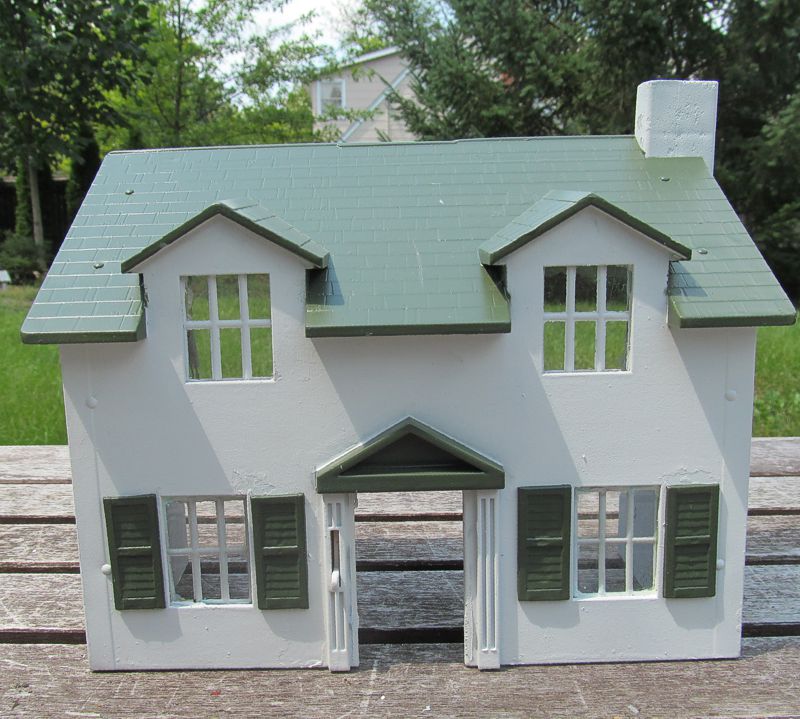
Also, the chimney/hinge broke while I was reworking this house. so the pieces are separate - your pieces won't be. At the end of this process, let the pieces dry overnight, or at least a couple hours, if you have dry, warm weather. (If you worked outside, and you need to bring them in, lay them out somewhere that wet paint won't damage, and be certain the "face" of the piece is completely exposed.) Even after the primer coat is thoroughly dry, continue handling these pieces like photos - only with very clean hands and only by the edges. Painting the Base CoatUnless you have something that you want to stay the color of your primer, you don't have to mask anything before you add the next coat of paint. I added my "base coat" next. In the case of the house I was rehabbing, some of the paint had discolored, so I decided to reapply the base coat. Why did I choose white walls and green roof for my building? Because in Ohio, that's the most common color for farm houses, and this house sits on a farm. I know - boring. :-)In this photo (and the one of the windowframe above, you'll see a faded "Hunter green" roof. Don't let that throw you - your roof will be primer-colored by the time you spray the base coat on. Use the same "baby step" approach to paint as you did to prime. Add several light coats twenty minutes or so apart, and coming from different angles. On the Cape Cod, be sure to spray up under the "eaves" of the dormer and the porch roof, and to get the whole front of the dormer. It's possible, if you do all of your painting from one angle, for the roof next to the bottom of the dormer to keep your base coat from settling there. If you'd like, you can make the side of the dormers the base color. That's what I did the first time, though it required extra masking in the next step. But it's almost impossible to see those once the building is in place anyway. So this time around, I just let them go the roof color. When you're satisfied with your base coat let it dry at least 24 yours before you do the next step. You don't want to mask carefully, do a perfect job on the roof, and then discover that your base coat has come off with the masking tape. MaskingIf your base coat and mullions are the same color, masking is easy. In my case, I left the chimney white, too, though I suppose I could go back and mask everything else on, then spray it brick red or something. Maybe I will.When I mask something like this, I start with the most complicated part - the edge under the roof. I taped under the "eaves" to keep that part white. Then I taped the front of the dormers. If I had wanted the side of the dormers to be the base color, I would have had to mask those as well - a fairly tricky proposition. After I did the hard part, the rest was easy. Again, when you do this, your roof will be primer-colored at this stage. Note that I made a point of not masking the little porch roof. I wanted it to take on the color of the roof.
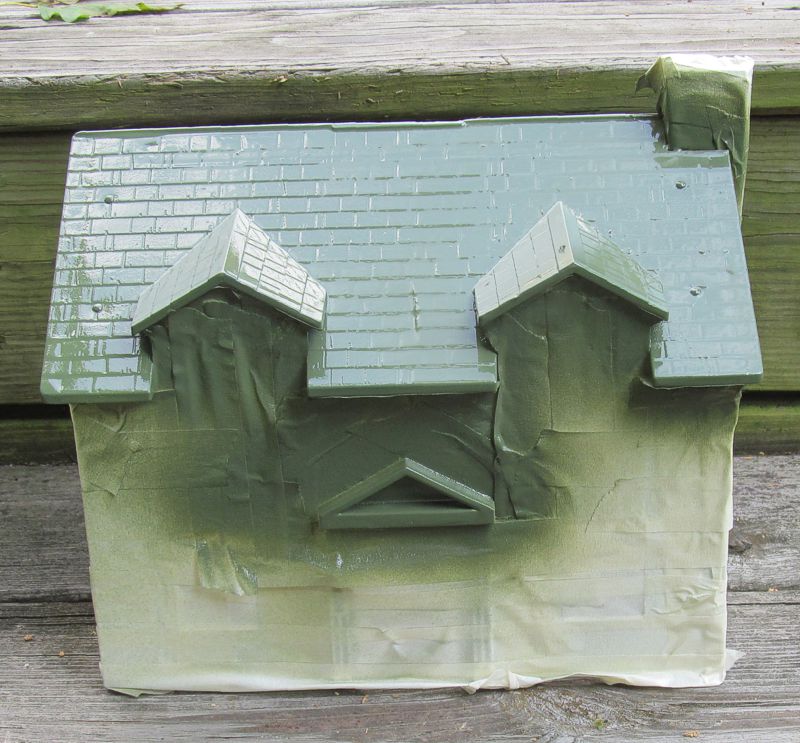
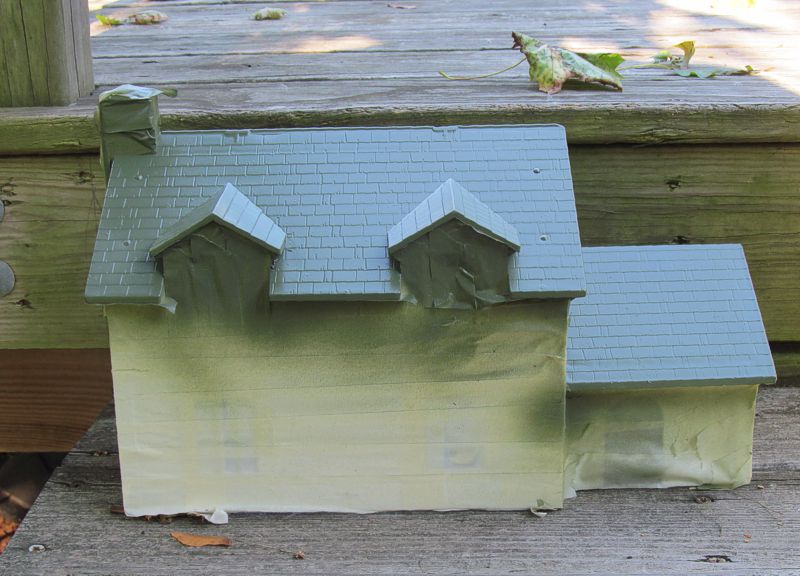
Roof PaintingThe first time I painted this house, I used Hunter Green on the roof. That's a dark green with a hint of blue that is very similar to the color used on barn and farmhouse roofs all over Ohio. When I started to paint the roof this time, I was out of Hunter Green. However had something called Italian Olive that looked promising. So I used that.Chances are pretty good that you left fingerprints all over the roof when you masked the structure. So dampen a lint-free cloth with Glass Plus or Fantastic or something similar and wipe the roof before you paint. Be absolutely certain it's dry. Because the roof is more textured than any of the other surfaces, it's especially critical to hit it from multiple directions. The following photos show the house with the roof painted before the house is unmasked.
ShuttersMy shutters were still Hunter Green, so I sprayed them Italian Olive to match the roof, then glued them in place.
I also installed lighting, using a fixture that would hold the Malibu-style wedge bulbs. You can see a photo of the thing attached (and spray-painted, though that's not necessary) in the next photo.
|


|
|
| 
|
|
 |
|
 |
 |
Note: Family Garden TrainsTM, Garden Train StoreTM, Big Christmas TrainsTM, BIG Indoor TrainsTM, and BIG Train StoreTM are trademarks of Breakthrough Communications (www.btcomm.com). All information, data, text, and illustrations on this web site are Copyright (c) 1999, 2000, 2001, 2002, 2003, 2004, 2005, 2006, 2007, 2008, 2009, 2010, 2011, 2012, 2013 by Paul D. Race. Reuse or republication without prior written permission is specifically
forbidden.
Family Garden Trains is a participant in the Amazon Services LLC Associates Program, an affiliate advertising program designed to provide a means for sites to earn advertising fees by advertising and linking to amazon.com.
For more information, please contact us

 |  |