 | |||
 |
 |  | |
 |  | ||
 |  | ||
 |  | ||
 |  | ||

| Please Read: How to Help Our Site at No Cost to You - Some of our articles contain recommendations for products we like and vendors we personally trust. Some of those vendors may pay us a very small commission if you click on a link and buy their products. This costs you nothing at all and helps offset the costs of what we do. So if we point you to something you decide to buy later, please make certain you come back through our site and click on the link directly. Thanks. |


|
Okay, so you've taken my advice and built (or at least planned) a "raised" railroad. Now you have to figure out how to get your towns and forests the same height as your trains. The most common backfills used to raise the apparent "ground level" of garden railroads are dirt and gravel. To hold the backfill in place, most garden railroaders use some kind of retaining walls, generally made of wood, stone, or preformed concrete blocks. Of course, each of those materials is available in a wide variety, some of which may not be affordable or even available in some areas. So this article is largely a review of basic principles that affect any retaining wall/backfill project, with some notes about advantages and disadvantages of specific kinds. Note: Most landscapers face most of the same obstacles as garden railroaders when designing retaining walls. As a result, all but one or two of the examples discussed on this page are visible in parks, front yards, and even near restaurant entrances where you live. So don't wait until you see a bunch of garden railroads to decide what kind of retaining walls would look good supporting your own garden railroad. Observe the dozens of non-railroad examples you pass every day and decide what look would most suit your back yard, your skills, your tastes, and your budget. In fact, several of the photographs in this article are not from garden railroads at all, but from raised vegetable gardens or city businesses that tried to dress up their space a little. The following topics are discussed in this article:
Backfill OptionsThe first part is relatively easy. For backfill, you basically have a choice between gravel only, or dirt and gravel.
Backfill is usually sold by the cubic yard, which is 27 cubic feet of dirt. This sounds like a lot if you're talking about trunk space, or even mulch (which you only spread a few inches deep, after all). But a cubic yard of earth will only raise a 5'x5' square area by about a foot. You probably won't get a precise measurement - the people who haul your dirt are as likely as not to be 10% off or so anyway (how would you know)? But you can get a good idea if you multiply the width by the length of the area you plan to turn into railroad, then multiply that by the average height (in feet) you want to raise the railroad. So a 15'x30' railroad, raised 2' on the average, will require 900 cubic feet of backfill, which (divided by 27) is about 33 cubic yards. Of course nobody says you have to get all the dirt at once. The first loop of my New Boston and Donnels Creek railroad was about 14' wide by 20' long, and averaged 18" (1.5') high, or a little over 15 cubic yards. The topsoil company I used could only bring about 9 cubic yards in one trip, but I also had dirt that I dug out from the pond, and earth from other landscaping and gardening projects to contribute, so I made it work. The northern loop of my railroad is also raised, but it's mostly raised on rock walls and timber framing, so I didn't need as much dirt there. When a business across the street had some landscaping done and the company left a pile of dirt no one wanted, I got good use of my wheelbarrow. That said, garden railroader Ray Turner had over 100 cubic yards brought in for his garden railroad, which is, admittedly, far bigger than mine. Wall IssuesYou have many choices of retaining wall material, which vary in cost, appearance, and permanence. One of the biggest factors to consider, though is rigidity, that is, how much "give" the wall has once the wall and backfill are in place. You'll also want to consider how to handle drainage issues, how you want to use your wall as a transition from your "back yard" to the railroad, and how much you want to invest.RigidityIf your track is mounted on a very solid base, such as a 2"x6" roadbed over 4"x4" posts that have been backfilled, your retaining walls only need to be strong enough to keep your dirt and gravel from shifting around too much. On the other hand, if your track is just sitting in gravel (even tightly packed gravel), your retaining walls have to be much more solid, as the mechanical integrity of your railroad depends on your dirt and gravel staying pretty firmly in place.
Another way to think about a wall's rigidity might be to think about how well it would hold up to your weight. The first category above should be able to hold up to you walking or climbing anywhere on its structure. You should be able to kneel on or clamber around the second category, as long as you paid attention to where you are putting your weight. But if you tried clambering around on the third category, you'd find yourself slip-sliding away. (There's nothing wrong with a wall that's not designed to hold your weight, just make certain that something else is supporting your roadbed. DrainageMost retaining walls, properly built with appropriate materials, will outlast the "lifetime" of the railroad they support. Before we get into the pros and cons of individual materials, though, it's important to discuss drainage.All retaining walls require pressure relief, that is, a system for allowing water to escape instead of building up pressure behind the wall, be it weep holes drilled through concrete or unmortared vertical cracks between stones in a wall.
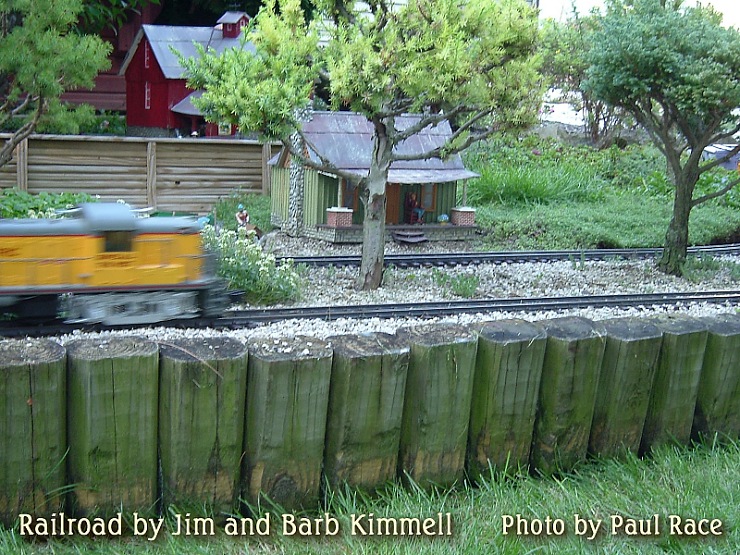
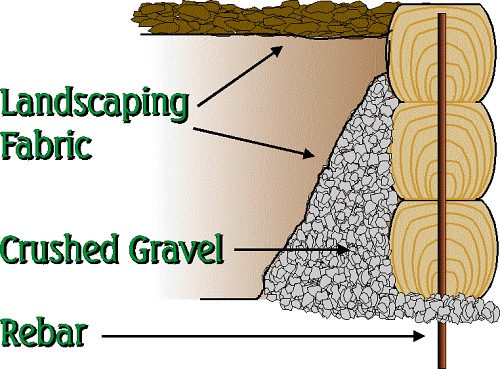
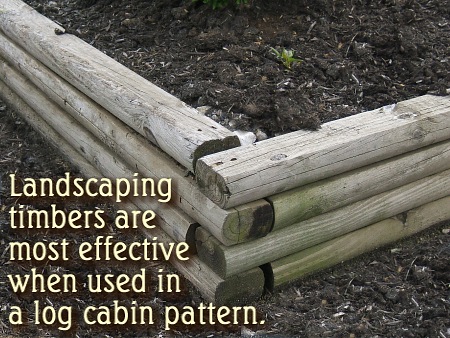
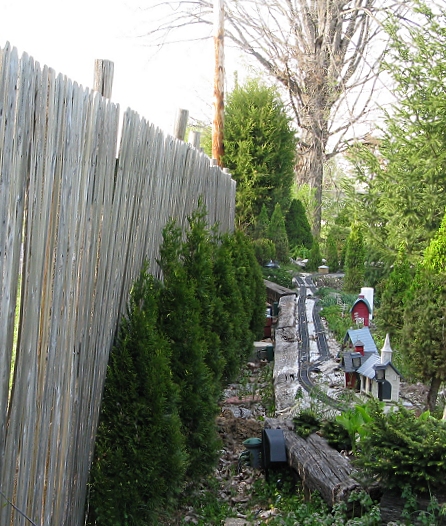
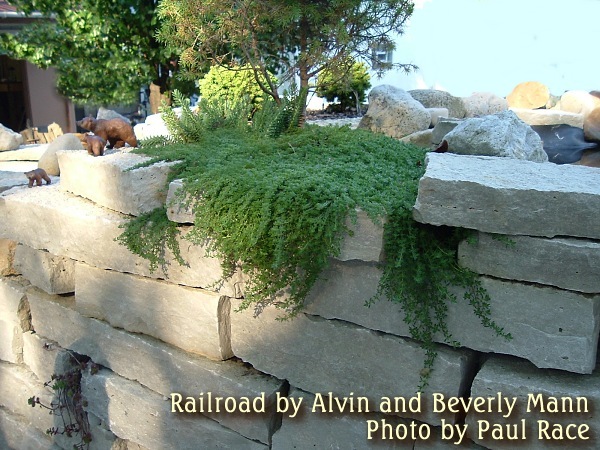
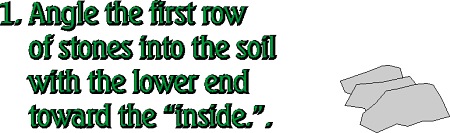
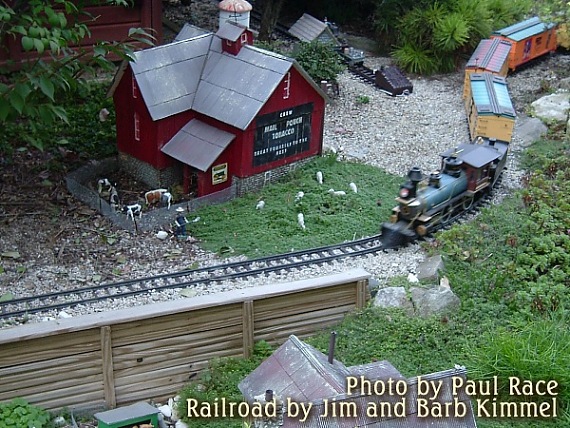
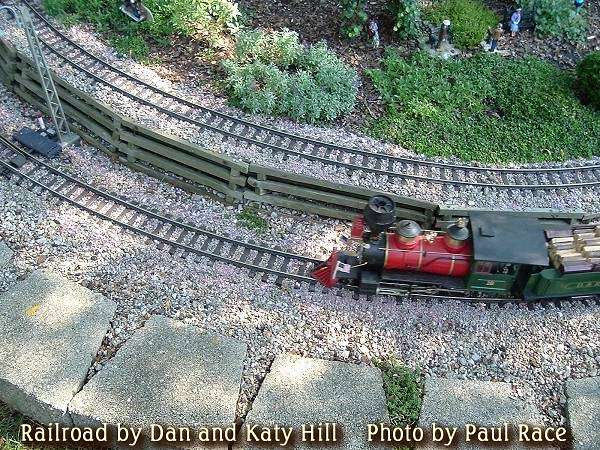
My friend Larry the contractor tells me that the best way to avoid wood products rotting out from ground contact is to keep the dirt away from them altogether. The drawing shows a hypothetical installation. A gravel buffer" lies against the lumber, with a top-quality landscaping fabric (the kind with the little tiny holes) between the dirt and the gravel. The landscaping fabric is to slow the leeching of the dirt into the gravel buffer, so that drainage is maintained. (I added the landscaping fabric on the top because I've become a weed nazi in my old age.) A side view of the same installation would show that every place the ends of the timbers (or railroad ties) appear to "butt" up against each other, there is actually an inch or two between the ends of the members, to reduce water pressure behind the wall. In the drawing, I also included gravel underneath the wall. This is suggested if you're using "landscape timbers" in a damp area - they don't really hold up as well to constant moisture as you'd think they should. Update for 2015 - After having experienced nearly total failure of my original railroad tie installation, I no longer recommend using railroad ties or "landscape timbers" anywhere east of Kansas or in the Pacific Northwest, even if you do it the "right way." More below. Additional points about drainage will be inserted as they relate to specific materials below. The Wall as TransitionNone of the materials and approaches discussed in this article are visually objectionable. None of them distract from the gardens and trains they support, if they are properly used. However, you should choose one that visually "fits" the rest of your yard as well not spoiling the effect of your railroad.Most retaining walls around garden railroads use materials that won't fool anyone into thinking that they are part of the miniature world they support. However that's not altogether bad. A wall that looks like a wall provides a layer of "demarcation," a sense that here the "real world" ends and the miniature world begins. People viewing dioramas or indoor railroads don't let the base of the table distract them from enjoying the miniature world; neither will people viewing your garden railroad. As an example, the vertically-installed landscaping timber segments at the top of this page nicely separate the lawn from the railroad, while at the same time looking like they belong to both. (On the other hand, you can also tell that the protective chemicals are already leeching out of the poor things at ground level. So I would not recommend this specific installation outside of desert regions.) One way to think about it: If you take one photo in which you can see the wall and your back yard but not the railroad, and another photo in which you can see the wall and your railroad, but not your back yard, and the wall looks like it "belongs" in both photos, you've created an effective transition.
To summarize, whether you choose a wall that draws a line between reality and imagination or one that blends the railroad into its surroundings, you'll want to choose materials that:
CostsAs in all other areas of life, costs may affect the choices you make. In some cases, you exchange cash outlay for ease-of use. But the relative of cost of each choice depends on the availability and cost of materials in your region.In almost every case, you need to remember that the most expensive wall is one that someone else builds. So if the most expensive solution you see also looks like the easiest, and it keeps you from spending hundreds or thousands on professional installers, that's still not a bad deal. In the other extreme, the cheapest wall is the one made entirely of free or repurposed materials. An example would be my earliest loosely-stacked rock walls, which were made entirely from stones I found in the yard of our old house. Chances are you won't be so lucky, or you may not have time to chase down bargains. That said, you should sit down with a calculator and figure out your relative costs before you make your decision. One way to figure out relative cost is to figure the "square foot" of surface. To give an example, a modest 15'x30' garden railroad that is raised 2' on the average will require 180 square feet of surface ([15+15+30+30]x2). Let's say you live in the desert, in an area where termites aren't a huge problem, and you think railroad ties might do the job. (They vary in size, so be sure of what you have available before you do your final calculation.) As an example, a railroad tie that is 8' long and 6" high gives you 4 square feet of surface. If you can get ties in good shape for $10, that gives you a base cost of $2.50 a square foot, or $450 for our example. If you figure you'll need to spend $75 on a truckload of gravel, $75 on landscaping cloth, and $20 on rebar to finish the job, your total cost for our example 15'x30'x2' railroad, would be $620, or $3.44 a square foot. But what if ties are hard to come by in your area or you don't want to futz with anything that heavy? Most "landscaping timbers" are 8' long and 3.5" high. So each timber gives you about 2.3 square foot. If you pay $7 per timber, that's $3 a square foot. But if you want your timber walls to stay around a while, you'll want to use gravel and landscaping cloth, too. And the cost of those products could raise your total cost to something closer to $4 a square foot. So in the example shown, railroad ties would be cheaper. But if railroad ties in your area are $16@ instead of $10@, that would push the overall cost of a railroad tie wall to almost $5 a square foot, and the timbers would be the less expensive choice. What about those cool vertical timbers as shown in the photo at the top of the page? Bad news - to stay in position, at least a third of the timber must be underground to maintain enough "leverage" to hold back the backfill. So if you want a 2' raised railroad, your timbers will need to be 3' long (longer if you're in a heavy rain area). Actually, though, these things usually come only in 8' lengths, so to maximize your investment, you'd really wind up cutting them into three 32" pieces, giving a final height of about 20". Still, the cost of the lumber will be half again as much as if you were putting these in horizontally. All other things being equal, a retaining wall for our example 15'x30'x2' railroad would cost $960 (counting crushed gravel and landscape cloth). Worse yet, in damp climates, this solution will have the shortest life span of any other solution discussed in this article; see below. The cheapest wooden retaining wall I've stumbled across is the "fence-style" wall shown below with 2"x6"s screwed to vertical 4"x4" posts. I got the idea for this approach while doing research for my article on Accessible Garden Railroads. Many vegetable and flower gardens that have been built to serve mobility-impaired gardeners use this sort of construction. The version shown in the photos was actually a 4'x8'x1' version built for our tomato garden, which we decided to raise in 2012. The lumber for this project came to about $2 a square foot. (I got 2"x6"x12' boards for $9@ and 4"x4"x8' posts for $6@. This 4'x8'x1' raised bed used two posts and four boards, for a total of $48 of lumber to create 24 sq. ft. of retaining wall. Ironically, the pricing for this lumber was all over the map. If I had bought six 2"x6"x8' boards instead of four 2"x6"x12' boards, the cost would have been closer to $3 a square foot, so take a calculator to the store when you shop for pressure-treated lumber. Also, if I were building a higher version, I might use a higher ratio of posts, but the overall cost would still be about $3/sq.ft. For our example of a 15'x30'x2' railroad, that would come to $540. Note: In 2015, the price for most of this lumber is 25% higher than it was in 2012, so adjust your estimates accordingly. Stones come in all shapes and sizes and cost levels; however, if you have to pay cash for your stones, a stone retaining wall will likely cost you more than any other solution. It's also hard to estimate how many square feet of retaining wall a given pile of rocks will give you. Of course, if you like the look of stone, nobody says you can't build the "front" retaining wall with stone and the back with something else, or start out with something less expensive and add stacked stone in front of it later. Concrete products offer a good compromise, although you have to pay attention to exactly what you're getting. The most common landscaping blocks are 12" across by 4" high, so it takes three to give you a square foot of retaining wall. If you buy the kind of block that has the little molded-in "lip" in back to hold upper layers in place, and you provide a little bit of space for drainage between stones, you don't have to use crushed gravel, etc., for backfill like you should do with lumber, so your cost is mostly just the cost of the blocks. If your blocks cost you $1.75@, you'll pay $5.25 a square foot, or $945 for our example railroad. On the other hand, some discount stores are selling 8"x3" stones. Unfortunately, you need six of these to make a square foot, so if you pay $1@ for these, you're paying $6 a square foot, or $1080 for our sample wall. Worse yet, walls made with these "bargain" blocks will be less stable than walls made with the bigger ones - there is less weight and horizontal surface to create "drag," and most of them don't have the little "lips" to keep upper layers from sliding forward. If nothing else, these examples show you that "your mileage will vary." You'll have to do your own homework on costs; we've just tried to give you some things to think about. Wooden Retaining WallsRetaining walls made with treated wood products have been popular for home improvement projects for decades. They have many advantages, including the fact that it's relatively easy to predict the cost and performance of any given wooden wall in any given situation, something that's not true for stone, and not always true for some concrete solutions. They do have a shorter lifespan than properly-installed stone or concrete-product walls, but, properly installed, they will outlast the life span of any homeowner's garden railroad anyway.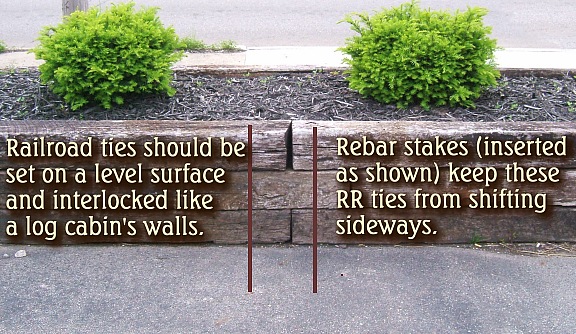 Railroad TiesRailroad ties are made of evergreen wood that is saturated in creosote, a preservative that is also used on telephone poles and which lasts for decades. In times past, used railroad ties would become available when railroads would re-lay a section of track that had gone too far to maintain. Since the decline of passenger trains, big railroads have begun decommissioning redundant main lines and passing sidings, making many more ties available. In the past, railroad ties have seemed like a "natural" solution for garden railroaders for several reasons:
On the other hand:
Building Tips - When I was taking photos for this article, it didn't occur to me to take photos of "what not to do," but I saw plenty of examples of railroad tie walls that either looked stupid or that self-destructed because the builder had ignored basic principles. Now that parts of my railroad are sixteen years old, I realize that - even if you use them correctly, they will not hold up indefinitely in Ohio. So I would only recommend considering them if you live someplace much dryer. If you live anywhere you have to water your lawn more than five times a year to keep it alive, you can keep reading this section, though. One principle to consider is slope. Railroad ties (like anything with a strong horizontal line) look best when they are fairly level. If your ground is not level, consider digging it out a little so your first tier of ties lays level. (For extra protection, pour a layer of crushed gravel underneath the part that is "dug in" to give it a little extra drainage. Just because the tie has stood up to half-burial in a rocky ballast for generations doesn't mean it will stand up to full ground contact in damp topsoil indefinitely). Another principle to consider is mechanical structure. Many folks have made the mistake of thinking that "these things are so heavy, they're not going anywhere." You would be surprised at the horizontal pressures that heavy rains, freeze-thaw cycles, or shifting soil can bring to bear on retaining walls of any kind, even railroad ties. Even my little two-tie-high "wall" bowed out more than I liked before I got out the power drill, hole saw, and rebar. The best installations stagger the ties like Lincoln Logs, then use rebar to fasten the ties to each other and to the ground. My preference would be to install each layer an inch or so "back" from the previous layer, to help compensate for an outward shift later, but you don't see that often. A final principle to consider is drainage, as shown above. Use gravel backfill against the ties to help moisture drain away from them. Also, install the ties so that there is an inch or two gap between the ties wherever the ends come together. (On my railroad, I stuck some Creeping Jenny starts in those gaps in the hopes that it would spread out a little and soften the profile of the ties. It hasn't yet.) Caution: As charming and useful as railroad ties are in the garden, Ohio State warns that they most likely contain chemicals that make them unsuitable for use in a garden in which food is going to be grown. Now, that's not likely to affect many garden railroaders, but we thought you should know.
Landscaping Timbers"Landscaping timber" is one name for a 3.5"x6"x8' post that's rounded to look like a slightly hewed log. Most of these are actually by-products of plywood production - they are the "core" that is left when the usable "plys" have been shaved from the log. The core is then milled into the shape you see at the store. Between the plywood factory and the store, these posts are soaked in preservative; however, they are not pressure-treated, so the preservative doesn't soak all the way in. A few years back, when CCA was the most common preservative, Ohio State's experts estimated the life span of one of these in full ground contact at between five and seven years.Timber buried completely in the soil may not receive enough oxygen to support decay, and timber above the soil generally doesn't stay moist enough to support decay. But un-treated, or under-treated timber at the soil line in moist climates creates a "perfect storm" for premature decay. That's why I show the gravel underneath the landscaping timbers in the discussion on drainage. Yes, using a gravel "footing" instead of hard-packed dirt may be more hassle at first, but if it keeps you from tearing things out every 7 years or so, it's worth it, don't you think? Also, it's a lot easier to replace these before they blow apart, spilling mud and trains on the adjacent walkway. Building Tips - As discussed above, these work best when they're stacked in a "log cabin" formation with the lengths interlocked, then fastened together with spikes or rebar (preferred for anything over three layers high). For the best visual effect, try to keep the horizontal posts level, rather than having them go up and down with the slope of your yard. And monitor them seasonally for any signs of premature decay that might indicate it's time to improve drainage or make other changes.
Update for 2015 - Since I last edited the paragraph above, my angry-at-the-world neighbor threw up a privacy fence on both sides of his property, using the cheapest possible panels and those 3.5"x6"x8' landscaping timbers instead of fence posts. If he'd told me he was going to do it, I'd have split the cost with him and bought decent materials. As it was, the landscaping timbers were only about $2 cheaper than 4"x4"x8' ground-contact-rated posts, so he saved about $16 by buying them. Our water table is so high that sometimes in the spring, that part of the yard is standing in water for weeks. Plus we get high winds from the west.
Consider using 4x4s Instead - It occurs to me that if you want the sort of "log cabin" retaining wall that folks often buy the cheapo landscaping materials to create, the cost of ground-rated 4"x4"x8' posts would only be 25-30% more, and they would last much, much longer. Plus, since they no longer use arsenic to bug-proof the things, they're much safer to have around than they used to be. That said there is an even cheaper solution that is just as attractive. Read on.
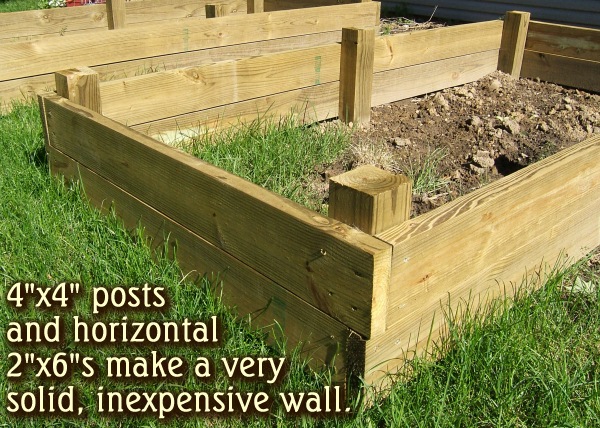
Fence-style ConstructionWhat about the fence-style construction I "borrowed" from folks who are used to building "accessible" raised gardens? Well, the only pieces going into the soil all of the way are the vertical 4"x4" posts, which are rated for full ground contact. Also, even if the lower 2"x6" boards rot out (which they shouldn't because I actually left lots of space for drainage at the bottom, I can simply replace those boards, I don't have to disassemble the whole wall like you do when the bottom landscape timber or railroad tie rots out.Building Tips - I used 2"x6"s because for some unknown reason, 2"x6"x12' pieces cost substantially less per "square foot" than 2'"x8"s or 2"x10"s, or even 2"x6"x8' pieces, which would have worked just as well. Because I was creating three of these in a row to create my new "vegetable garden," I was more careful about measurements on these than I usually am on measuring the boundaries for my railroad. I measured the location of each post carefully, then dug the posthole to just below the frost line (I didn't use concrete because this is in a garden someone might want to reuse as a regular garden some time). Then I cut the posts and set them loosely in each hole. Next I used two of the 2"x6"s to build a framework that looked like a bottomless 4'x8' box. I set the box over the first set of posts and used a square and tape measure to make certain that the box was parallel to the garage and perfectly rectangular. Then I backfilled the post holes enough to hold the posts in place and checked again. When I was certain I had the right location for each post, I tamped the dirt in around them. Then, using a level, I found the highest corner of my "box." I screwed the box to the post there, then continuing to use the level, raised the framework the right amount all the way around and screwed it to the remaining posts. Because the ground sloped, there was a few inches' worth of space between the box and the ground at one end. After checking the "square" all the way around, I added the next layer of 2"x6"s, then added a few more screws to both levels to keep the whole thing very solid. As it turned out, all of the posts stuck out a little, and some of them stuck way out. I trimmed the long posts to match to match the short ones, but left them there in case I want to add another layer's worth of height some day. If I was doing it for my railroad, I would trim the posts flat. At any rate, I them backfilled now and holding tomatoes, cucumbers, and zucchinis. (It would be more fun to have them holding trains, but I have another garden for that.) As of this writing, several years have gone by without any noticeable problems. I've added two more raised gardens, and I've even used this technique to shore part of my railroad where the ties completely gave out. Stone Retaining WallsStone is the most natural, and potentially the most expensive and least predictable of any retaining wall material. Most of the stones on my railroad were more-or-less free, if you discount me blowing the rear shocks on my minivan when I got too ambitious at a demolition site (yes, I had permission from the owner). The vast majority came from my own property; the former owners had used old limestone foundation blocks from a long-fallen barn to line flowerbeds and build stepping-stone paths.If you don't have free access to good limestone blocks, though, you'll either have to come up with serious cash or make do with odds and ends (most of which are fairly round north of I-70).
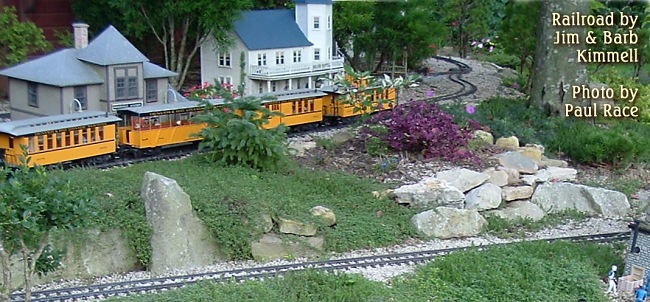
Loosely Stacked StoneIf your roadbed is supported by a timber framework or something else substantial, there's no reason your retaining walls all need to be "bulletproof." I personally like the natural look of "loosely stacked" stone, as shown in the photo to the right. It holds the dirt in place well enough to maintain a shallow slope, and it allows plants to grow. The "bank" of woolly thyme to the left of the photo is not growing over naked earth; rather it's growing over stones that are arranged similarly to the stones you can see. The whole "scene" looks natural and "established."Building Tips - Although there is some engineering to any stacked stone wall (see below), there is more "art" than "craft" in arranging irregular "found" stones on a slope. In my case, I made certain that there was topsoil between the layers, and I poked starts of miniature sedums (mostly Acre and Stubby Fingers) into the cracks between the stones once they were installed, to give the look of vegetation taking root in a cliffside. If I had to build my railroad over again, I'd still use loosely stacked stone on the "front," I'd just give my roadbed a firmer foundation and not count on a stacked stone wall to hold everything exactly in place.
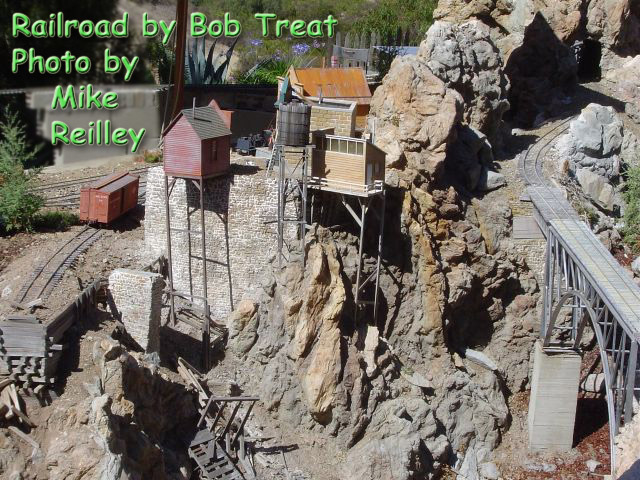
Tightly Stacked StoneSouthwestern Ohio is one big limestone quarry. If you dig down far enough, you'll find limestone just about everywhere. That's why more-or-less squared-off limestone chunks were used for barn and house foundations a century ago, and why most quarried stone you can buy here for landscaping is limestone. A few years ago, "flat rock" landscaping became popular; it uses quarried limestone that is several inches wide and long, but only about 3" high. The idea is that you can stack them like blocks, but the wide, flat, uneven surfaces provide enough "drag" to keep them from sliding across each other too much. Landscapers love them because they can install a "waterfall" and pond, line the pond with these stones, and stack more stones up around the back of the "waterfall" and be done with the job very quickly. A retaining wall built with these is more stable than a retaining wall built with irregular stones, and it can be closer to vertical without risking collapse. However, the wall will still not be entirely stable or stand up to great force from poor drainage or people carelessly putting too much of their weight on it (kneeling or leaning). And don't even think about leaving the top row exposed so kids think it looks like a path they should walk along.Building Tips - Treat flat stone like any other stone; install it at a slight angle, backfill carefully, and make certain that each layer is reasonably stable before you add the next layer. The nearly vertical "flat stone" wall in the photo is actually not holding dirt as much as it is hiding the pump and filter mechanism for the owner's waterfall. It's also on a portion of the railroad where no one would be climbing. Again, if this was a "real" retaining wall, I'd recommend a little more angle to it.
Building a Stacked Stone WallBuilding a mortared stone wall is probably beyond the scope of this article (although it's not hard). But many gardeners prefer to build "stacked stone" walls, which you can do with any kind of stones. The big difference is that the more irregular your stone is, the more the slope of the wall must diverge from vertical.
Concrete Product Retaining WallsLandscaping BlocksStone-like products made for landscaping have been available commercially for decades, including both blocks that needed to be mortared together like bricks and "mortarless" blocks that had extensions that would grasp the soil behind them.But when easy to use "mortarless" products began to be made for do-it-yourselfers with deep pockets, visions of "castle walls" began to spread across the land. The most common version is shaped something like a bulging trapezoid with the sharpest corners knocked off. In fact, on many of these blocks the corners are knocked off, literally, to give the blocks' face a more natural appearance.
Even after you're satisfied with your "final" installation, inspect it every few weeks at first (and every few months thereafter) for signs of bulging or settling that will detract from the cosmetic or mechanical benefits of the wall. And don't let kids walk around the top edge (they will try, especially if it looks like a row of stepping-stones).
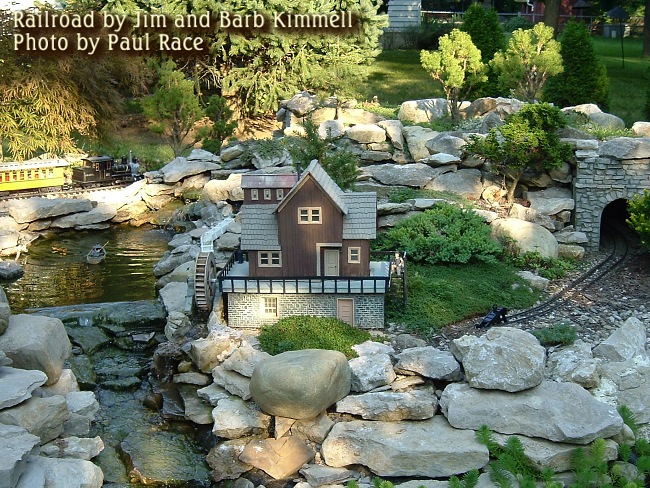
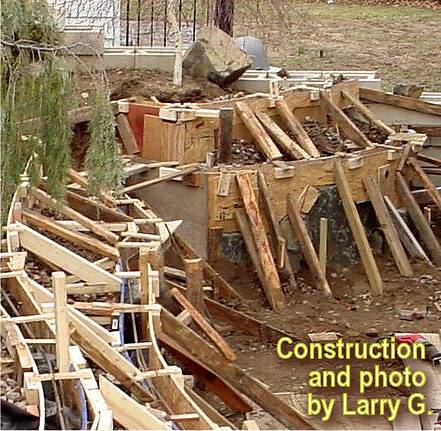
In some townships, poured concrete retaining walls are counted as "permanent improvements" that can drive up your property taxes, but that's no reason not to use them if you have the will and skill. Again, many good books discuss the "how," but I thought I'd include one extraordinary example of the "what." Larry G. likes to do things big and permanent. The concrete walls you can see are actually on top of a huge row of rocks that Larry had brought in and positioned in place. Larry paid to have a bunch of 300-400-pound "bluestone" boulders set six inches into the ground on a gravel base. He then drilled vertical holes in this rock and pounded short lengths of rebar into them to provide a firm footing for the concrete wall he was going to use to top it off. Larry used OSB board to make the forms because he wanted the walls to bend gracefully (difficult with plywood), but the OSB boards required a lot more bracing than you'd usually need. |

 
|


|
| 
|
|
 |
|  |  |
Note: Family Garden TrainsTM, Garden Train StoreTM, Big Christmas TrainsTM, BIG Indoor TrainsTM, and BIG Train StoreTM are trademarks of Breakthrough Communications (www.btcomm.com). All information, data, text, and illustrations on this web site are Copyright (c) 1999, 2000, 2001, 2002, 2003, 2004, 2005, 2006, 2007, 2008, 2009, 2010, 2011, 2012, 2013, 2014, 2015 by Paul D. Race. Reuse or republication without prior written permission is specifically
forbidden.
Family Garden Trains is a participant in the Amazon Services LLC Associates Program, an affiliate advertising program designed to provide a means for sites to earn advertising fees by advertising and linking to amazon.com.
For more information, please contact us
 |  |