|
Pool2Patio - Dry-Setting a Patio With Antique Bricks
This article reviews a project that began when I took out our above-ground pool and decided to install a patio in its place. I'm not quite done, but the effect is nice enough that I figured it was worth reporting on.
Previous Efforts
I've "dry-set" three brick sidewalks in our yard with three different kinds of bricks.
 | The first went in about 2000, when I used a bunch of reclaimed antique street pavers to make a path to nowhere in the back yard. (It would have been a path to my garden railroad if I'd had enough pavers.) |
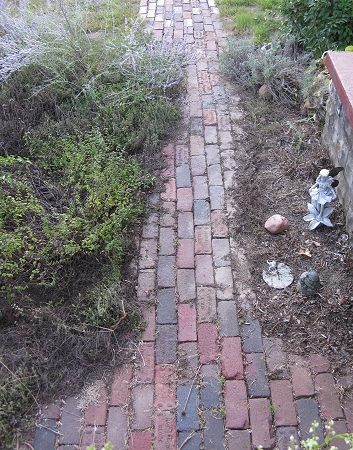
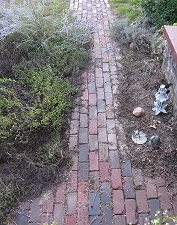
| The second went in about three years later, when I used some antique clay house bricks to make a short path to the pool deck. It's still there although one of the bricks has "exploded" and needs replaced - we'll talk about that further down. |  |
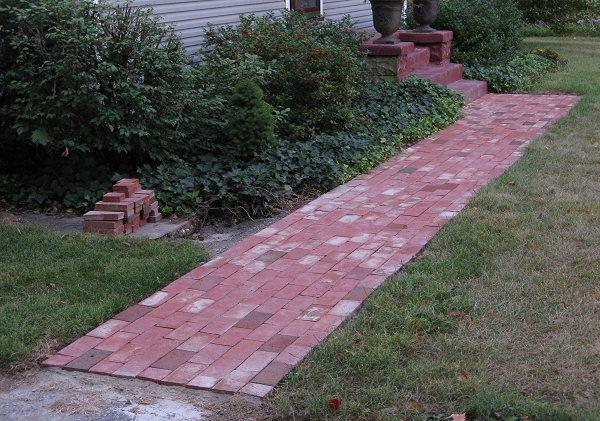
 | The most ambitious sidewalk went in about 2008, when I used fired paver bricks to replace the broken-up concrete sidewalk between our driveway and front door. That project is described in our article Dry-Setting a Paver Path
|
In addition, I've helped other folks with other kinds of blocks and bricks and flagstones, so I recognize the value of the various configurations. (I've reviewed several of them in our article on Paver Choices.) But it so happened that for me, in this circumstance, it was most cost-effective to use bricks again.
The Pool Arrived
About 2003, in-laws who had a 24'-diameter pool in their back yard upgraded to a larger pool. So they gave us their old pool, and promised to help us set it up.
We ordered a new pool liner and paid a local guy with a Bobcat to dig up a 24'-circle of sod. Then we paid for a dump-truck full of sand, which we spent several hours smoothing out. We made a sort of shallow basin so that the center of the pool would be about 6" deeper than the rest. Then my in-laws helped us set up the pool and build a deck for it.
The Pool Went Away
In the winter of 2012-2013, the liner sprang a leak. Other parts were on the verge of failing, as well. So instead of trying to fix the liner or buy a new one, I decided to take the thing down. Soon I had a 24'-diameter "pad" of compressed sand and the happiest cats in Ohio.
We have plenty of yard, so there was no particular reason to try to coax the sand pad back into lawn. Besides, I thought it would be nice to have a big patio that lots of folks could sit on when we had gatherings. The thick pad of sand should give a nice base. But how could I "pave" an area that large without spending a fortune?
Size Counts
Remember "Pi R Squared"? That's how you figure the size of a circular area. I've only built rectangles so far, which are easy to calculate. If you have a rectangle-shaped pool, and you're considering a project like this one, you're in luck. But I wanted to keep the circle. And I wanted to keep the same dimensions as the sand pad if possible.
Our old 24'-diameter pool had a 12-foot radius. Squaring that radius, you get 144. Multiplying by Pi, you get about 452 square feet. To put things into perspective for you, here's a little table of how many square feet various popular swimming pool sizes take up. Also, since I wound up using 8"x4" bricks, which are 4.5 to the square foot I've added a column showing how many bricks you need if you go that way.
| Pool Diameter | Square feet | # of Bricks | | Pool Diameter | Square feet | # of Bricks |
| 12' | 113 | 509 | | 22' | 380 | 1710 |
| 14' | 154 | 693 | | 24' | 452 | 2034 |
| 16' | 201 | 905 | | 26' | 531 | 2389 |
| 18' | 254 | 1143 | | 28' | 616 | 2772 |
| 20' | 314 | 1413 | | 30' | 706 | 3177 |
Yes, I rounded off, but you'd also want to buy an extra 5% or so to compensate for breakage. If you're planning on using 4"x8" brick-format pavers as I eventually did, you'll need 4.5 bricks per square foot. So I would need a little over 2000 units if I used bricks or brick-shaped pavers to cover the area vacated by our 24' pool.
Around our pool, I had added a 30"-wide strip with daylilies and lots of mulch, so I wouldn't to have to deal with mowing close to the pool. I figured I'd leave that strip as "flower bed" around the future patio - I could always let it go back to lawn later, and extending the planned patio out to the 29' line would increase the area from 452 square feet to 661, frankly a lot of expense for relatively little benefit.
The pool came down in May, and I immediately started shopping for materials to cover the space where the pool had been. It wasn't until September, though, that I came upon a product/price combination I liked.
No matter how you shop and wait for sales at commercial suppliers, you're not likely to find any paving solution you like for much less than $2 a square foot. The least expensive solution I could find was when Menards would put their plain, boring 12"x12"x2" concrete pavers on sale for $1 a square foot. But I didn't really want to spend between $500 and $1000 for a big circle of cheap-looking pavers.
If I used a brick-format (4"x8") paver, I would theoretically need about 2050 bricks. That meant that if I spent .50 a brick, the price most big-box stores were offering for the quick-cast imitation bricks, I'd still be spending over $1000 on this project, way more than I wanted to spend.
Shopping For Used Materials
I often use Craig's List to shop for used materials so I started doing searches on "bricks," "paving stones," "pavers," etc. Since I'd already used four basic types of "bricks" in my yard, I could usually tell what the folks were selling by the photographs. As it turned out, the problem wasn't getting materials cheap - lots of folks had materials that were left over from some project or another. The problem was getting enough of the same materials cheap. Our article on Paver Choices describes the major differences among the materials I was considering, but the major choices consisted of:
- Quick-cast concrete pavers in various formats, including 4"x8" brick shapes.
- Fired brick pavers in 4"x8" format. They are the most durable, and maintain their appearance better than the quick-cast concrete versions.
- Reclaimed bricks in 4"x8" format. Though they crumble easily, they have the most authentic old-fashoned appearance.
There are other choices, but those are harder to come by on the secondary market, and they tend to be more expensive. I have used both fired-brick pavers and reclaimed bricks extensively. All other things being equal, I might have preferred the fired brick pavers. But I've already learned that if you get "almost enough" of these and realize you need more, you might have trouble finding the same color. And, unlike reclaimed bricks, which tend to have all sorts of colors, even if they all came from the same house, it's obvious if you try to mix and match fired brick pavers.
About the time I was making a decision, a number of the big-box suppliers put the quick-cast concrete imitation bricks on sale for .25 a brick. That meant, I could get what I needed for a little over $500, but I'd still have, frankly, my third choice.
Then one night on Craig's list, a fellow listed that he had 1600 reclaimed bricks he would sell for $135 if the buyer would pick up. I knew that, technically 1600 would only give me a 21'-diameter circle, but I also knew from past experience that:
- Reclaimed bricks are often uneven in size, and may take up more space than they technically "should" So 1600 bricks might get me closer to 24'-diameter than you'd expect.
- Reclaimed bricks from old houses tend to come in all different colors and textures, so if I could find another 400 from another source cheap, the mixed-up-colors and textures would blend with whatever this fellow had.
As it turned out, soon after I borrowed the neighbor's pickup truck and brought home all of the bricks, another fellow advertised a big stack of fired-brick pavers - possibly enough to do the whole job - for even less money. But by now I was comitted. And the old bricks look more like they belong to our old house anyway.

Here's where things went a little sideways. When I brought the bricks home, I piled them in stacks of fifty, so I could count them easily. No question, there were a lot of bricks, even counting the handful that broke during shipment. But after all was said and done there were only 1135 bricks. I was still happy with my purchase. Estimating that 15 broke during shipment, that means that I had paid about eight and a half cents per brick - a third to a sixth of what I "should" have paid.
So I kept an eye out on Craigs' list for other folks selling similar bricks for decent prices. In the meantime, I didn't want a stack of bricks in my back yard, and ever day I waited, the sand smelled worse (thanks to the cats). Moreover, I was having a major event in the back yard in a few weeks - our garden railroad's sixth annual Christmas-themed open house. So I figured I 'd start with what I had.
Prepping the Pad
If I was starting from scratch, I'd probably set down a layer of Quickcrete Sand Mix instead of the existing sand (which was the same grade you buy for sandboxes.) But since there were several inches of tightly packed sand, I figured that would do with that for a base. Then I would pour the Quickcrete Sand Mix in between the bricks when I was done.
You'll recall that we had shaped the pad under the pool in a shallow basin shape, so the pool would be deeper in the middle. I wanted the patio to be as flat as reasonably possible, so I used a garden rake to loosen the top layer of sand around the outer edge. Then I used a sturdy leaf rake to pull the sand into the middle. By the time I was done, the middle of the pad was higher than the outside edges, but the top layer of sand in the middle was much looser, so I figured it would be a "draw."
 Setting Setting
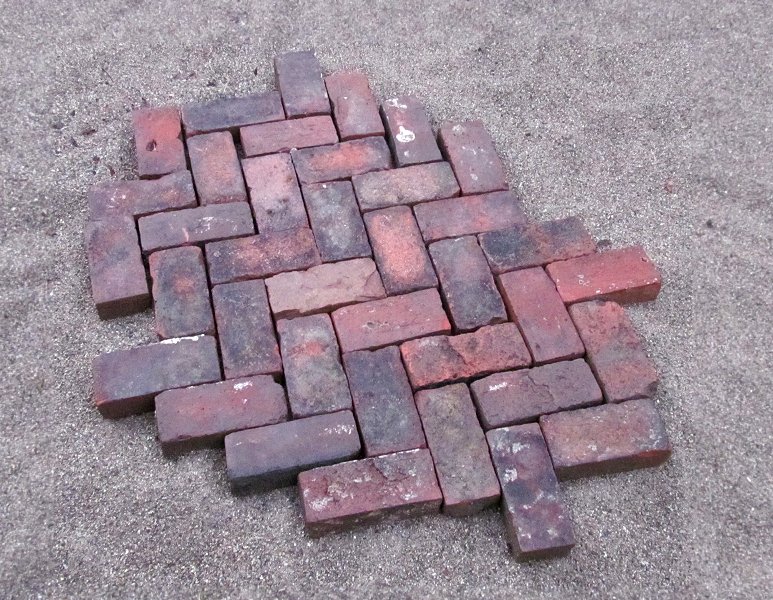
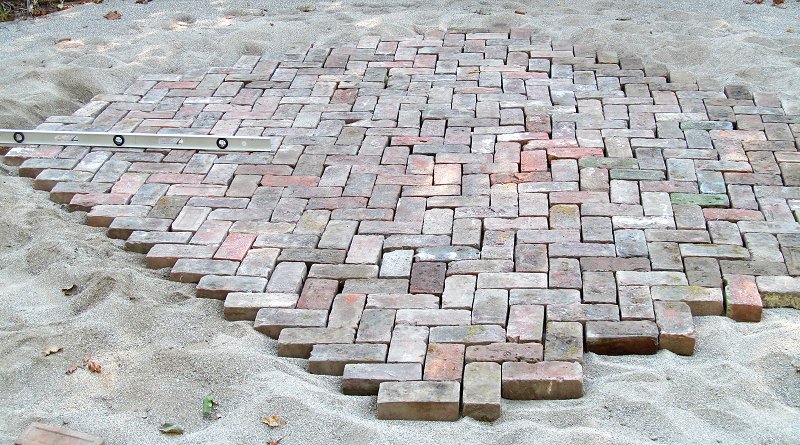
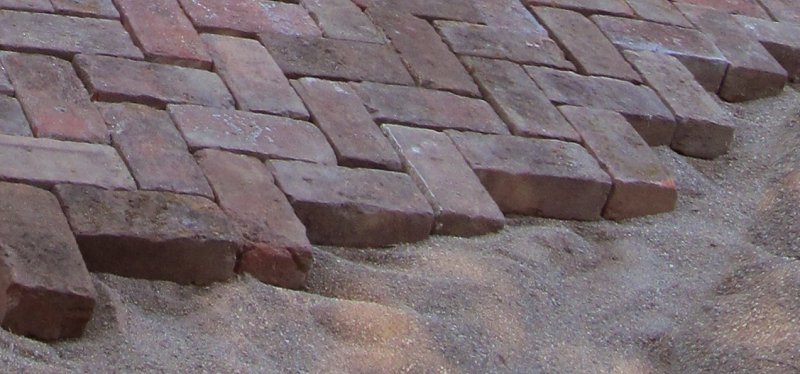
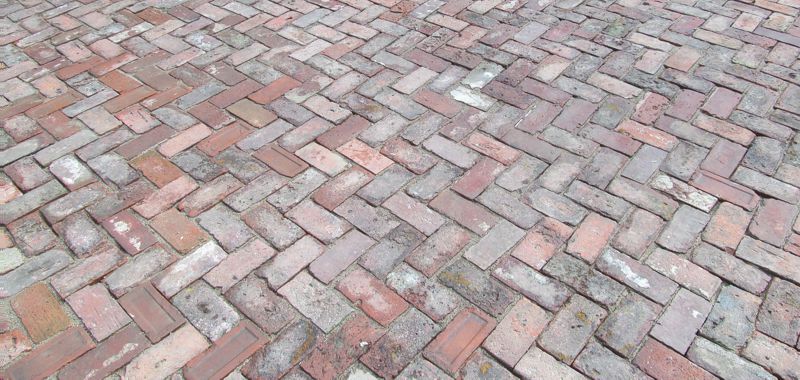
I decided to use a herringbone pattern, similar to what you might see on very old city streets. I also decided to start from the center and work my way out in every direction until it I got a sense for how far my 1100+ bricks would go.
Herringbone was a common choice for pavers a century ago because it doesn't have any long straight lines. If a crack developed between two pavers, it would hit a "dead end" in a few inches, rather than going completely across the roadway or sidewalk the way a crack in a traditional brick pattern could. That said, it's a little complicated to start, because the bricks don't interact the way you think they should. A couple of times when I was first starting, I realized that I had laid a brick wrong and had to go back and relay the last two or three bricks.
I set each brick carefully, pushing and dragging it across the sand until it was level and in the correct position relative to its neighbors. In fact, for this exercise, I used a 5' level to make certain that the bricks were staying more or less level as I set them.
Too Little Sand? After I'd laid about twenty bricks, I realized that I was using a lot of sand to set each brick. The loose sand I had raked toward the center had a lot more "give" than I expected. Soon I'd have to rake more sand in to the center. Eventually, I'd probably have to buy more sand. So I pulled up what I'd installed so far, and started again, about an inch lower than my first effort. Now I was pushing sand out rather than raking it in, but I figured it would be better to have excess sand than to have too little. After I'd laid about twenty bricks, I realized that I was using a lot of sand to set each brick. The loose sand I had raked toward the center had a lot more "give" than I expected. Soon I'd have to rake more sand in to the center. Eventually, I'd probably have to buy more sand. So I pulled up what I'd installed so far, and started again, about an inch lower than my first effort. Now I was pushing sand out rather than raking it in, but I figured it would be better to have excess sand than to have too little.
It was Septemer 20 when I started. I only had an hour or so each evening between work or sundown, so I made that hour count. Eventually, I got enough of a "flow" going that I could lay between 75 and 100 blocks an hour.
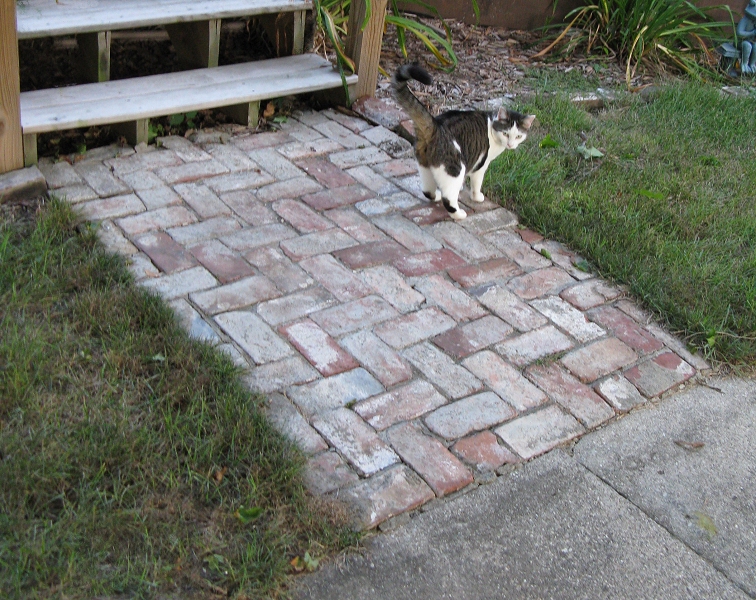
 As you'll see in the photos, the bricks were not only different colors, but also different shapes. Many of them had a corner or part of an edge chipped off. I turned those so that the "good side" showed as much as possible. Most of them had an indentation on one side - designed to face downward and "cup" the mortar to help hold itself in place. They worked well enough with the sand, but when the side that should have been the top had a bad chip in it, I turned those upside down. You can see a few of these "upside down" bricks in the photos as well. As you'll see in the photos, the bricks were not only different colors, but also different shapes. Many of them had a corner or part of an edge chipped off. I turned those so that the "good side" showed as much as possible. Most of them had an indentation on one side - designed to face downward and "cup" the mortar to help hold itself in place. They worked well enough with the sand, but when the side that should have been the top had a bad chip in it, I turned those upside down. You can see a few of these "upside down" bricks in the photos as well.
Asymmetrical Edges
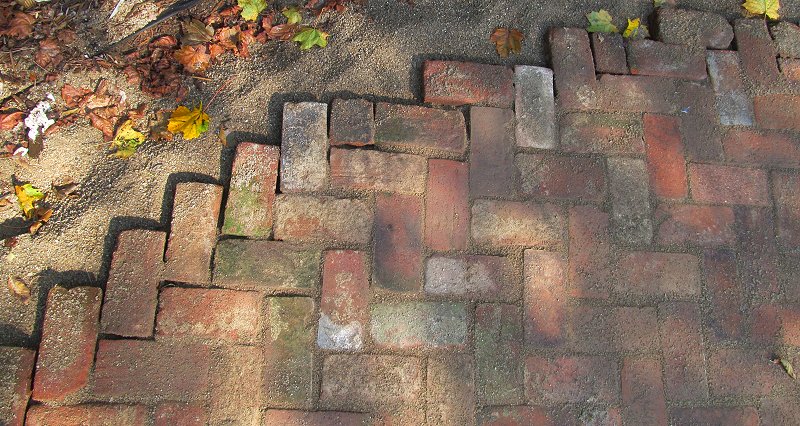
Up until now I've only used the Herringbone pattern on rectangular projects, so I didn't realize, in attempting a circle, how much difference there would be between the various outside edges of the project as I was working. You can see some of what I mean in the blowup of the photo above.
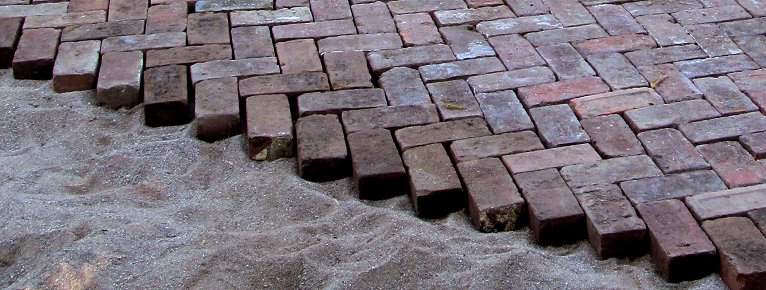
 Two edges (opposite of each other) developed a "saw-tooth" sort of line in which there was never more than a half-brick width between one course and the next. No, it wasn't as smooth as you might get by cutting a bunch of bricks into triangles and finishing the edge off that way, but it was pretty attractive. Two edges (opposite of each other) developed a "saw-tooth" sort of line in which there was never more than a half-brick width between one course and the next. No, it wasn't as smooth as you might get by cutting a bunch of bricks into triangles and finishing the edge off that way, but it was pretty attractive.
 The other two edges, though, had a far more pronounced "stairstep" edge pattern. Once I realized that I wasn't doing anything wrong, I didn't mind. After all, I'd have to make some adjustments on the outside edges of the circle eventually. I mention it mostly because someone who didn't realize this was a normal effect of this pattern could imagine they were doing something wrong. The other two edges, though, had a far more pronounced "stairstep" edge pattern. Once I realized that I wasn't doing anything wrong, I didn't mind. After all, I'd have to make some adjustments on the outside edges of the circle eventually. I mention it mostly because someone who didn't realize this was a normal effect of this pattern could imagine they were doing something wrong.
Again, if you use a herringbone pattern on a rectangular project, you'll wind up using a lot of half bricks to get straight edges, but you won't encounter this.
Too Much Sand?
 About two weeks in, I had very large pile of sand on one edge, and it was getting difficult to work in that direction. Though I was planning on topping the whole thing off with Quickcrete Sand Topping mix, I figured it wouldn't hurt to shovel some of the loose sand onto the bit I had laid and sweep it into the cracks. I started in the center, and was surprised how well the otherwise loose sand stabilized the bricks. Of course, the sand wasn't exactly packed all the way down into the cracks, so things weren't as solid as they could be, but it meant that we could walk on that part without fear of a brick shifting so much it would need to be reset. About two weeks in, I had very large pile of sand on one edge, and it was getting difficult to work in that direction. Though I was planning on topping the whole thing off with Quickcrete Sand Topping mix, I figured it wouldn't hurt to shovel some of the loose sand onto the bit I had laid and sweep it into the cracks. I started in the center, and was surprised how well the otherwise loose sand stabilized the bricks. Of course, the sand wasn't exactly packed all the way down into the cracks, so things weren't as solid as they could be, but it meant that we could walk on that part without fear of a brick shifting so much it would need to be reset.
Our weekends, unfortunately, were either rainy or busy, so the whole process dragged out about a month.
Getting Low on Bricks
About three weeks in, I could tell that I needed to stop adding any more bricks to the west or south side of the circle if I wanted the thing to come over to where people could get onto it easily from the existing sidewalk. So I worked just on the north and western sides of the "circle." I use the word "circle" loosely in this context, since I was really creating sort of a lopsided diamond with blunt points.
"Smoothing" the edges
 As the northern and western "point" of the thing approached my planned border, I started substituting half-bricks (from my pile of broken bricks) here and there so that I could keep the overall herringbone pattern going right up to the edge but not have anything sticking out of the edge. This isn't necessarily as smooth as it could be, but since I might eventually add another course of bricks outside the edge you can see now, it was as good as it needed to be for this winter. As the northern and western "point" of the thing approached my planned border, I started substituting half-bricks (from my pile of broken bricks) here and there so that I could keep the overall herringbone pattern going right up to the edge but not have anything sticking out of the edge. This isn't necessarily as smooth as it could be, but since I might eventually add another course of bricks outside the edge you can see now, it was as good as it needed to be for this winter.
By the way I wasn't trying to make the sawtooth or stairstep edges smooth - I was just trying to make the overall shape more like, say, a stop sign than a diamond.
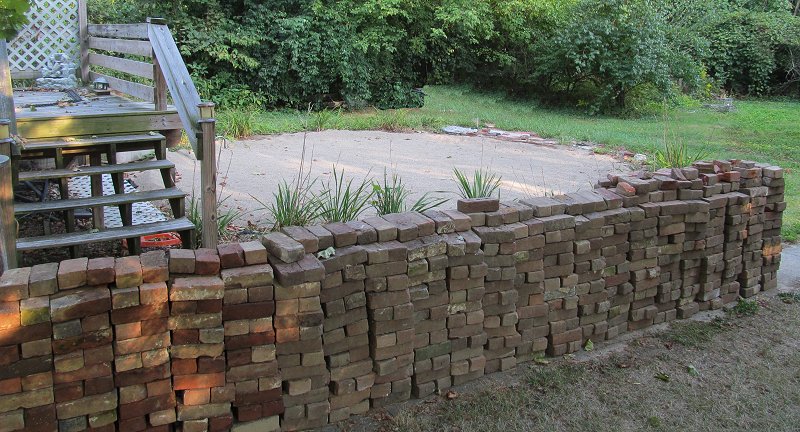
Finally I just plain ran out of bricks. I had several 8"x16"x2" concrete pavers that had originally been supporting the pool's vertical posts. So I laid these adjacent to the brick "patio" going toward the sidewalk. That isn't necessarly a permanent, or even a very attractive installation, but it will guide visitors to walk onto the patio where it is "sound" and not step up on the yet unfinished (and unstable) edges.
The Deck Edge
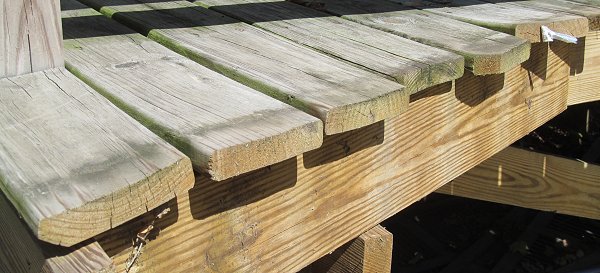
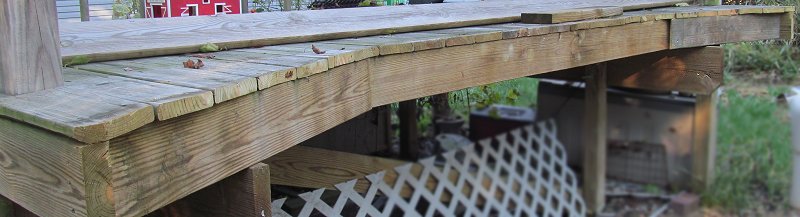
 Back when there was a swimming pool standing here, my brother in law laid the deck boards so they would go under the flange of the pool's edge. Once the pool was gone, it was obvious that the boards were all different lengths, and that there was less support under one end of the deck than on the other. Back when there was a swimming pool standing here, my brother in law laid the deck boards so they would go under the flange of the pool's edge. Once the pool was gone, it was obvious that the boards were all different lengths, and that there was less support under one end of the deck than on the other.
I didn't mind the curvature of the deck edge, it's really kind of cute, but I wanted it to look just a little more finished. So I added a support underneath the right end of the deck boards to make the thing look symmetrical.

Then I cut the uneven ends of the boards off more or less flush with the horizontal beams. Much better.
Washing the Excess Sand Away
In the meantime, having a layer of loose sand over the top of the bricks was becoming inconvenient, so I put my garden hose nozzle on the "jet" setting. Starting from the middle, I tried to use the water pressure to spray the sand down into the cracks and blow any excess toward the edges. 
By the time I was through the bricks looked more "settled," and you could see the various colors much better. I'm hoping that the wet sand went down into the cracks better than the dry sand did. But all things being equal, this should hold for now.
Getting Ready for Visitors
At this point, I have a sort of lopsided circle of bricks about 20 feet across. Approaching them on foot from the grass, the thing actually looks pretty nice. When you're standing on them, it's pretty nice, too, even though it's obvious that I need more bricks. But I have other work to do before our big gathering next month, so for now I've just put the broken bricks in a pile south of the completed part of the patio. I've also used .99 solar lights from WalMart to mark off the area where folks can walk without danger of kicking the edge bricks out of place.
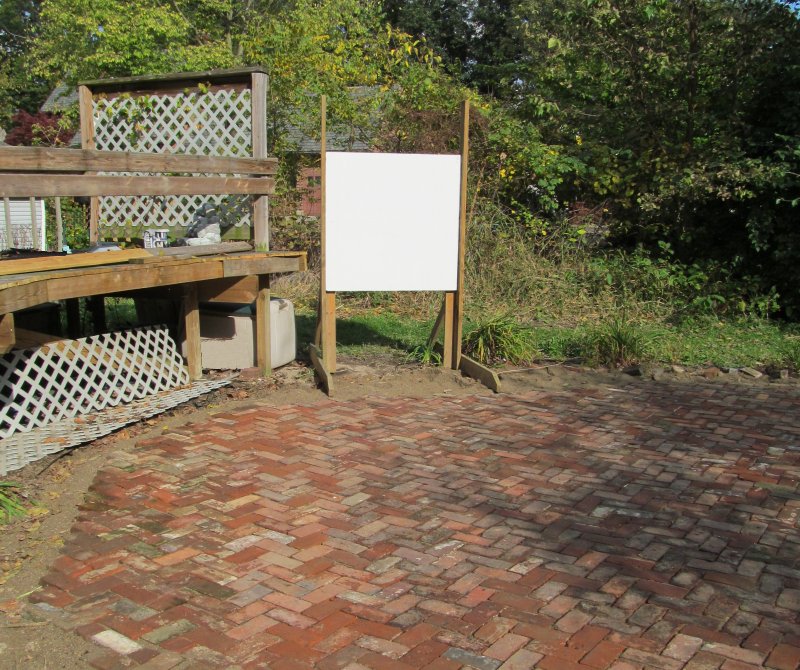
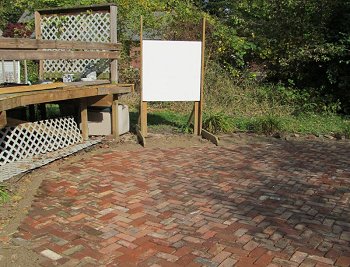 And for the gathering in question, Molly and I brought around the homemade "movie screen" that we showed Polar Express on last year. So in three weeks, I expect to have rows of chairs on the bricks, a popcorn popper around the corner, and a train-related movie (maybe The General) ready to go as soon as it gets dark. Here's hoping for another warm November. And for the gathering in question, Molly and I brought around the homemade "movie screen" that we showed Polar Express on last year. So in three weeks, I expect to have rows of chairs on the bricks, a popcorn popper around the corner, and a train-related movie (maybe The General) ready to go as soon as it gets dark. Here's hoping for another warm November.
Conclusion (For Now)
It's probably a matter of time until I come across the rest of the bricks I need. But I won't have time to lay them now even if I had them, so it's probably a good thing I ran out when I did. I'll update this article when the rest of the project is done.
By the way, folks may be wondering how I intend to finish off the edges of the circle. Since the final effect of this thing will be of extreme age, I don't think there would be anything wrong with leaving the 4" jagged edge effect all the way around, then letting the grass grow right up to the edges to disguise it and hold the edges in place.
We'll keep you posted. In the meantime, please contact
us if you have any questions, corrections, suggestions, or if you want to share about a similar project you've done.
|
|