| |||
 |
 |  | |
 |  | ||
 |  | ||
 |  | ||
 |  | ||
| |||
|
|
| | |
| | ||
| | ||
| | ||
| | ||


|
Planning a Christmas Open House, Part 3This year (2008) I am planning to have a "cold-weather" open house with a Christmas theme, my first ever. This is third in a series of notes on my progress and/or lack thereof.
Reviewing my photos and notes for Part 2, it was very obvious that there's been a lot of catch-up and rework. You'll probably be glad to know that I think I got the rest of that done in this installment (I think) plus a little extra. What I did get accomplished in the last weekend of October included:
Testing the Trains and TrackGarden railroaders may wonder why I haven't spent more time discussing trains and track. In part, it's because I already did serious work on my right-of-way before I technically started getting ready for the open house. As a follow-up of that effort, I spent time tweaking a new installation and seeing what trains I could run in late September and early October.My mainline is still a little too bumpy to run really big cars like my heavyweight passenger cars, but I was able to run my larger locomotives.
Pacific - I also have a PRR-painted Pacific that is running a little glitchy, so I think I'll have someone look at it before I try using it for real. Atlantic - When I first got seriously into garden railroading, I couldn't afford Aristo Pacifics, nor did I like the look of USRA heavyweight Pacifics with Pennsylvania painted on the side. Lionel, however, based a series of locomotives on the Pennsylania E-6 Atlantic. After rebuilding and testing out a "basket case," I bought two more when I came across them cheap. The best running of the three was formerly painted for Southern Pacific or some other inappropriate railroad, but the road name only appears on the tender, and I swap those out with Aristo Tenders when I get a chance. After I finished relaying the track, I got the Atlantic running and pulling two Sierra coaches, but it wouldn't pull three without serious wheelspinning on one curve. I can either add weight to the locomotive (which is too light by almost everyone's standards) or regrade that section of track (which includes two bridges, so regrading could be complicated. But I don't really have time to do either, so the Atlantic may be cooling its heels unless it's needed to backup the Mikado.
One of my 0-4-0s is actually part of an AristoCraft Christmas train set, which just came down from the attic.
The Eggliner even ran across a few dry maple leaves on the track, although it wouldn't plow through several in a pile. It will pull a coach or two on good trackage, so if for some reason I can't run a "train" on the lower track, I can run this. This would also make a good backup for Thomas and James if no children are watching Thomas' railroad. - Thomas and James are much higher maintenance, so there's no reason to run them if their fans aren't there to watch.
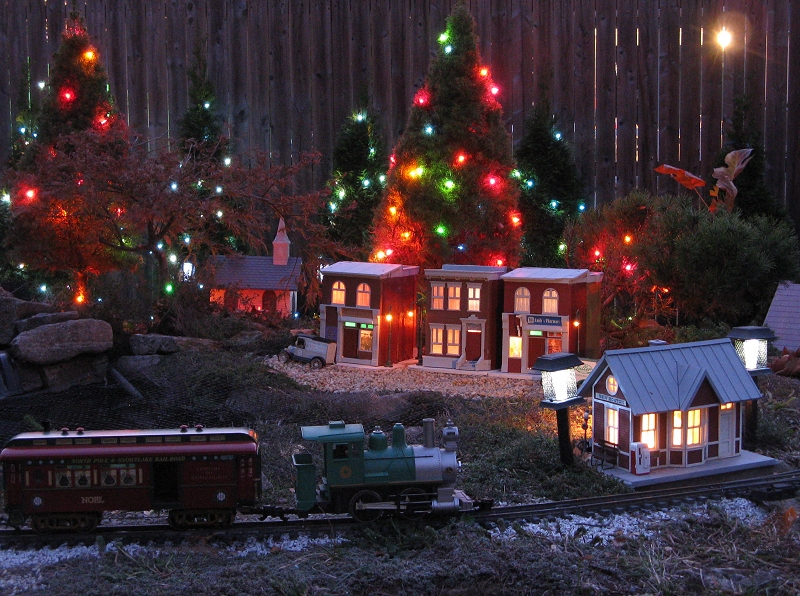
Car-wise, in addition to the red Aristo passenger train shown above, I have two Christmas cabeese and an additional Aristo combine painted for Christmas. I got the combine last year in a swap, and it DOES have an interior and lighting. In summary, although the newly-relaid right-of-way is not optimum yet, and not likely to be completely ready for prime time until late spring, it's good enough to give me several choices of trains, and I have enough Christmas-themed odds and ends to make a nice backup. Rehabilitating and Lighting New Boston's Downtown Buildings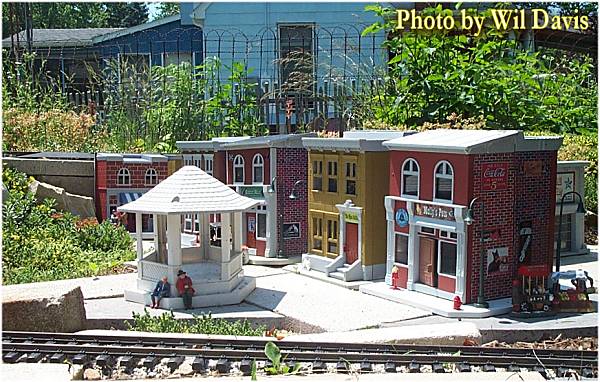 Long before I had a permanent outdoor railroad, I had a town's worth of store-fronts and brownstones. The original Fischer Price Sesame Street buildings were built to represent the urban setting of the Children's Television Workshop series. As a result, the architectural details included reasonably accurate reproductions of early 20th-century urban architecture. Yes, the "footprint" is small, and they are two stories instead of four or more, but that's typical of expensive "Large Scale" model buildings as well. To me, these were both cheaper and more accurate than anything that was available in the early 1980s (and few products that have come along since offer much improvement). I also appreciate that each building comes with a realistic sidewalk/base that gives it a "settled" look wherever you set it. Long before I had a permanent outdoor railroad, I had a town's worth of store-fronts and brownstones. The original Fischer Price Sesame Street buildings were built to represent the urban setting of the Children's Television Workshop series. As a result, the architectural details included reasonably accurate reproductions of early 20th-century urban architecture. Yes, the "footprint" is small, and they are two stories instead of four or more, but that's typical of expensive "Large Scale" model buildings as well. To me, these were both cheaper and more accurate than anything that was available in the early 1980s (and few products that have come along since offer much improvement). I also appreciate that each building comes with a realistic sidewalk/base that gives it a "settled" look wherever you set it.
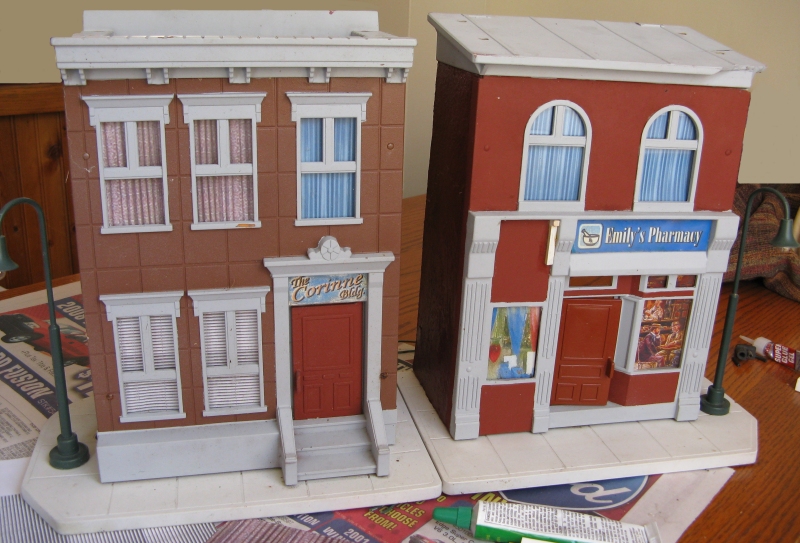
Building New Boston - The first set I came across at a garage sale was in such good shape that I cleaned it up and gave to my kids (it's still in the attic awaiting grandchildren). The next set was so mildewed there was no question of children ever handling it again. So I was on a roll. Eventually I got three more sets. Each set included a "townhouse" or brownstone apartment building and a storefront. I disassembled the sets and sawed off the handles and other disfiguring protruberances. I soaked and scrubbed the paper off of the faces (in retrospect, I should have removed the paper from the inside as well, but I didn't). The storefronts had a paper door pasted where a store window "should have been." So I carved out additional window openings on three of the four storefronts. Then I carefully masked and painted the storefronts, made signage on my computer, and even made a kind of plastic brick paper, complete with period advertisements, to cover the side walls. The other thing I should have done was to replace those pressed-wood side walls before I invested so much time into the rest of the structures. I also found some great street lamps to glue on the corners, but I never wired up the lamps nor put lights in the buildings. For one thing, I almost never ran trains after dark.
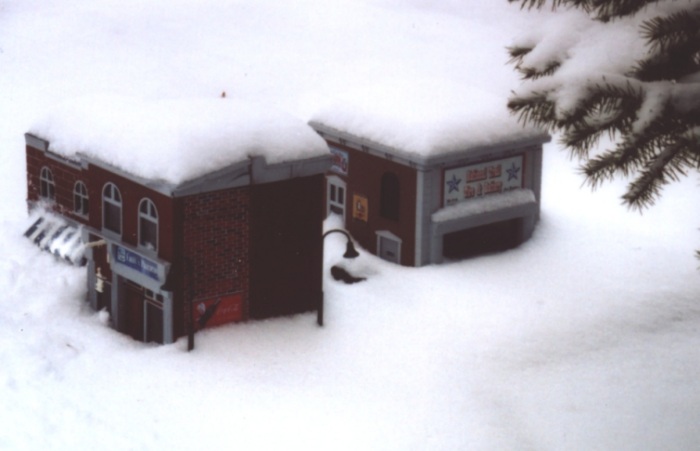
Urban Decay in New Boston - Eventually the paper on the inside of the buildings got a little strange, and mice visited at least a couple. But the biggest problems were the ones you couldn't cure with a bleach bottle - the pressed wood sides swelled up to the point where they were causing the buildings to get a funny shape. In late 2005, I put the buildings in storage and started looking for deals on all-plastic buildings I could use to replace them.
The most obvious problem was the swollen building sides. The plastic "brick paper" I had put on was either coming off or bumpy, and the building sides which were only painted had peeled. Many of the side pieces had swollen from about 1/2" to nearly 1". But you couldn't tell that from the front. So I got out some dark red house paint, tore off the "brick paper," and painted all of the building sides. I also picked up and prepped some more sockets for wedge-shaped light bulbs.
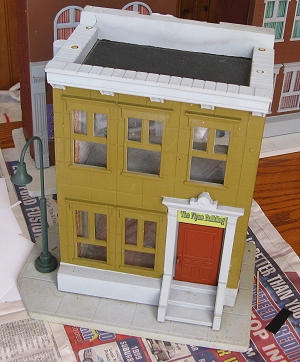
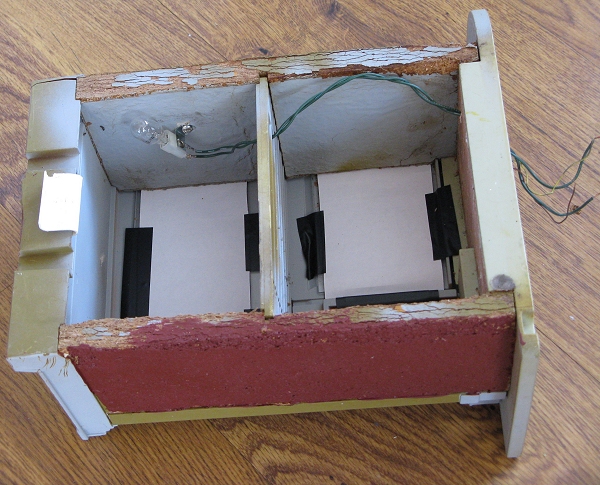
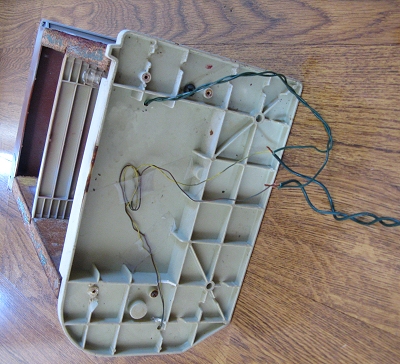
Curtains for New Boston - The internet and a color laser to the rescue. I went onto the Internet, then downloaded and massaged images of curtains and venetian blinds (being sure to stick to images that weren't copyrighted). Then I used acid-free "non-yellowing" paper to print of a bunch of different colors and sizes to try out. One cool thing was, once I had a drape pattern I liked, I could change the color in Paint Shop Pro simply by fiddling with the "color balance" feature. (I have put the curtains I made on the Curtains and Shades page of our Free Large Scale Signs and Graphics page.) I also found, resized and printed several graphics I could use for my storefront windows. Unfortunately most of those didn't come out as well as the curtains, but they do add a nice overall texture to the scene. Then I got busy. Once I started cutting up my new curtain paper, it was obvious that I should have printed more of certain colors - the colors I printed the most of didn't really look right with most of my buildings. The venetian blind paper, though, was an unqualified success. Once I found graphics I thought suited each building, I taped them in place with electrical tape. This should hold until I need to replace the graphics, then release pretty clean. Attaching Interior Lighting - As the photo to the right shows, I also drilled holes through the floors, screwed a lamp socket to a wall, and fed the wires through.
I used only one lamp socket per building, even though the floors would obsure the lighting from one floor to the next, because I usually install these buildings back-to-back and their backs are open unless you put something over them. The lighting from the second floor of one building shines through the first floor of the adjacent building, and so on. I then spliced the wiring from the street lamp to the wiring from the 12-volt wedge socket. The photo to the right shows it before I soldered the joint and wrapped it in vinyl electrical tape. This way each building would have one lead that would connect to the low-voltage lighting system. (The street light bulbs were made for 18v, but they DO glow somewhat with 12 volt.) Cleaned up, with new graphics in the windows, these buildings took on a whole new life, even in daylight. Doing the Math - I did notice that I was digging pretty deep into my second supply of 4-watt wedge bulbs as I completed this phase of the project. No matter how I figured and refigured things, there were just going to be too many buildings lit with 4-watt fixtures to be able to light my whole railroad with one low-voltage lighting system. Wal-Mart to the rescue - they had a Malibu set for 30% off. So I disconnected Louie's buildings and the New Boston Station from of the off-brand wiring, and ran the Malibu's wires to feed the revamped New Boston area. I also picked up four bags of pea gravel from Home Depot. I wanted gravel to set the city buildings on temporarily, and pea gravel is generally pretty temporary when you put it on dirt.
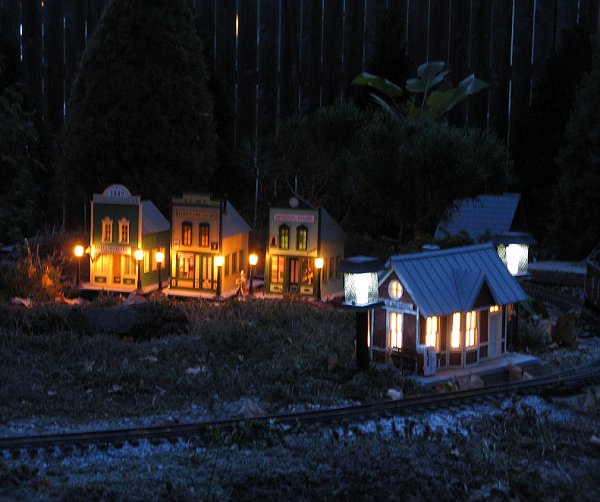
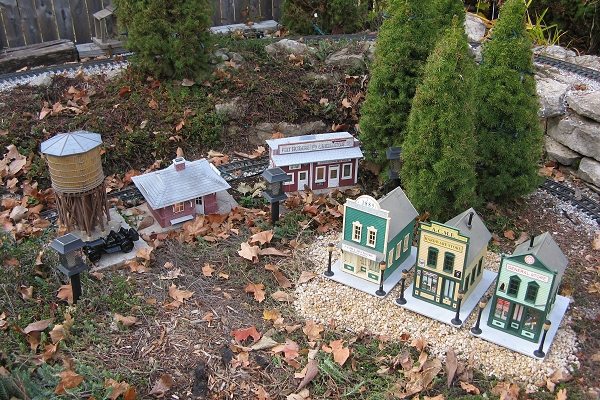
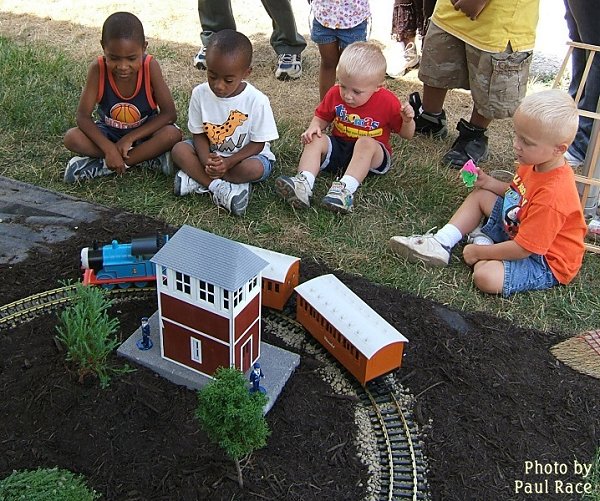
Then I started experimenting with various placements of the New Boston buildings (where they used to go has been overgrown by a big fir tree I don't want to trim or move). I really only had room for six of the eight buildings so I set two aside for use elsewhere. When I had a pretty good idea of how I wanted things, I dumped a bunch of gravel and leveled it out. I then wired the New Boston buildings and station into the Malibu system. At twilight, when you can just see the lights coming through the windows, they look great, if I say so myself. 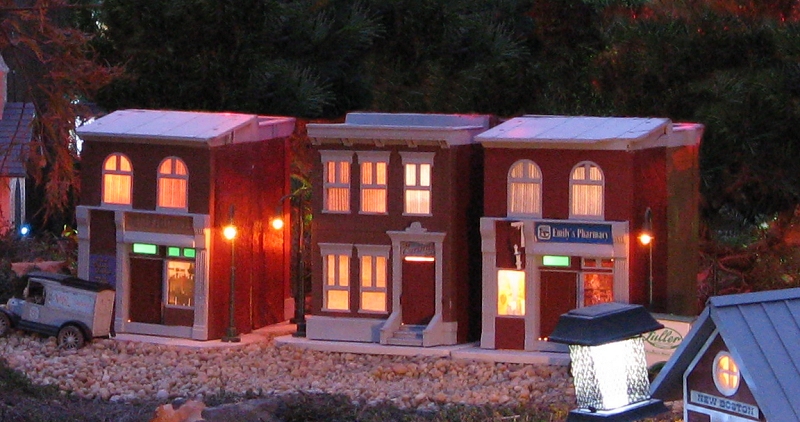 I also added a I couldn't help it. When it got dark enough to see the windows of New Boston glowing, I plugged in most of the Christmas tree lights and started running trains. I am REALLY pleased with how nicely things are going together so far. Oh, and there was a valid reason to test the trains just then - I did need to make certain that I wouldn't blow a fuse or something when I added the trains' power supplies to the rest of the system. Giving Thomas a New HomeWhen I set up my last Thomas railroad, it was on an elevated loop of 5/4" decking screwed together to make a 9x4' oval. At the same time, I also had a 4'-diameter circle on the ground so Thomas could run on that while James was on the elevated loop.
For this open house, I wasn't sure I'd have time to put the elevated loop together properly, especially since the trestle has been damaged. But the well cover, a 5'x5' concrete slab on the back of our house, would hold a 4'-diameter loop of track well enough.
I also brought out the windmill and the the little vertical waterfall that we used for the Thomas railroad project at Holden Arboretum last year. The waterfall looked dumb by itself, but I surrounded it with natural stone and two weird junipers I found at Home Depot for half off. At the moment, I'm thinking that any leftover gravel should go into and behind the track circle to make a more natural appearance. As an example, the "ground-level" Thomas railroad in the photo above is actually on a piece of tarp, but the mulch makes it seem very much established. This little railroad is about 40 feet from the NB&DCRR, so there's no danger of sharing the lighting system. I plan to try powering the lights with a 1-amp trickle-charger from a Toro mower that bit the dust years ago. Even at that, this RR is almost under our back porch light, so it won't be dark like the NB&DCRR will be. Of course being able to see the kids poking at Thomas or fiddling with accessories or whatever is a good thing. By the way, I also got my leaf net spread over the pond; you could probablly tell from the photos.
Still to Go - Here are some things I'd like to get done in the next four days. What do you think?
So all in all, there's not THAT much on my plate in the next few days . . . Conclusion (So Far)Although I've been playing "catchup" all month, I really feel that I'm almost caught up. And, thank the Lord, most of what I felt I "needed" to do is done. Once again, if you get to this open house or the next one, you will be seeing parts of the railroad that have never looked this good before.You may feel I've documented the re-do and fixing-up parts of this effort to death, but I want to encourage you that even the third or fourth most disorganized garden railroader in the world can come a long way quickly with a fixed goal in mind. I also hope that as you see the railroad "coming together" and the Christmas lights coming on, it helps you get encouraged about your own railroad and your own Christmas. Remember the song from Mame, "We Need a Little Christmas?" In the play, it isn't Christmas at all. But Mame's household has suffered some tough setbacks and she gets out the Christmas decorations early to cheer everyone up. Well, we know a lot of of folks who "Need a Little Christmas right now," including folks who read our articles. So we may be a little early, but we are wishing you the best holiday season, Christmas, and New Year (and, if applicable, Hannukah) possible, even if it's not even Thanksgiving yet! If you like the idea of getting into a holiday frame of mind early, you might enjoy the articles, stories, and craft resources on our Family Christmas Online(tm) pages. Back to the trains, if you would like to ask questions, be notified of future open houses on the New Boston and Donnels Creek, or learn about other Christmas-themed open houses in Southwest Ohio this year please visit our 2008 Christmas Open Houses sheet. Best of luck, have a great fall and winter, enjoy your trains, and especially enjoy any time you have with your family this season. Paul Race
Note: If you arrived at this article by clicking on the "Next" link in our New Boston and Donnels Creek series of chronological articles about our garden railroad, you can continue the series using the links below. Next - Proceed to our next article "Planning a Christmas Open House, Part 4." Previous - Return to our article "Planning a Christmas Open House, Part 2." Return to our article "Planning a Christmas Open House, Part 1." Return to our article "Refurbishing Garden Railroad Roadbed," which describes how we used cement roadbed to addressed the massive burrowing animal and weed growth problems caused by following the track-over-gravel-on-a-dirt-pile instructions of the desert-dwelling garden railroad experts and GR editors. Return to our article "About the Owner/Author/Lead Editor," which describes Paul's circumstances and approach to garden railroading in the early 2000s Return to our article "NB&DC Rolling Stock," which lists the sorts of cars I was running on my railroad in the early 2000s. Return to our article "Motive Power, which was written in 2003, and updated in 2008. It describes the locomotive we were using most of the time to pull trains on the New Boston and Donnels Creek. Return to our article "June, 2003 Photos, to see what our railroad looked like four years after we broke ground, and one year after the 2002 convention. Return to our article "Layout So Far," which describes the track plan, plants, etc. of our garden railroad as of the early spring of 2003. Return to our "January, 2003" article, which includes photo of our railroad caught in a 6"-8" snow right after running trains at Christmas. Return to our "June, 2002 Photos article, which contains photos of our garden railroad as it was set up for the 2002 National Garden Railway Convention in Cincinnati. Return to "What to Do When a Tree Eats Your Railroad." To return to our article "Stress Testing on the NB&DC RR," click here. To return to our NBDC 1998-2000 Pictures page, click here. To return to Landscaping and Pond Construction, 1998-1999, click here, To return to our page About New Boston and Donnels Creek" click here. To return to the New Boston and Donnels Creek Index Page, click here To return to the Family Garden Trains Home Page, click here
| 

|
Reuse or republication without prior written permission is specifically forbidden. Family Garden Trains is a participant in the Amazon Services LLC Associates Program, an affiliate advertising program designed to provide a means for sites to earn advertising fees by advertising and linking to amazon.com. For more information, please contact us |
 |  |
| Visit related pages and affiliated sites: | |||||
| - Trains and Hobbies - | |||||
 |  |
|
 |
|  |
 |

|

|  |
|

|
| - Christmas Memories and Collectibles - | |||||
 |

|
 |

|

|
|
| - Family Activities and Crafts - | |||||
 |

|

|

|

|

|
| - Music - | |||||

|
 |
 |

|

|

|

|

|

|

|

|

|

|

|

|

|

|

|
 Mikado -
My AristoCraft Mikado has barely had a chance to run on my own railroad, although it got to run when we did a series of Garden Railroading clinics in Holden Arboretum (near Cleveland) in 2007. Unfortunately, when it came back from that experience, the sound system in the tender was left on, so the sound doesn't work at the moment, and I won't have time to replace the battery. Fortunately, I have a tender from a similar AristoCraft locomotive that will work and has sound of sorts. I was pleased to see that the Mikado would pull several short ("Sierra") passenger cars around my still less-than-optimum right of way without anything derailing. So one option is to have the Mikado pulling a short passenger train. (Although we will test that out Saturday morning before folks start arriving, in case some other adjustments are necessary.)
Mikado -
My AristoCraft Mikado has barely had a chance to run on my own railroad, although it got to run when we did a series of Garden Railroading clinics in Holden Arboretum (near Cleveland) in 2007. Unfortunately, when it came back from that experience, the sound system in the tender was left on, so the sound doesn't work at the moment, and I won't have time to replace the battery. Fortunately, I have a tender from a similar AristoCraft locomotive that will work and has sound of sorts. I was pleased to see that the Mikado would pull several short ("Sierra") passenger cars around my still less-than-optimum right of way without anything derailing. So one option is to have the Mikado pulling a short passenger train. (Although we will test that out Saturday morning before folks start arriving, in case some other adjustments are necessary.)
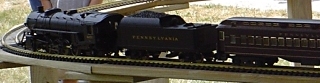
 A-5 - One of my early favorite Large Scale locomotives was also based on a Pennsy prototype - AristoCraft's 0-4-0 switcher, available with and without tender. These little workhorses are the most reliable, surefooted engines in my fleet. When I was testing out my relaid track, the switcher was the first locomotive I tried. The one I used started life as an RC Cola engine in a promotional package, but got a repaint when it came into my train shed.
 This train set will be my "backup" in case for some reason none of my larger locomotives will work on the mainline Saturday. Otherwise, I may place it on the "shortline," lower loop of my railroad. I had been thinking that the coaches were lit, but when I got the set down from the attic, I realized they aren't, so there's no benefit to running them at night. We'll see.
 Eggliner - The AristoCraft Eggliner is a four-wheeled passenger carrier that is a lot of fun as it zips around under its own reliable power. The Christmas version is painted up like a Christmas package. Last year, I had loaned out some of my other Christmas trains, and this one was the main train we used around the Christmas tree inside, so I know it's reliable. On Sunday afternoon, I used this for testing track that I hadn't rechecked for a couple of weeks. If the Eggliner doesn't run on it, it's not track.
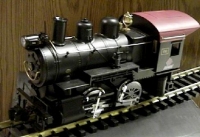
 Others - I also have two Bachmann Christmas streetcars, which I would gladly run if I had any space and time to put up any more small loops of track. I even have a battery-powered Bachmann Big Hauler 4-6-0 painted for Christmas that has seldom been run. The Lionel 0-4-0T shown in the earlier photos for this project is another "Christmas-themed" oddity - left over from a set Lionel discontinued long ago. I've been using it for testing, too.