| |||
 |
 |
 | |
 |
 | ||
 |
 | ||
 |  | ||
 |  | ||
| |||
|
|
| |
|
|
| ||
|
| ||
| | ||
| | ||
| Written by Paul D. Race for Family Garden Trains(tm) |


|
From the Editor: Update, 2023: - I originally wrote this article about 2007; sorry, I don't remember exactly when. It involves fixing the right-of-way that I installed according to "common wisdom" and Garden Railroad's editors and experts eight years earlier. Before I realized that those experts all lived in deserts or desert-like places where you couldn't even keep weeds growing if you didn't irrigate. The universal instructions of those early days went something like this:
Okay, the last one may not ring quite true, but the problem is the above were universally presented as a permanent solution, and I followed those instructions for my first loop and parts of my second. Sadly, garden railroaders in any place that gets as much rain and frost heave as we get in Ohio soon discover that this "approach" only lasts for a few years. Since I was in no mood to tear the railroad out and start again with a ground-rated lumber solution, I opted for a more permanent version of the gravel-in-a-trench approach - a thick, wide layer of concrete supporting the track. By the time we moved away, thirteen years after this work, a few cracks had developed that were easily repaired, but, essentially it fixed the weed and frost heave issue better than any other solution I've tried or seen, except for the raised plattorm approach. So it might be worth your consideration. Refurbishing Garden Railroad RoadbedOne reason Family Garden TrainsTM has so many articles is that I have had so many mistakes to learn from. Back in 1998, when I started my first garden railroading project, I made what turned out to be a "biggie," given Ohio climate and wildlife conditions. I installed my first loop of track in a way that folks in dryer climates use all the time. Over several years, maintenance problems grew, until I reached a point that some years, I didn't have trains running on that loop at all. I've known other folks who've had similar infrastructure problems after using other methods, so hopefully, this article will be useful to a wide range of folks. If nothing else, it makes a strong case for doing things right in the first place, and gives suggestions for how to fix the problem.
To folks who are already anticipating the problems I encountered, I can only say that this method is featured in many books, magazine articles, and videos on garden railroading. In retrospect, I realize that the folks who recommend this approach live in different climates and with different animal populations. It's also worth noting that my railroad's problems have occurred on other Ohio, Indiana, and Pennsylvania railroads that were built with entirely different methods. The ProblemsUnfortunately, my railroad's "roadbed" became prone to disruption by weeds, burrowing animals, and, eventually, frost heave.Weeds - Even in places where the gravel is several inches deep, enough dust had blown in with a year to give certain kinds of seeds a start, and once they started, they could root quickly through the gravel, through the sand, and into the soil. And pulling rooted weeds up through the ties on your railroad is disruptive at best. Yes, there are "solutions" for this problem, but each has limitations:
In retrospect, a solid "roadbed" under the track (such as concrete or 2"x6" pressure treated roadbed) would have nipped the weeds-growing-in-the-right-of-way problem in the bud, if you don't mind the pun. That said, folks who don't have many plants anyway, or who live in near-desert climes, don't have this problem, and some folks near me who do just have time to stay on top of it better than I do, so your mileage will vary.
I field-tested any number of mole and vole "solutions," as well as "tricks" for making the roadbed more stable without a complete "redo," but those solutions either didn't work, or they caused other problems. Frost Heave - To avoid frost heave disrupting a garden railroad in northern climes, most people choose one of two approaches:
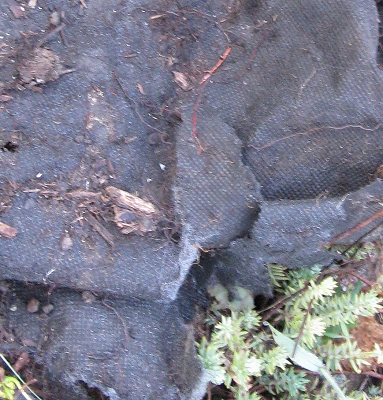
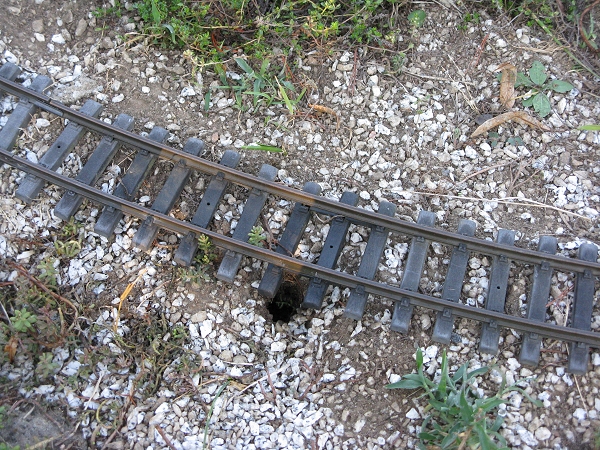
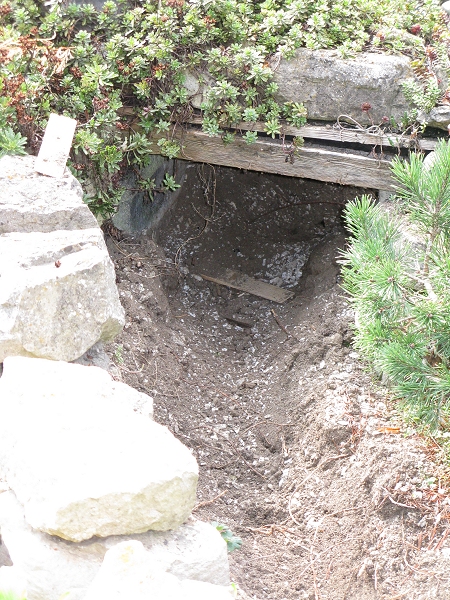
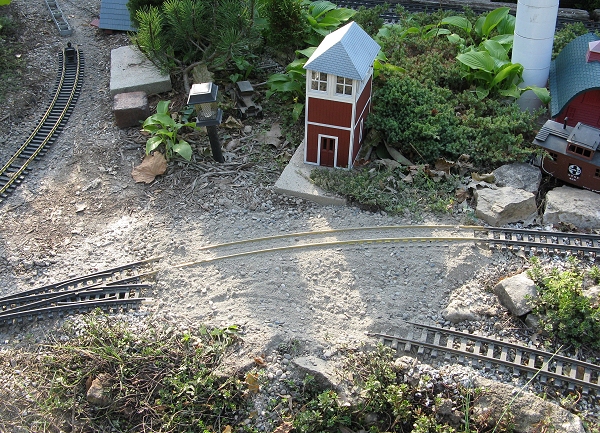
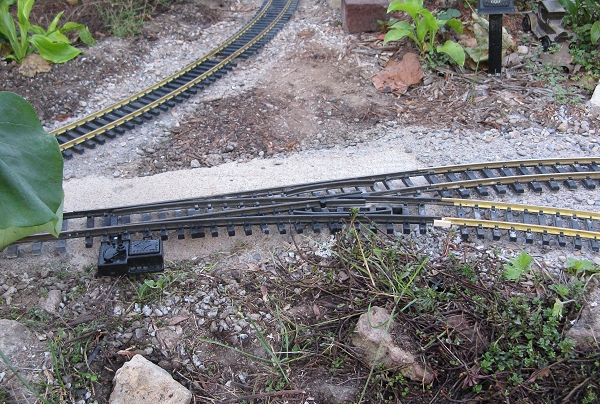
The photo to the right shows a section where the animals had pushed the trackage and underlying weed fabric on one section so high that it would no longer couple to the rest of the track system. What you can't tell easily from the photo is that the "mainline," which runs through the two wide-radius turnouts drops about two inches between the main part of the loop and the lower edge of the photo. Other Issues with Uneven Roadbed - When the roadbed gets "bumpy" and there are depressions under the track, too much vertical pressure on the tie strip will cause ties to pull away from the track, and it's hard to get them on right again without either damaging the ties or else uninstalling and reinstalling the track. This problem is almost nil in new track, but by the time your track has been down for ten years, it starts to become noticeable.
In August, 2008, I pulled up all of the track that I laid in 1998-99. Since it wasn't nailed or screwed down, removing it mostly entailed disconnecting the jumper wires and unscrewing the Aristo tie plates which held the pieces of track together. I had another loop of Aristo 10'-diameter track that I used for train shows and clinics, so I figured I could use that if the ties didn't come back before I was ready for the track. (They didn't, by the way, though they did come eventually.) Hopefully you can see why I decided that, while I was rebuilding the roadbed, I figured I might as well make provision for refurbishing the track as well.
Installing Concrete - My next phase was to fill the trenchs I just dug with concrete.
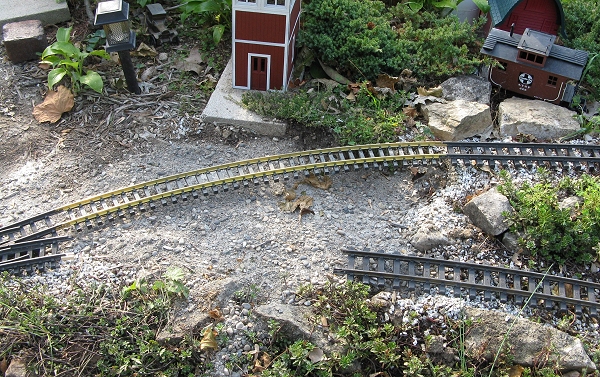
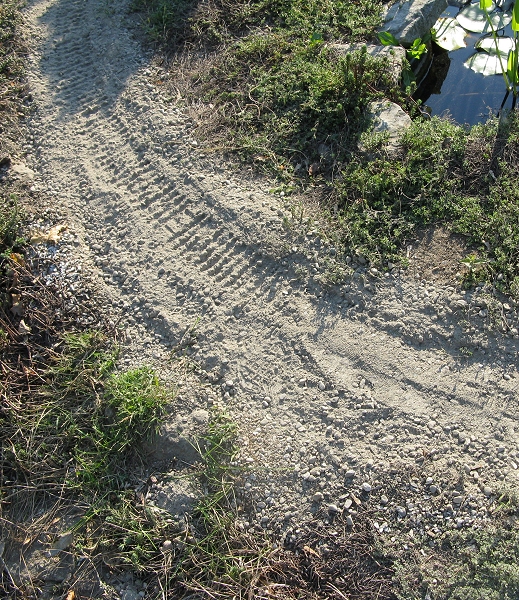
As the photo to the right shows, the resulting paths look more like sand and gravel than they do cured concrete. I can't help thinking they look a little like old gravel roads - a possibility for additional modeling when I get the rest of the railroad functional again. The trench/concrete ROW widens in front of the church at the right because a turnout goes there.
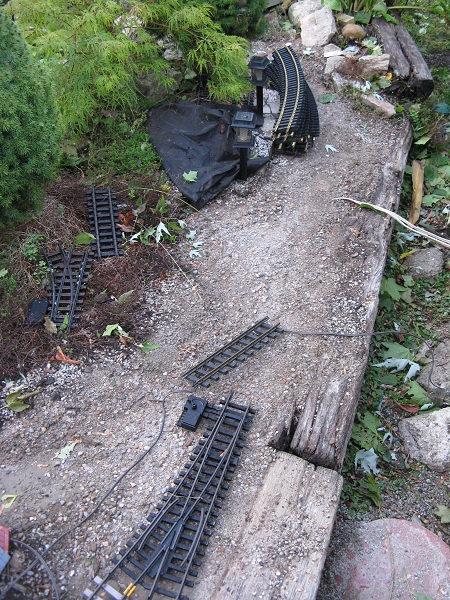
Tweaking - Next, using my "clinic" track, I temporarily relaid trackage to determine where I needed to add more concrete to smooth or level things out. I also "cannabalized" a couple "spurs" on my railroad that I could live without until spring. Near the top of the photo at the right, you can see some US-syle 10'-curves I brought out to work with. The "south loop," it's sidings, and the pieces that connect it to the rest of the railroad involve about 42 feet of track. I left two turnouts out of the "track plan" because they're getting borderline, too, and I don't really need them to operate the basic loops I want to run this fall (and maybe winter). variations. Laying that much track, even temporarily, took a few hours. I had to screw several of the Aristo pieces together because they kept pulling apart while I was experimenting with various configurations. This is a valuable lesson. Back in 1998, I plotted the original course of this loop by using a 2x4 as a compass around a central point, something that is pretty tough to do once a waterfall and several trees are "installed." Getting a nice level roadbed was a lot easier then, too. If I had simply dug a trench and filled it with concrete instead of tamping down the soil, things would have been much less complicated later.
Then I swept the concrete mix down to where I could see the top of the ties as well. I took a level and went all the way around trying to make certain that there were no unnecessary grade changes. Where necessary, I pulled the track up and packed more concrete mix beneath it. The photos below show a section under which my first concrete backfill left a huge gap. The photo on the right shows the same piece with concrete mix "filling in the gap" and ready to provide a semi-permanent support once the track was removed again and I could soak gently it down.
After the track was all taken up and the roadbed smoothed out, I use a mist setting on my garden hose and soaked the top layer of concrete down without "blowing it away."
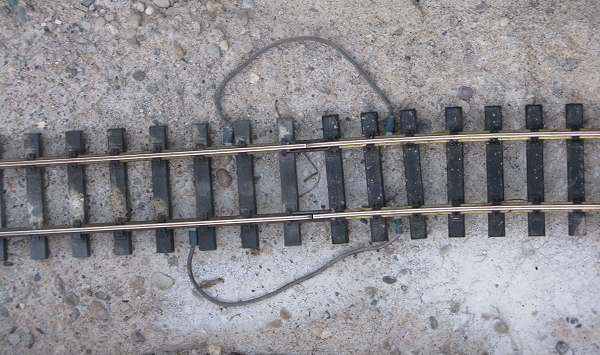
Cleaning and Inspecting the Track - The next thing I did was to walk all the way around the mainline with a very fine 3m sanding sponge, hitting the top and inside edge of the rails. This also allowed me to visually inspect the rest of the track to see if it would be safe to run a locomotive around to test my connections. Parts of the wooden roadbed section had gotten a little uneven, but that was nothing to what I'd fixed already, so I made a note to adjust that part later. Finally, I brought out an Aristo 0-4-0 and a small power supply, hooked up the power supply, set the locomotive on the track and watched nothing happen at all. By then it was dark so I came in, figuring that, worst case, I had probably wired a jumper backwards. Testing and More Tweaking I had. The following Sunday afternoon, I tracked down the erroneous jumper and rewired it. I then ran the locomotive around the railroad slowly, adjusting obstacles it encountered, and using my stash of Grani-Grit "Developer Layer" chicken grit to tweak the slant of the track or to fill in where the track was "hanging in mid-air." I didn't have enough grit to ballast the whole railroad right then, and that is almost pointless before the leaves fall, but I wanted to make certain the railroad was at least as smooth as it was the last time I had things running.
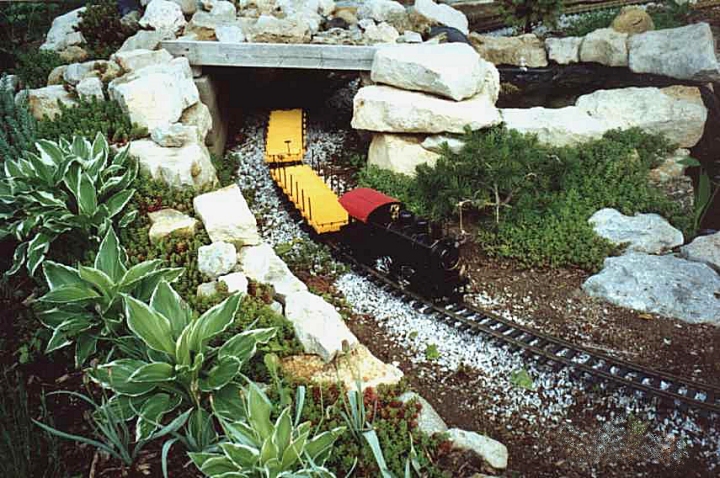
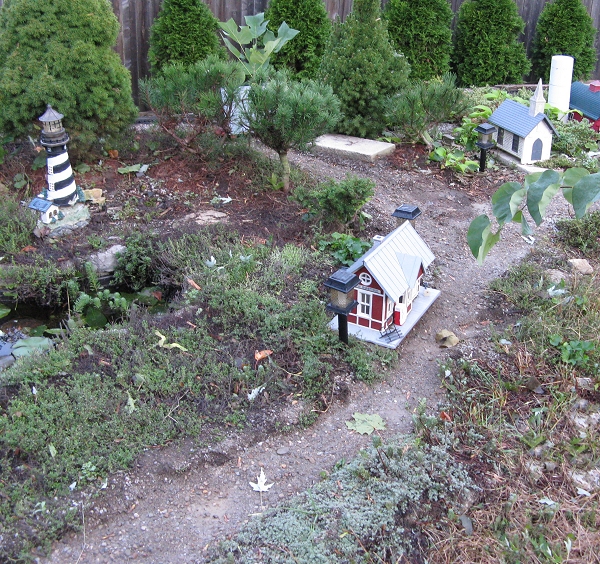
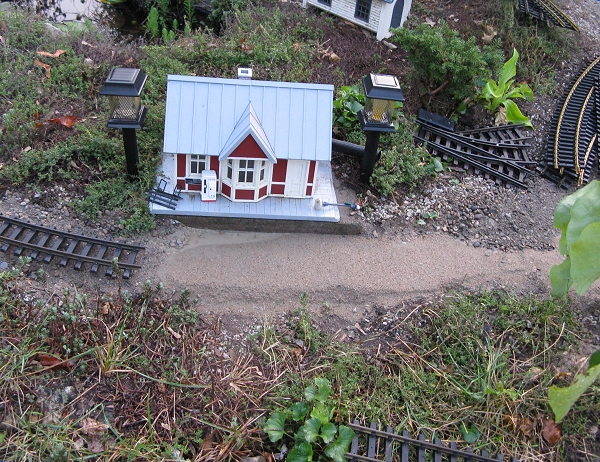
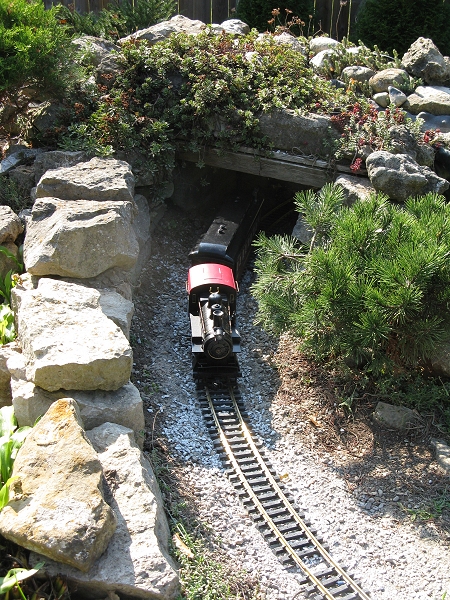
Finally, I strew a little more "ballast" around the front edge of the railroad for cosmetic purposes, took a photo, and went inside. I made a point of using the 0-4-0 so I'd have a photo you could compare with the one at the top of the page, taken about 2002. You might notice that both the Mugo pine and the rock wall have grown taller. So the 0-4-0 looks smaller as a result. The 2-8-2 should look great, though, don't you think? What's Left to Do? - I still need to tweak the roadbed in several other places, including shimming up the wooden roadbed in one section. I also need to trim back some conifers that are crowding the right of way (I think a Dwarf Alberta Spruce knocked the bell off the 0-4-0; I'll have to go looking for it again). I am so pleased with the overall effect, though, that I may extend this process to the lower loop, which has not suffered from frost heave or animal invasions to speak of, but is prone to weed problems. Next spring, I'll bring out the really big trains and do the additional tweaking that will be necessary to get them to run well on this track. But that will be nothing like the work I've done so far. Above all, though, I plan to run trains this fall and maybe into the winter. If you are ever heading toward southwest Ohio, contact us and I'll tell you if I have any open houses scheduled. I hope to have a couple a year from now on, now that I am close to having my railroad back. What Should the Benefits Be? - The "good part" is that, if this works out like it should, it should:
What Would I Do Over?If I was starting a new railroad, I'd be inclined to use the "simple, raised roadbed" (2"x6" construction) for everything and backfill AFTER the roadbed and track were in place and tested. That's the way Paul Busse, a pro, used to do it for professional railroads, but that seemed like too much work when I was starting out. Find out what folks in your area have done with success, though - you might be fine with the same approach that was "less than optimum" for me.
If you would like to add anything or correct anything in this article, please contact me. In the meantime, best of luck, Paul
Related Articles from Other People
Reader ResponseDan Stenger, of Richwood, KY writes:I have the 2X6s under my entire railroad (excluding trestles and bridges). It does "pop up" during the winter; one year up to an inch and a half. However, it settles right back down without any issues and seems to move as a unit. We have been laminating 1X6s instead of the 2X6 method, but we've been using this method for over 15 years. I'll probably use the same method to build the next railroad. Note: If you arrived at this article by clicking on the "Next" link in our New Boston and Donnels Creek series of chronological articles about our garde railroad, you can continue the series using the links below. Next - Proceed to our next article "Planning a Christmas Open House, Part 1." Previous - Return to our article "About the Owner/Author/Lead Editor," which describes Paul's circumstances and approach to garden railroading in the early 2000s Return to our article "NB&DC Rolling Stock," which lists the sorts of cars I was running on my railroad in the early 2000s. Return to our article "Motive Power, which was written in 2003, and updated in 2008. It describes the locomotive we were using most of the time to pull trains on the New Boston and Donnels Creek. Return to our article "June, 2003 Photos, to see what our railroad looked like four years after we broke ground, and one year after the 2002 convention. Return to our article "Layout So Far," which describes the track plan, plants, etc. of our garden railroad as of the early spring of 2003. Return to our "January, 2003" article, which includes photo of our railroad caught in a 6"-8" snow right after running trains at Christmas. Return to our "June, 2002 Photos article, which contains photos of our garden railroad as it was set up for the 2002 National Garden Railway Convention in Cincinnati. Return to "What to Do When a Tree Eats Your Railroad." To return to our article "Stress Testing on the NB&DC RR," click here. To return to our NBDC 1998-2000 Pictures page, click here. To return to Landscaping and Pond Construction, 1998-1999, click here, To return to our page About New Boston and Donnels Creek" click here. To return to the New Boston and Donnels Creek Index Page, click here To return to the Family Garden Trains Home Page, click here
|


|
Reuse or republication without prior written permission is specifically forbidden. Family Garden Trains is a participant in the Amazon Services LLC Associates Program, an affiliate advertising program designed to provide a means for sites to earn advertising fees by advertising and linking to amazon.com. For more information, please contact us |
 |  |
| Visit related pages and affiliated sites: | |||||
| - Trains and Hobbies - | |||||
 |  |
|
 |
|  |
 |

|

|  |
|

|
| - Christmas Memories and Collectibles - | |||||
 |

|
 |

|

|
|
| - Family Activities and Crafts - | |||||
 |

|

|

|

|

|
| - Music - | |||||

|
 |
 |

|

|

|

|

|

|

|

|

|

|

|

|

|

|

|