| |||
 |
 |  | |
 |  | ||
 |  | ||
 |  | ||
 |  | ||
| |||
|
|
| | |
| | ||
| | ||
| | ||
| | ||


|
Planning a Christmas Open House, Part 2This year (2008) I am planning to have a "cold-weather" open house with a Christmas theme, my first ever. This is second in a series of notes on my progress and/or lack thereof.
Much of my inspiration for this project has come from Dan Stenger, who has several nights of open house on his garden railroad most Christmas seasons. Last year Dan
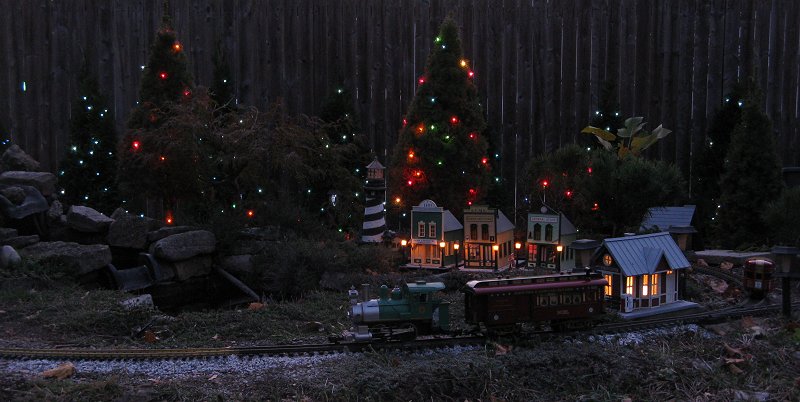
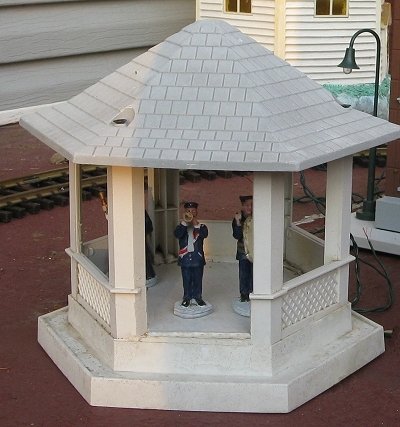
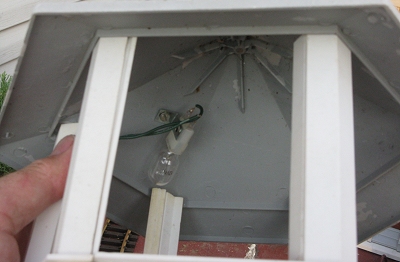
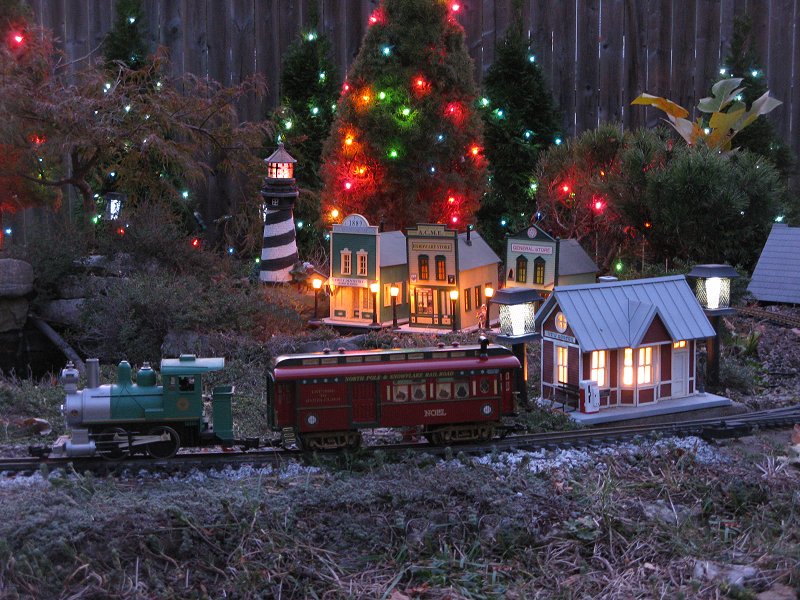
Lighting the TreesI have a row of Emerald Green Arborvitas along the west (back) edge of my railroad. Hopefully they will one day grow large enough to obscure the privacy fence and make a nice natural backdrop. In the meantime, they are mostly cone-shaped, so lighting them will make them look a little like a row of Christmas trees. I also have many miniature conifers on my railroad, including Dwarf Alberta spruce, which also mostly have a cone shape.Power Distribution - Over the years, I've picked up several of those yard stakes with the outlets in them, and a couple heavy-duty timers with multiple outlets. I plugged a timer in and ran a yard stake/power feed from it. I then ran another yard stake/power feed from the first stake, in what engineers used to call "daisy chaining." I doubt that "daisy-chaining" these is recommended, but I tried to avoid overdoing it. I have never needed to distribute "serious" 110-volt power to my railroad before, since the track and the few buildings that were lit use low-voltage. And I didn't really have time to do it "right" this time. But using the little power stakes helped me avoid the trap of wiring too many stands of Christmas lights in series. Getting Wired - I started out wiring the row of arborvitas with the many strands of blue lights that my wife's Aunt Anna left behind when she passed away early this year. Shelia thinks that Anna would be tickled that we found a use for them. Again, although you CAN "daisy chain" strands of Christmas lights, plugging them into each other, using the yard stake/power supplies allowed me to avoid plugging more than two strands in a series over most of the railroad. When the big job of wiring the arborvitas was done, I worked piecemeal, in between other projects, lighting the other trees with multicolored lights. At the moment, a few clusters of trees are still unlit. But using a blue backdrop with brighter colors up close seems to add depth to the setup, and it is pretty when it's all lit up. Rehabilitating and Lighting BuildingsIn last week's blog-like article, I mentioned that I had experimented with low-voltage lighting and had temporarily installed three buildings that I picked up, pre-wired, in Michigan. Well, the effect is remarkable. So I determined to rehabilitate at least some of my other buildings and get them lighted and ready to go for this open house. On my lunch hour, I visited a local used electronics warehouse that has been going out of business for over a year, looking for a 12volt socket and bulb combination I could easily use in my buildings. The only thing I could find that was even remotely standard was sockets for the wedge type bulbs used by the low-voltage garden lighting systems. They also had some 12-volt wedge bulbs with the wattage unlabled. Since they were only a few cents each, I bought some of those as well, but they turned out to be ten watt or more - too bright for my purposes. (I subsequently picked up some Malibu parts, including more 4-watt bulbs.)
The first candidates for rehabilitation were:
Still to Go - Here are some things I'd like to get done in the next week. What do you think?
So all in all, there's not THAT much on my plate in the next two weeks . . . Conclusion (So Far)You can see that much of the work I've done for this open house really consists of finishing tasks I never got around to before and fixing things I either didn't do right the first time or let get into worse condition than I should have. This does demonstrate that:
'Nudder Note about Christmas - As we mentioned in our first installment, part of our reason for doing all of this rework and setup is to make Christmas a little more cheery for our family, friends, and readers. I hope that detailing all of our "trials and tribulations" as we prepared our railroad for an open house this year doesn't discourage you about the things you need or would like to do, either for your railroad or for this Christmas season. [Actually, I'm writing this note after the open house, and I can promise that it really does come together, mostly.] Rather, we hope that these articles give you ideas and encouragement for your own projects, and that they also contribute to a happier and more fulfilling Christmas for you and your family. Once again, if you find nothing useful in these articles, we at least hope that you accept the Race family's best wishes for a safe, happy, and blessed Christmas and New Year! Finally, if you would like to ask questions, be notified of future open houses on the New Boston and Donnels Creek, or learn about other Christmas-themed open houses in Southwest Ohio this year please visit our 2008 Christmas Open Houses sheet. Best of luck, have a great fall and winter, enjoy your trains, and especially enjoy any time you have with your family this season. Paul Race Note: If you arrived at this article by clicking on the "Next" link in our New Boston and Donnels Creek series of chronological articles about our garden railroad, you can continue the series using the links below. Next - Proceed to our next article "Planning a Christmas Open House, Part 3." Previous - Return to our article "Planning a Christmas Open House, Part 1." Return to our article "Refurbishing Garden Railroad Roadbed," which describes how we used cement roadbed to addressed the massive burrowing animal and weed growth problems caused by following the track-over-gravel-on-a-dirt-pile instructions of the desert-dwelling garden railroad experts and GR editors. Return to our article "About the Owner/Author/Lead Editor," which describes Paul's circumstances and approach to garden railroading in the early 2000s Return to our article "NB&DC Rolling Stock," which lists the sorts of cars I was running on my railroad in the early 2000s. Return to our article "Motive Power, which was written in 2003, and updated in 2008. It describes the locomotive we were using most of the time to pull trains on the New Boston and Donnels Creek. Return to our article "June, 2003 Photos, to see what our railroad looked like four years after we broke ground, and one year after the 2002 convention. Return to our article "Layout So Far," which describes the track plan, plants, etc. of our garden railroad as of the early spring of 2003. Return to our "January, 2003" article, which includes photo of our railroad caught in a 6"-8" snow right after running trains at Christmas. Return to our "June, 2002 Photos article, which contains photos of our garden railroad as it was set up for the 2002 National Garden Railway Convention in Cincinnati. Return to "What to Do When a Tree Eats Your Railroad." To return to our article "Stress Testing on the NB&DC RR," click here. To return to our NBDC 1998-2000 Pictures page, click here. To return to Landscaping and Pond Construction, 1998-1999, click here, To return to our page About New Boston and Donnels Creek" click here. To return to the New Boston and Donnels Creek Index Page, click here To return to the Family Garden Trains Home Page, click here | 

|
Reuse or republication without prior written permission is specifically forbidden. Family Garden Trains is a participant in the Amazon Services LLC Associates Program, an affiliate advertising program designed to provide a means for sites to earn advertising fees by advertising and linking to amazon.com. For more information, please contact us |
 |  |
| Visit related pages and affiliated sites: | |||||
| - Trains and Hobbies - | |||||
 |  |
|
 |
|  |
 |

|

|  |
|

|
| - Christmas Memories and Collectibles - | |||||
 |

|
 |

|

|
|
| - Family Activities and Crafts - | |||||
 |

|

|

|

|

|
| - Music - | |||||

|
 |
 |

|

|

|

|

|

|

|

|

|

|

|

|

|

|

|