| |||
 |
 |
 | |
 |
 | ||
 |
 | ||
 |  | ||
 |  | ||
| |||
|
|
|
| |
|
|
| ||
|
| ||
| | ||
| | ||
Written by Paul D. Race for Family Garden Trains(tm)
 |


|
Glazing Windows with Lucite®Glazing is the construction term for the part of the window you can see through, usually glass. I've tried several kinds of glazing for model buildings, and I feel that "acrylic glass" products like Lucite work best for me in most projects. This article is meant to be a supplement to my other articles on painting and building model buildings, including the article titled Painting Plastic Structures. Most of what's on this page is already familiar to most hobbyists, and most homeowners, for that matter. But I figured I'd provide a step-by-step report on a recent project in case my methods, or even my mistakes, might give someone who has never scored and snapped a piece of acrylic glass courage to try.Why Glazing Helps BuildingsHaving your buildings' windows glazed can be helpful several ways:
What Are My Options?Several different kinds of glazing are used in garden railroad buildings and kits:
The first several structures I built for my garden railroad didn't have any glazing at all. Fortunately, I had some scraps of 1/8" Lucite available from a window repair project. I tried using that, and was so happy with the results, I've used the same material in several other buildings, even when some form of glazing was supplied. I understand that Lucite® is an acrylic and is very similar chemically to Plexiglas®, though they are different brands. So most of what I say about Lucite is also true of Plexiglass or any other "acrylic glass" product used in storm doors or other places where clarity and strength must go together. I am using the term Lucite throughout because most of the 1/8" replacement acrylic glass panels sold in our part of Ohio are Lucite® brand. I have worked with thicker pieces of Lucite and Plexiglass both, but that would be overkill for this application, and besides, once you get over 1/8" it gets a lot more complicated to cut. (I use a saw with a special blade for anything over 1/4".) Getting Lucite® PanelsLucite® comes in sheets big enough for a picture window, but that size is very hard to work with. You want little pieces. Sometimes your local hardware store will give you the scraps from a bigger project if you explain you want them for a craft project (don't try to explain garden railroading to them or they'll just look at you funny and turn you down anyway). I've also gotten scraps from a broken storm door and other sources. Unless you're using the Lucite for structural purposes (which some folks do), a bunch of scraps will do just as well as (or better than) a single big piece.When you get a new Lucite panel, it will have protective plastic coating on both sides. Leave that on until you're done cutting the material - it will help protect it from getting scratched up while you're working with it. You Will NeedYou probably keep the following stuff around, but just in case you don't, you should have:
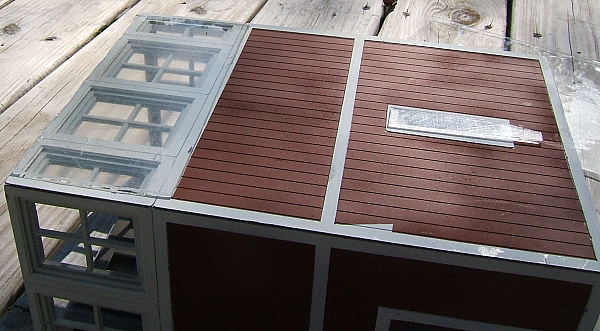
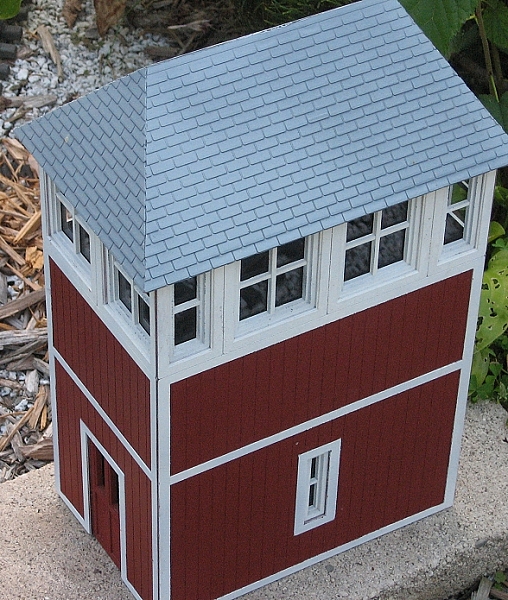
Measuring and Scoring Lucite PanelsIn most cases, you will want your windows to be 1/4" to 1/2" larger than the window opening in both direction, to give you room to glue them to the inside of the building without excess glue sqeezing out into the window opening. Also, if you have several windows in close proximity, it's easier to cut one panel than several.That was a no-brainer the case of my Colorado Model Structures tower, which had four walls of windows so close that it only made sense to cut one strip of glazing for each wall. This is the structure featured in the article "Painting the Colorado Models Tower." If you look at the blowup of the last photo on that page, you'll see that from a normal viewing position, you can tell there is no glazing in the window. Colorado Model Structures did supply glazing, in case you wondered, but I like Lucite better, so I held off until I had time to write this article. The window openings were only about 2.3" high, but I cut the windows to be three inches high, so I'd have plenty of space for gluing. I cut the long pieces first, always a good practice - if you mess up a big piece, you can still use it to make little pieces. If you make all your little pieces first, then mess up a big piece, you may need another trip to the store. In this case I had to be careful not to make the strips too long - since the windowframes went right up to the corner, the glazing strips could cause a tight squeeze.
The Lucite scrap I was using was eight inches wide, and the long wall would need a strip about 7 5/8" x 3". So I measured a 3" strip and marked the plastic safety coating with my Sharpie. Then I brought the Lucite scrap to the edge of my deck (in winter I use a very sturdy table inside). I lined it up so that I could pull my utility knife toward me, but the edge of the scrap was just over the edge of the deck. That way when the knife got off the plastic, it wouldn't slash the deck. Then I held the carpenter's square over the Lucite scrap in such a way that it would guide the utility knife as I cut. Sorry, I don't have a photo of this, since I was using both hands. You don't actually cut through the Lucite - you are trying to "score" it, that is to create a straight line that is thinner and weaker than the rest of the panel. The deeper and more evenly you score the product, the more likely it is to break cleanly when you snap it in the next step. I usually give it about four good passes, trying to make certain all four passes go into the same cut - if you have multiple scoring lines, even if they're very close, you increase the risk of a jagged edge. Snapping the Lucite Panel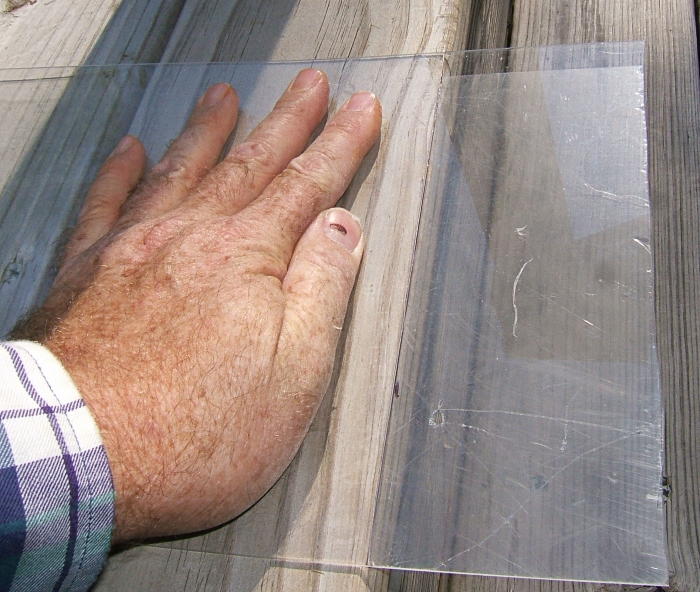 This is a part of the project in which it is good to wear protective eyewear and to keep kids away. You are going to apply pressure as evenly as you can along the entire scored line trying to get it the panel to break where you scored it. Lucite panels almost always break cleanly, and they almost never shoot out any fragments, even if they don't break clean. But there's a lot of pressure at work, and you want to take precautions.
The photo above shows me positioning the panel over the edge of my deck (again, I use a very sturdy table indoors during the winter). The photo doesn't show my right hand, because I was using that hand to snap the photo. Once I had both hands free, I applied pressure along the score line as evenly as I could and pressed down on the side that was sticking out in mid-air. If you do this inside and anyone else is home, warn them first - sometimes the crack of separation sounds like a .22 going off. In this case, I did it right - the line was clean and straight. Even if it hadn't been, I had allowed enough overlap that it would still probably suit my purposes.
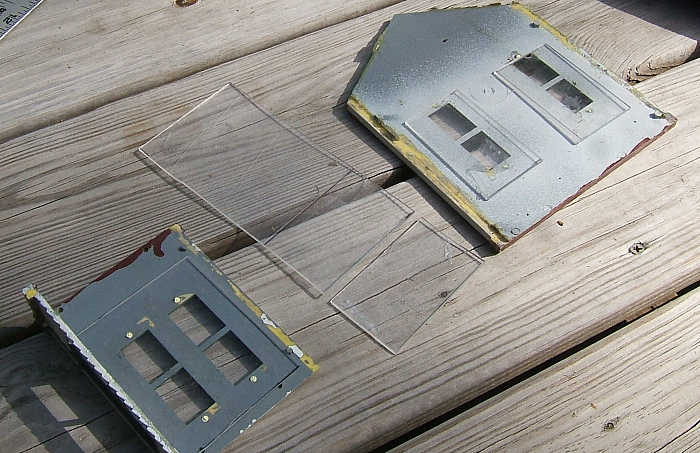
The photo at the right shows the two pieces I have scored and snapped so far laying on top of the tower to make certain they covered the window panes. Next I scored and snapped the other long piece, then scored and snapped off the end. The glazing strips for the side windows would need to be a little more than 4" long. I scored and snapped another 3" wide strip, then measured, scored and snapped the piece for one end of the building. This left a piece that I couldn't actually use for the Colorado Models Tower, but would use for another project. A Small Detour
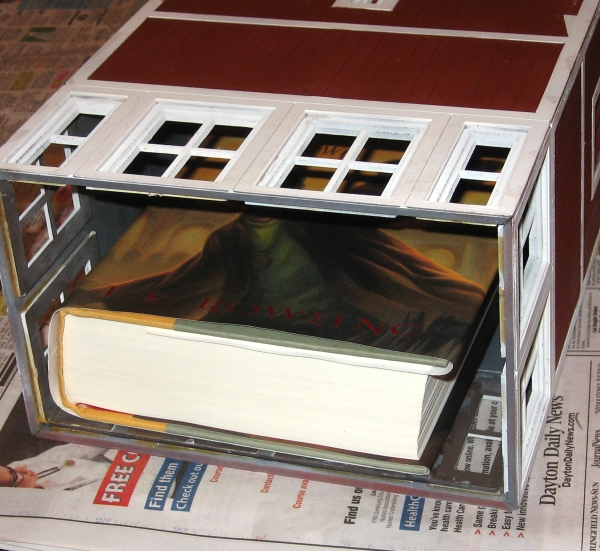
Gluing the Windows in PlaceLater that week, I had a few minutes to finish the task. I got out the Lucite bits, a couple different kinds of glue, and the building (still without the roof attached). I peeled the protective coating off of my glazing pieces and wiped them with a cotton dishtowel to remove any fingerprints I might have left.In the past, I've used a kind of silicon goop for this job, but I've noticed that after a couple of seasons of baking in the sun it starts to lose its adhesion. So I thought for this project, I would try superglue first. My plan was to get the windows in place quickly, then leave another bead of a more robust glue to bolster the gluing I laid a trail of "superglue" around the edge of the windowframes on one long wall, keeping it as far away from the window opening as was practical. Then I wiped the piece of glazing I was going to use on a soft dishtowel and carefully dropped it into place. Oops, a piece of sprue attached to one windowframe was keeping the glazing from laying flush against the window. I got a knife and sliced it off, then tried again. I pressed the Lucite down against the windowframe, being careful not to squeeze in such a way that the glue bled out into the opening. Then I held it in place for about a minute, as long as it usually takes to glue two pieces of plastic together with superglue.
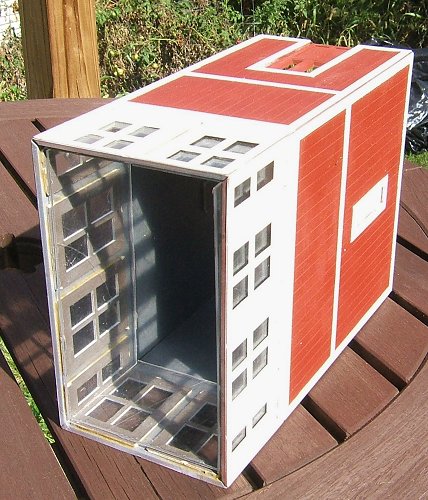
Back On the RailroadSince this building was initially assembled, it has traveled about 1400 miles and been used in about five demonstration railroads, all without windows. It also spent most of August and all of September on my railroad. So it was not great difficulty to pop the roof back on and set it out again. I have some work to do on my railroad this fall, and I plan to move this building to a slightly different location eventually. I also want to add illumination of some sort. Still, this photo gives you an idea of what it looks like with windows in place. If you click on it, you'll see the whole thing.
Reader FeedbackDick Friedman, of greater Sacramento, California, says: Good article on glazing. An unending source of plastic if you live in a '70's house is the kitchen ceiling florescent lighting panels. They're about 2 foot on a side. Mine are clear crackle finish. They last about two years in the kitchen before yellowing. But in buildings, the slightly yellow tint is hardly noticeable, and makes LED's look a little less blue! I cut the long strips with a band saw set on VERY SLOW, and use the scratch and snap method for the length. Bachmann's J&S passenger cars have glazed windows, but not doors. They look finished with glazing! Wil Davis, of Dayton, Ohio, says: The only comment I have is I have had great luck with Silicone Adhesive Caulk in clear. I have been using Lucite windows for years and it is the only thing I have used. I have yet to have one let go. [I might add that Wil's railroad is mostly in the shade and mine's mostly in the sun, so that might affect the aging of the product. - ed] Tell me about your projectsIf you have a particularly interesting structure painting project you'd like to tell other garden railroaders about, please contact me with the details. |

|

| 
|
|
 |
|
 |
 |
Note: Family Garden TrainsTM, Garden Train StoreTM, Big Christmas TrainsTM, BIG Indoor TrainsTM, and BIG Train StoreTM are trademarks of Breakthrough Communications (www.btcomm.com). All information, data, text, and illustrations on this web site are Copyright (c) 1999, 2000, 2001, 2002, 2003, 2004, 2005, 2006, 2007, 2008, 2009, 2010, 2011, 2012, 2013 by Paul D. Race. Reuse or republication without prior written permission is specifically
forbidden.
Family Garden Trains is a participant in the Amazon Services LLC Associates Program, an affiliate advertising program designed to provide a means for sites to earn advertising fees by advertising and linking to amazon.com.
For more information, please contact us

 |  |