| |||
 |
 |
 | |
 |
 | ||
 |
 | ||
 |  | ||
 |  | ||
| |||
|
|
|
| |
|
|
| ||
|
| ||
| | ||
| | ||
Written by Paul D. Race for Family Garden Trains(tm)
 |


|
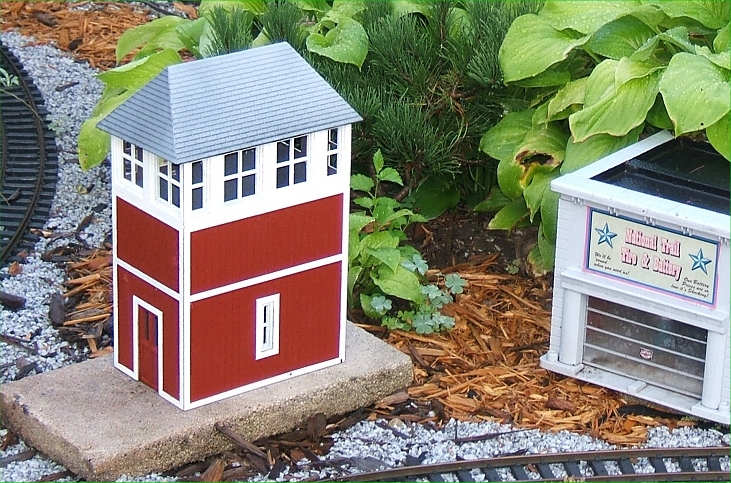
Note from Editor: - Since I wrote this article, Colorado Model Structures has shut down, apparently for good. Though the particular product we selected for this article has been discontinued, the principles we describe apply to any plastic structure that comes in pieces. - Ed. Prepping a Plastic House for Year-Round ServicePainting the Colorado Models TowerThis article is a supplement to the Family Garden Trains(tm) Painting Plastic Structures article. It explains one way to paint a building kit from Colorado Model Structures. I've presented this project in some detail because it illustrates a few points that the big article didn't have room to present properly. Colorado Model Structures is owned by a garden railroader who has a real job making "machine tools." So, as a "labor of love," he designs and builds buildings that other hobbyists can easily afford. And to help build the hobby, he passes the "savings" on to you, in many cases charging a third of what you would pay for similar models from other companies (and a quarter to a fifth of what you would pay for "premium kits" of similar buildings). You don't get a fancy box, stickers, or a store-bought paint job that will fade in a few seasons That said, these models do not "snap together." You may need to file, trim, or sand an edge slightly to get the best fit. As an example, there is some flash (places where excess material got in between the "plates" of the mold and formed a sort of plastic halo around the main part). Still, most models have "flash lines" of some sort that you have to trim off, so I don't consider the trimming a problem. Note About the Level of Detail - Please don't be put off by all the little steps in our kit-painting/assembling articles. Most kit instructions assume an experienced user, so they leave out minor, but important steps that experienced kit-builders do without even thinking about them. We just want to make sure you have a painless experience, especially if this is the first building kit you've ever painted and assembled. We also want you to be very satisfied with the finished result. If if we left out a bunch of steps to make you think that kitbuilding is a breeze, you will not be as satisfied as you could be - if nothing else, your finished kit would look exactly like everyone else's. Once you've done a couple kits according to our instructions and seen the results, you'll be doing all of those minor, but important steps automatically, too, whether we have specific instructions or not. Like all garden railroad structures, this building needs to be primed, painted, and glazed before you set it out.* But if you're careful, you'll have a result you can be proud of for years to come. Deciding on a Paint SchemeThis model represents a building with reverse board-and-batten walls bordered by separate trim boards. The trim boards don't stand all that far out from the clapboard, so if you want them to be apparent, you'll need to paint them a contrasting color. Whatever you do you will want to prime first, so that's something you can do even if you haven't decided on a paint scheme.In my case, I wanted my building to match the station I had painted years ago with a rust-red base coat and white trim. So I chose to use rust primer, and the second coat of primer would become the "base color" for the board and batten walls. That meant that I would paint the trim last. In most other examples I've seen of folks painting this model, they painted the trim color first, then the base colort, so it's really up to you how you want to do things. You'll also need to decide on the color for the windowframes, roof, and door. I stayed with white for the windowframes, but I went with rust-red for the doors, because I wanted them to stand out. The roof was going to be gray primer, with a little extra black underspray added later to make the shingles stand out. The following illustrations show how the tower might be painted in several color combinations that were popular in different parts of the United States a century ago. Ordinarily, most or all of the railroad structures around a station will have the same colors, even if there isn't a standard for the whole railroad. The illustrations below are just to get you thinking about colors you might use.
Trimming the Flash and Sprue Remnants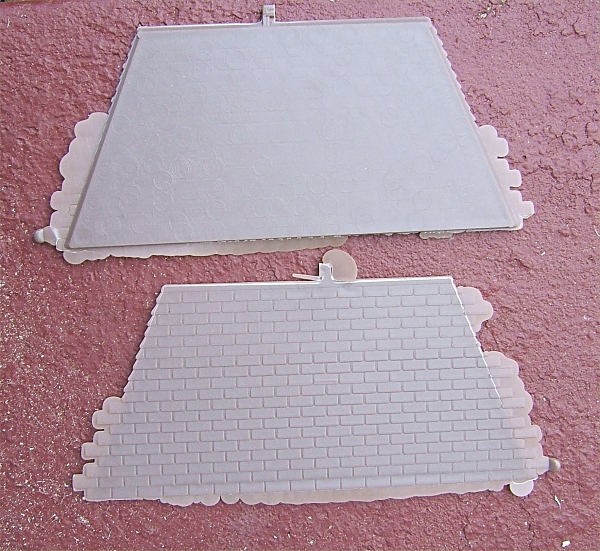 This next step is the main difference between painting and assembling this model and the equivalent "premium" model. You need to trim: This next step is the main difference between painting and assembling this model and the equivalent "premium" model. You need to trim:
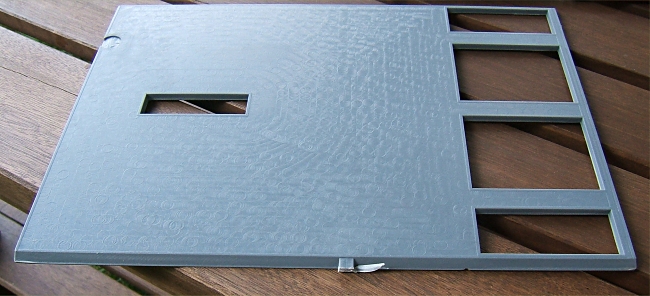
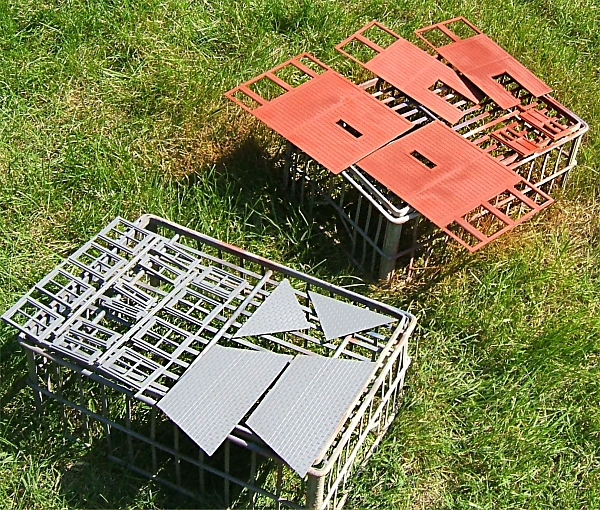
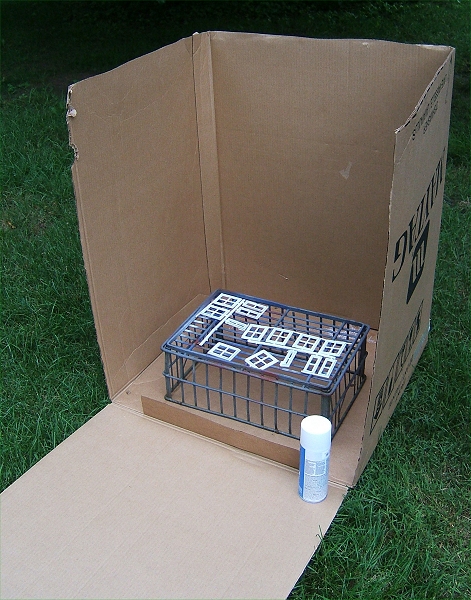
Resist the temptation to break off the extra shingles. The manufacturer's instructions say to leave the shingles sticking out until the roof is glued together, but I think they're talking about the "lower" edge, not the corners where the roof pieces need to join. Cut the shingles off carefully with a very sharp knife. The sprue remnants on the sidewalls will need, not only to be cut, but also to be filed smooth. Go ahead and trim any flash on the windowframes and doors while you're at it. I left the windowframes on the sprue until after painting, though. I did cut the doors away from the sprue, since I was going to paint them a different color than the windowframes. Once you've trimmed the flash, hold the wall pieces together and make certain they will fit when the time comes - it's a lot easier to check and fix that now than after you've painted the things. Do any more filing that seems necessary. Cleaning the PartsWhen all of the parts are trimmed and ready to go, lay out a clean dry dishtowel and place the parts next to it, along with another towel. Then wash your hands with dish soap and warm water to remove any excess oils from getting back to the parts. Locate some Glass Plus or Fantastic or a similar cleaning agent that doesn't require rinsing and leaves no residue.Clean each piece carefully, handling it by the edges or by the sprue so you don't leave "fingerprints" on it. Then dry it as well as you can and leave it on the clean dishtowel to dry out completely. By the way, this step is necessary on any model - even a clean-looking part from an expensive kit may have invisible fingermarks or oils left over from the manufacturing process. Priming the Parts Take the parts in a shallow box or something (so you don't have to handle them except by the edge) to wherever you're going to paint. As the Painting Plastic Structures article points out, I like to paint outside on warm calm days, using a wire framerwork that allows the air to circulate around the parts. I have also been known to convert an oversize box into a "paint booth" to cut down on breeze if I'm outside, or to cut down on overspray if I'm inside. Take the parts in a shallow box or something (so you don't have to handle them except by the edge) to wherever you're going to paint. As the Painting Plastic Structures article points out, I like to paint outside on warm calm days, using a wire framerwork that allows the air to circulate around the parts. I have also been known to convert an oversize box into a "paint booth" to cut down on breeze if I'm outside, or to cut down on overspray if I'm inside.
In this case, I chose a gray primer for the roof and windowframe parts, and a red primer for the building walls. (I might have used white primer for the windowframes, but I had just used it up on another project and didn't want to make another run to the store.) Shake the first paint can you plan to use thoroughly, until the little ball inside has been rolling freely for a few minutes. You might want to test the paint on a piece of scrap plastic. Sometimes when it is very humid or the can of paint is too cool, the paint comes out in tiny chunks, making your building look a little fuzzy, so you want to know if it's going to do this before the paint goes onto your structure parts. When you are ready to spray the parts, bring the paint can so that it fires down at an angle (paint won't spray properly going straight down). With the can aimed to one side of the parts, press the button until you get an even flow (usually a second), then bring When all the parts are painted, move them to a safe place with decent ventilation and allow them to dry overnight. Simple Finish Coat
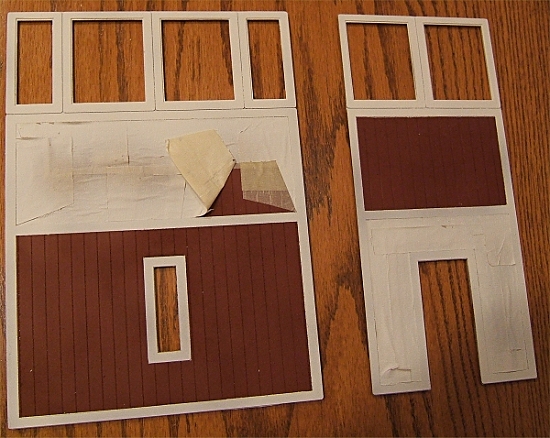
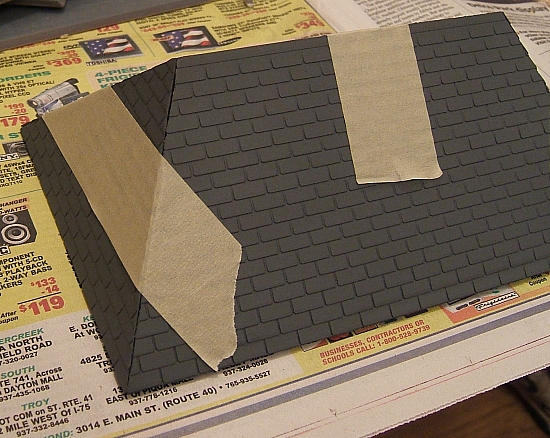
I also gave the roof parts another coat of primer gray (yes, you can use primer for a finish coat, but I still like to have two separate coats, applied at least a day apart). I had another process to perform on the roof later, but at this time, gray was all I needed. Complex Finish CoatThe walls of this model required a little bit more work than some models, since the trim is molded in and I wanted it to be white.
As you can see, there would be many "inside corners" to mask. If you've ever tried masking inside corners, you know that it is virtually impossible to get a true 90degree cut on the masking tape. But it's actually pretty easy to cut the tape at an obtuse angle and to get the point into the corner. Then you put another piece of tape, also cut at an obtuse angle over the top of the first one and perpendicular to it. By building up several small pieces like this (at least eight per "square" you need to cover), you can get 100% perfect corners. Try not to build up so many layers of tape that it keeps the paint spray from getting to the part you want to paint, though.
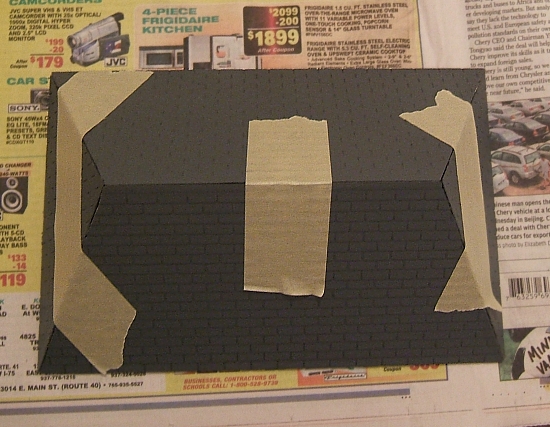
Once the base coat was masked, it was time to spray my trim. In the photo you'll note that I took the opportunity to add one more light finish coat to the windowframes at the same time I was painting the trim, since it was all flat white.
Final Cleanup and Touchup Before AssemblyNow it's time to cut the windowframes off of the sprues. On this building, most of the places that the windowframes separate from the sprues will be hidden in the final assembly. Still, if you have any parts that need to be touched up, get out some very cheap craft brushes (the kind you get 10/$1 at five and ten-cent stores). Then take the paint can you need and the parts you need to touch up someplace with very good ventilation and no open flames. Spray some of the paint into the cap for the paint can. It will stay liquid long enough for you to dip the brush in and do any touchup you need.When everything is completely dry, make certain the parts fit up against each other the way they should. Do any more filing that is necessary. In addition, make certain that the "mitered" corners of the roof and wall pieces are free of paint - you need every square millimeter of those edges ready to take glue. Assembling the TowerDon't start randomly gluing stuff together without reading the instructions carefully. For one thing if you glue the wrong windowframes into the windows next to the corners, your building won't go together. If you don't have a kit yet, and you wonder what I mean, take a look at one of the Colorado Models instruction sheets. You'll see that the window parts labeled W1 and W3 are "missing" a flange on one edge. The windows install through the "back," and the flange doesn't show, but it does have lots of area for glue so it can stick to the wall piece. Still, you can see that the edge without the flange must go in the corners - otherwise the flanges would bump into each other and the walls wouldn't fit together.I glued the windowframes and doors carefully in place and allowed the glue to set - not a hard job, since they "lay" in place. The manufacturer includes a bit of clear plastic you could glue in place for the windows. Since I plan to incorporate Lucite windows in the future, I left that step out (knowing that I'm encouraging wasp nests in the structure until I get around to putting in the windows).
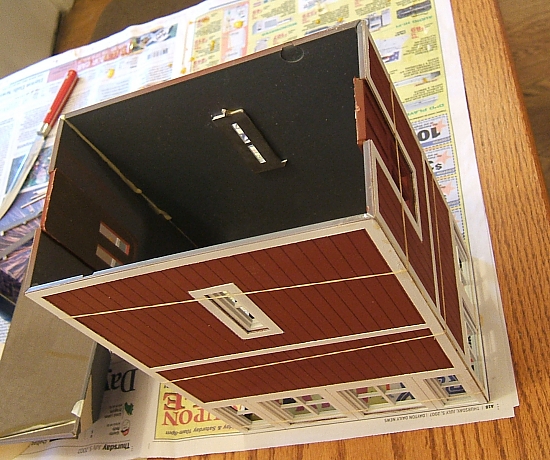
Then, I got out my trusty masking tape and kept taping the pieces together until I seemed to have the right angles and placement for every piece. I sqoze (is that a word?) some "Superglue" (cyanoacrylate) into the cracks and let that set up. When it was completely dry, I futzed with it a little to make certain it had A: set up and B: retained the correct shape.
Back to the walls: as I mentioned earlier, there aren't any handy little "snap-fit" features to hold things in place like there are on the structures costing five times as much. Here, the ability of "superglue" to set up in a few seconds was very helpful. I set two of the adjacent walls together, holding them vertically and pressing them into a carpenter's square to get a good 90degree angle. Conclusion
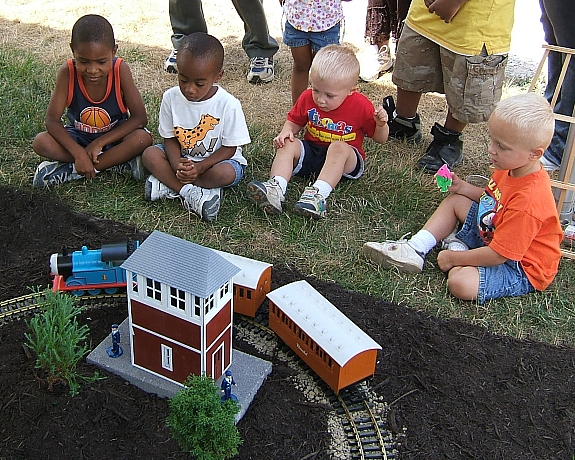
Nowadays the tower has a temporary home near my pond (and the only cluster of turnouts on my railroad). It does add a nice vertical component in a very small "footprint." Other Articles on Structures and Painting
In addition, hints for painting and examples of customer painting and kitbashing projects are provided on the Colorado Model Structures web site. |
|

| 
|
|
 |
|
 |
 |
Note: Family Garden Trains?, Garden Train Store?, Big Christmas Trains?, BIG Indoor Trains?, and BIG Train Store? are trademarks of Breakthrough Communications (www.btcomm.com). All information, data, text, and illustrations on this web site are Copyright (c) 1999, 2000, 2001, 2002, 2003, 2004, 2005, 2006, 2007, 2008, 2009, 2010, 2011, 2012, 2013, 2014, 2015, 2016, 2017, 2018, 2019, 2020 by Paul D. Race. Reuse or republication without prior written permission is specifically
forbidden.
Family Garden Trains is a participant in the Amazon Services LLC Associates Program, an affiliate advertising program designed to provide a means for sites to earn advertising fees by advertising and linking to amazon.com.
For more information, please contact us

 |  |