| |||
 |
 |
 | |
 |
 | ||
 |
 | ||
 |  | ||
 |  | ||
| |||
|
|
| |
|
|
| ||
|
| ||
| | ||
| | ||
| Written by Paul D. Race for Family Garden Trains(tm)
and New Boston and Donnels Creek: |
 |


|
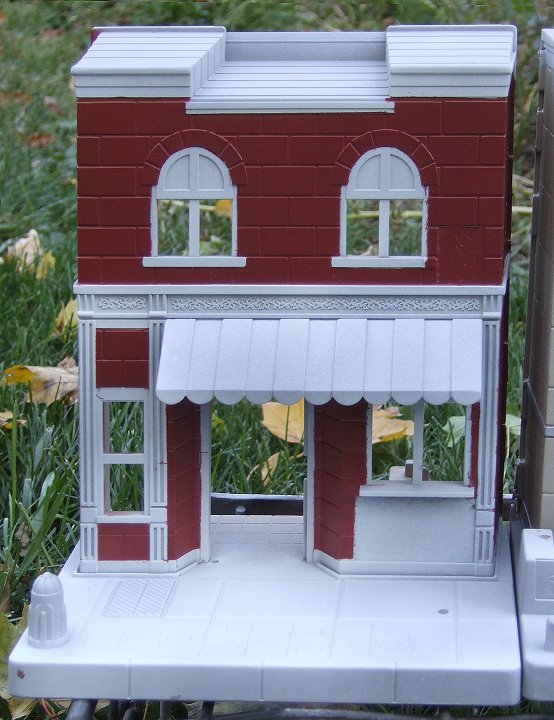
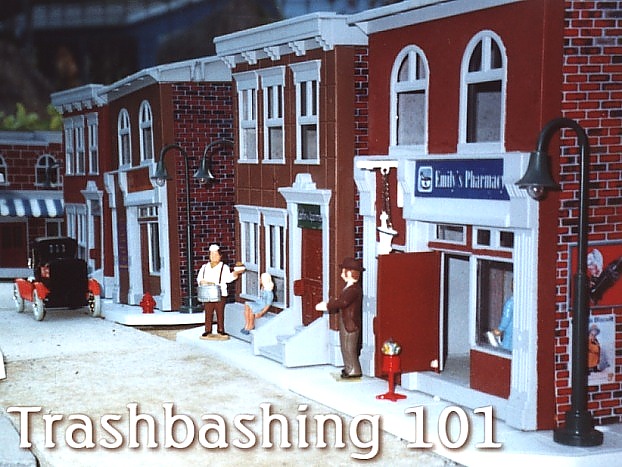
Trashbashing Step-By-StepThis article is a follow-up on my articles Trashbashing 101 and Painting Plastic Structures articles. Thanks to digital cameras, it is now cost-effective to take dozens of photos as I'm working on a project, so I can show all the steps between the "before and after" photos I showed in those earlier articles. I wrote this article as I prepared for our fifth annual Christmas-themed railroad in November, 2012, as well as planned open railroads in conjunction with a May, 2013 NMRA event and the 2013 Garden Railway Convention in Cincinnati Ohio. In addition to showing each step, this article emphasizes tips on using masking tape to get the cleanest, most professional paint job possible. What is Trashbashing?When I bought my first garden train (a battery-powered Bachmann Big Hauler) in 1984, all of the buildings I could find looked like they belonged in the alps. So I found some old toy American-style buildings that were about the right scale, and built a town up from them. When model railroaders use pieces from kits to build models other than the picture on the box, they called it "kitbashing." Since I was using toys that were so damaged, "Magic Markered," broken, or moldy (or all four) that they were better off in a landfill than a nursery, I called my efforts "trashbashing."
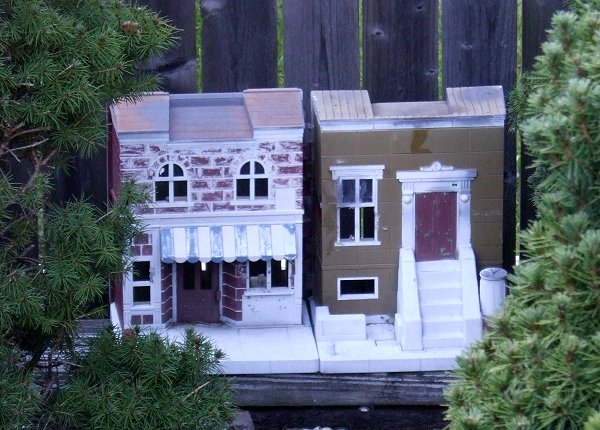
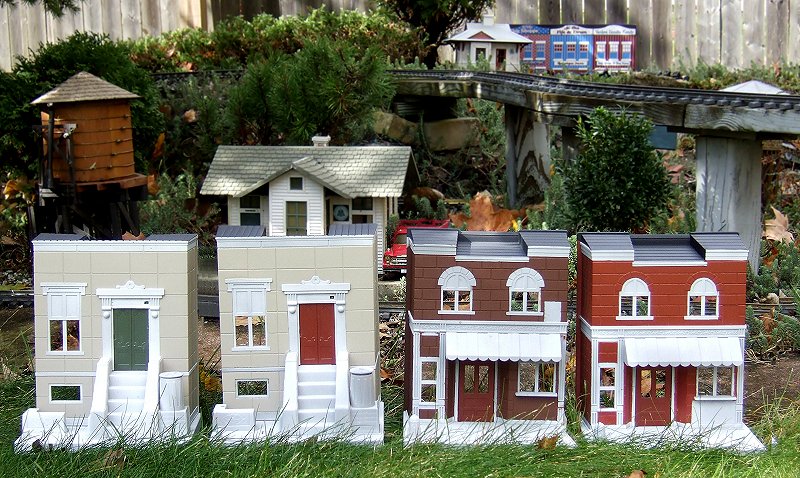
Unfortunately, I only had taken enough photographs for "before-and-after" shots. Nowadays with digital cameras I can afford to take fifty photos as the project is underway, and use the best fifteen or so to show the whole process. So it seems high time to show all the little steps involved with enough detail to give any reader confidence to tackle the project. Fifteen Years AfterWhen you've had a garden railway for a while, you notice that some things hold up outside better than others. Some of my buildings (like the Fisher Price buildings above) had plywood, Masonite, or pressed wood components. Although the paint jobs on the plastic parts are holding up fine, the non-plastic components need replaced. That said, the all-plastic former toys that I painted according to the methods described in Painting Plastic Structures have stayed good for years - and a few of them have spent several winters outside.
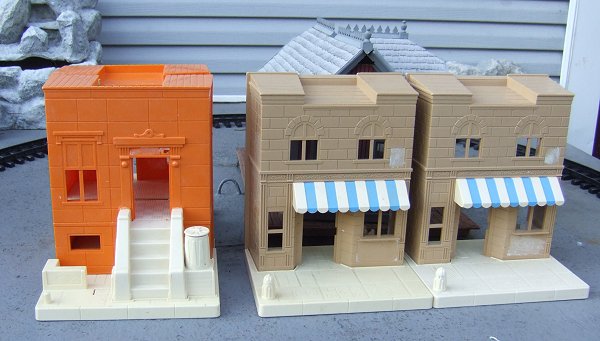
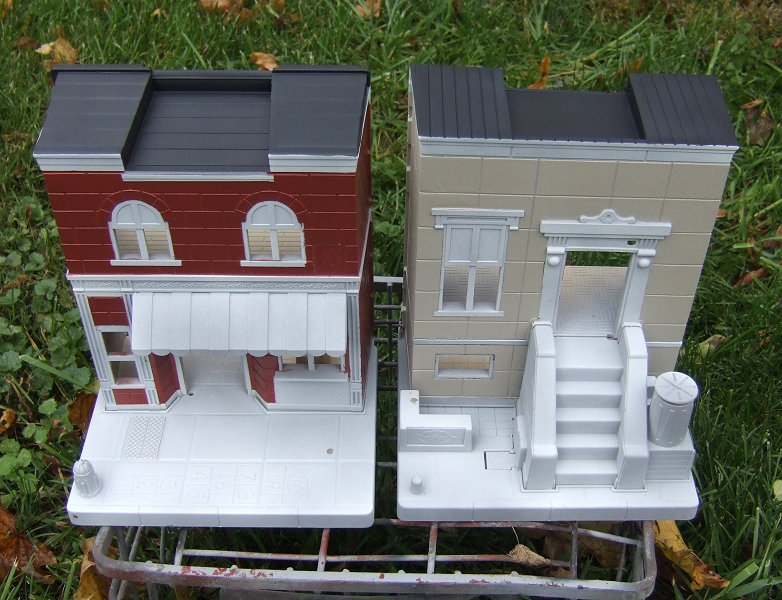
In other words, if I fixed up similar buildings that I've accumulated since, they should last me a decade or three of similar use. And I figured I could get them done in time for the November 10, 2012 open house, I could use them to "flesh out" some of the kids' railroads we always add for that one. Picking the ProjectsFor the first set of buildings in this project, I selected Playskool storefronts and townhouses like the buildings shown above. (I also worked on a few other buildings at the same time and took photos, but they're not really done enough to show a finished product, so I'll add them back in later.) Separation AnxietyI started by hacksawing apart the buildings that are fastened together. The "clamshell" arrangement is handy when the buildings double as a carrying case for a bunch of Little People, but it's not so useful when they're supposed to represent real structures. Having the buildings separate makes them a lot easier to paint, detail, and arrange on the railroad. Getting Down to the Plastic, Inside and OutOne other thing I have learned about trashbashing was that leaving the paper interiors intact on buildings that were going to go outside was a big mistake. Several of my early trashbuilding efforts developed an impressive black mold colony on the interior walls where the paper used to be. This can be a problem when I need to move or store the buildings, or when kids want to help me set things up. Back in the 1980s, I soaked the graphics off the front of the buildings and left the insides alone. In some cases I painted over the inside graphic labels in the hope that it would stabilize them. It didn't. Nowadays, if the building is completely plastic, I start by soaking the entire building in water, and scraping the inside as well as the outside. In fact, for this project, I also soaked the pair of Playskool buildings shown above (the ones I "finished" fifteen years ago). They need touched up anyway, and I didn't feel good about bringing them inside in their current condition. Note: Soaking a building that has plywood components is NOT a good idea, unless you plan to replace the plywood. If you have a building with integral pressed wood or masonite components that you want to replace, soaking the building will help you break those components away from the buildings without greaking the plastic. Then you can fabrice replacement parts out of plexiglass or some similar material. That said, the plastic on some of those has gotten pretty brittle, so be very careful when you disassemble them or you won't have anything left. Also, if you have the Playskool set I'm using and want to save the Oscar the Grouch that pops out of the trashcan when you push the button, fill a plastic bin about 4 inches deep and lay the building on its "back" so that Oscar stays dry, while all of the other graphics are getting soaked. I just realized that I don't have any photos of my buildings soaking in water. Use your imagination. Some of the stickers are really bad, and the glue is worse, so two or three iterations of soaking and scraping may be required. The picture below show some of the buildings I started on this for this project after they had the stickers soaked and scraped off.
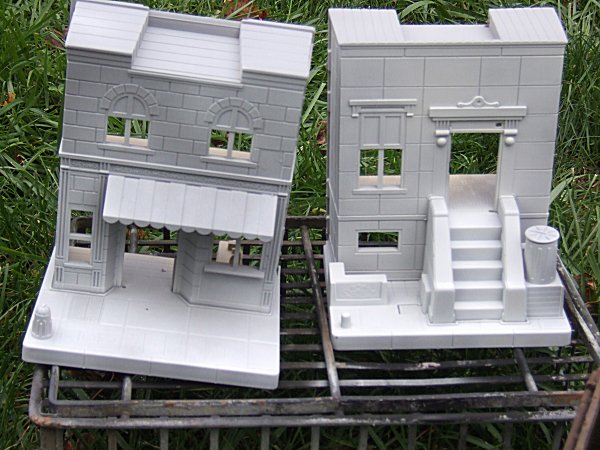
Prime SuspectsWhen you've got all the glue and stickers off that you think you can get off, let the buildings dry thoroughly. Then you need to remove all fingerprints from the buildings' surfaces - the oil from your hands can make a huge difference in how well the paint adheres. I use a light spray of Fantastic, Glass Plus, or some similar residue-free cleaning material. Then I wipe the building with a dry, lint-free cotton dish towel (no terry cloth!). From this point on I try very hard not to touch any of the buildings' exposed surfaces.Though I may use "red" (rust-colored) primer for building that will remain mostly red, I usually use gray primer, especially for buildings that:
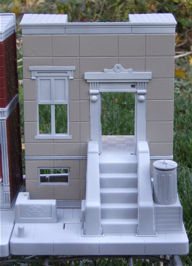
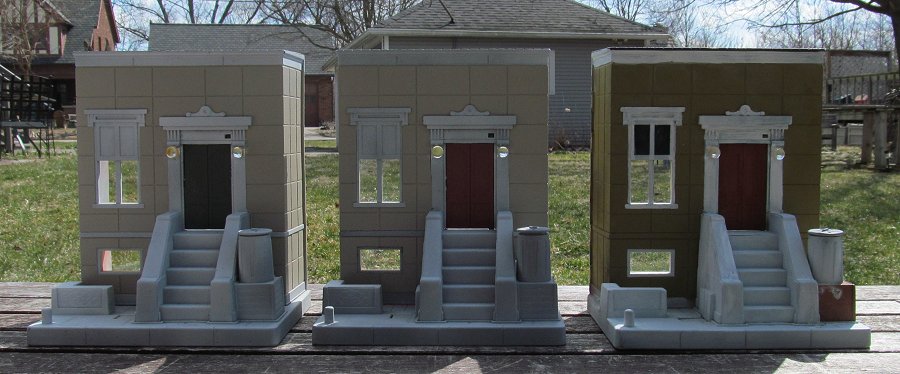
It took two light coats of primer to get rid of the orange on the townhouse. Deciding on a Color SchemePainting a building that was once orange or lime green a flat gray color lets me start with a sort of "blank canvas," aesthetically as well as physically. You need to get the original color out of your mind. You also need to think about color schemes that work for the time and place of your railroad and/or with your existing structures. Brownish Red or Reddish Brown - "Back in the day," reddish-brown was the cheapest pigment you could buy - just grind some dry rust into a powder and pour it into the solvent. That's why so many railroad cars, barns, schoolhouses, and even brick ("brownstone") city buildings are reddish-brown. No, you don't want everything to be the same color. But don't be afraid to have two or five different shades of "rust primer" in your paint closet, and to use them on your buildings. Period or Local Colors - If you live in Miami, you might be used to pink and aqua-colored buildings. If you live in New England, you might be used to colors that are a bit more "stark," white, gray, slate-blue, etc. In the "heartland," white with dark green trim are common colors for farmhouses, while century-old brick city buildings tend to be reddish brown (guess why?). Paying attention to the color pallet of the buildings in the time and place you want to represent will add realism to your little communities. Among resources you may find helpful when you're planning are the "collections" available from paint suppliers like Sherwin Williams. These are booklets that identify color families that tend to go together for, say a Western, Seaside, or Colonial look. By the way, if you ARE a brush person, you should know that some companies will sell you little sample cans of any paint in their catalog for a dollar or two. The paint store booklets are just a guideline, of course. Relatively few colors are available in flat or satin spray paint (which cover better and look more realistic than glossy paints). But you can still try to find colors that look good near each other and which reinforce the time and place of your little communities. Whatever color you choose for your "base" color, consider a contrasting trim color. It will make your structure look that much more interesting, and, often, more realistic. What about doors? In some neighborhoods, door color is the only thing that separates one townhouse from the next. A row of dull-looking buildings with bright red, green, blue, and yellow doors may be more effective than a row of different-colored buildings. As you'll see below, when I accidentally painted two of my townhouses the same color, I painted the doors different colors, and the result was very effective. As you'll see later, here are the colors I wound up using for this batch of buildings. You will make entirely different choices, I'm sure.
Painting the First TopcoatFor my Playskool buildings, I chose to keep the gray-primer-dusted-with white as my "contrasting color," so I left out a step that you'll usually have to consider. Here is the basic sequence you'll use for the first top coat of most buildings.
Note:If you want a different trim color, say white, spray the whole building that color, then mask off the trim before you put on the base color. You'll usually need the building(s) to dry overnight after each coat before you start masking for the next coat. Also, if you have a kit-in-the-box that hasn't been assembled yet, do all your spraypainting before you put the thing together. That will save you hours of masking. (See Painting Plastic Structures for details). If you have a building that's already built up, you'll have to do something similar to what we're proposing here, though. MaskingMasking tape is designed to stick temporarily to things you were going to paint around to keep paint from getting slopped onto them, such as natural woodwork in a room where you're going to roll paint on the walls. When you're spray-painting model buildings, careful use of masking tape is the best way to get a good clean paint job of multiple colors. Once you get the "hang of it," and you see how well your masked-and-sprayed buildings turn out and hold up, you may never go back to hand-painting buildings.By the way, you want the normal sand-colored masking tape, not the blue or green stuff. Not only are those more expensive, they actually don't protected the surface to be painted as well as the cheap stuff. (If you're masking over latex, though, they're better choices, because they're less likely to pull the latex off when you move the tape. That said, I never recommend painting outside buildings of any size with latex - it doesn't hold up outside like spray paint or acrylic) Before you begin masking anything, make certain that any existing paint is completely dry. Overnight drying in a dry place is usually good enough, but test a little corner to be sure. The biggest masking mistake most first-timers make is to try to cut pieces of tape the same size as the part they want to mask. Unless you have a remarkable eye, you'll never do that, even if you measure. Instead, think in terms of combining multiple pieces that are each smaller than the area you want to cover.
If you need to cover, say, a 1/4"-wide strip of "woodwork," cut strips narrower and shorter than that. Line up one corner and long edge. Then work your way around, the same way you did on the square, until you have masking tape over the entire strip of "woodwork" and nowhere else.
For a very complex building, this may seem very tedious. That's one reason I suggest starting on relatively simple buildings first. But take it from a person who has very steady hands when he uses a paint brush on tiny crafts - masking and spraypainting will still save you time and produce a better product than handpainting the same building. Better yet, it's something anyone can do with time and patience. It's also something you can do while watching television. As I look at some of the buildings I've masked, I realized what a huge waste of time that would have been if I wasn't already wasting time watching some television series that was mostly talking, so I didn't have to keep my eyes on the screen. The photo below shows two of the Playskool buildings masked and ready for the last topcoat. Clicking on it will show a larger photo.
Finishing the TopcoatsOnce again, when you're sure you've masked everything you need to, use a light spray of Fantastic, Glass Plus or something similar, along with a dry, lint-free cloth to wipe fingerprints off of the exposed surfaces. Most people skip this step, since you'll painting over primer, to which almost anything sticks. But I've seen fingertip oils that got deposited during the masking stage damage the top coat. I did it once myself. Duh.Spray lightly and evenly, as recommended in Painting Plastic Structures. The photos below show two of the buildings sprayed with the topcoat. Click on either will show you a larger photo.
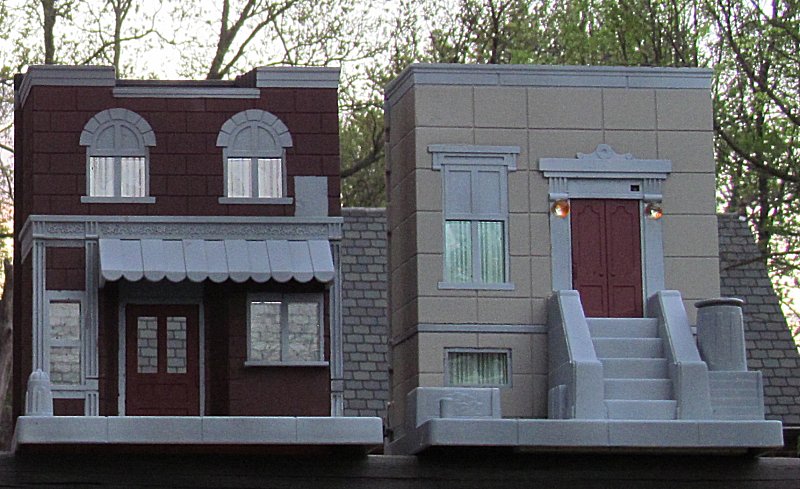
Wait until the topcoat is completely dry before you remove the masking tape. If you have another color topcoat to add, wait overnight before remasking the building. The photos below show two of the buildings that have been sprayed with the topcoat after the masking tape is removed. Click on either will show you a larger photo.
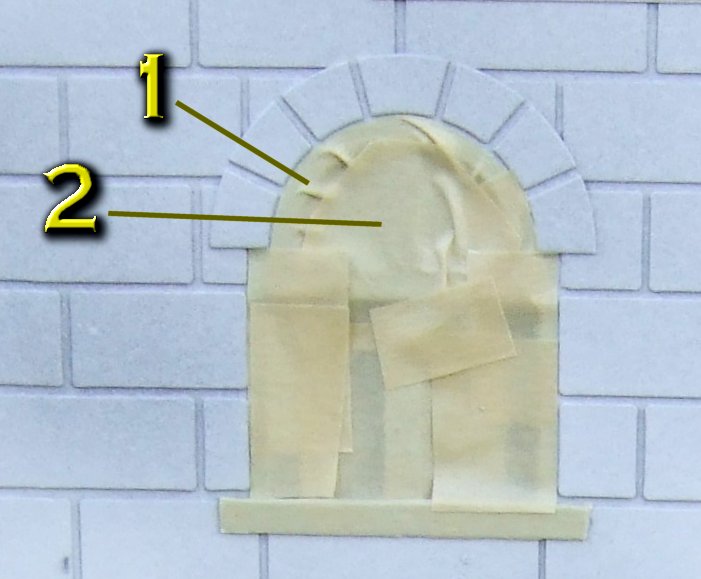
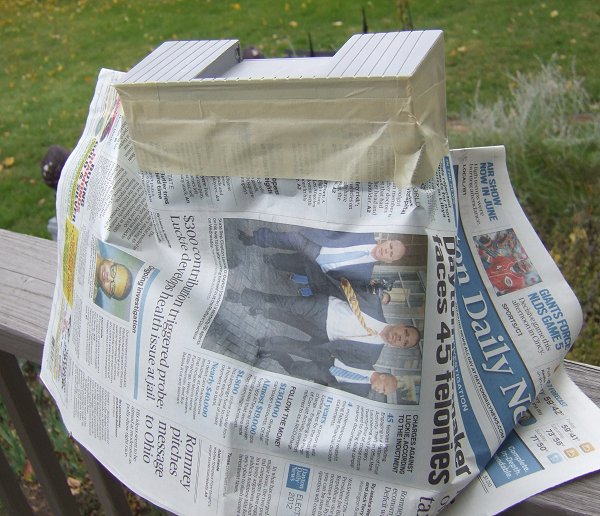
The RoofsI like painting the top of my townhouses and storefronts black or dark gray. Since our sun is so brutal, they turn gray eventually anyway. I have used textured paint to provide a "tar and gravel" look, but it doesn't hold up as well on horizontal surfaces outside as regular paint. On my Playskool buildings, it was an easy job to apply a single layer of tape along the roof molding to protect it, then tape a doubled sheet of newspaper to that tape and make certain there weren't any leaks.
The photo below shows two of the buildings after the roof has been sprayed black and the masking has been removed. As you can see, each layer of color that is carefully added brings an additional level of interest and/or realism to each building. Click to see a larger photo.
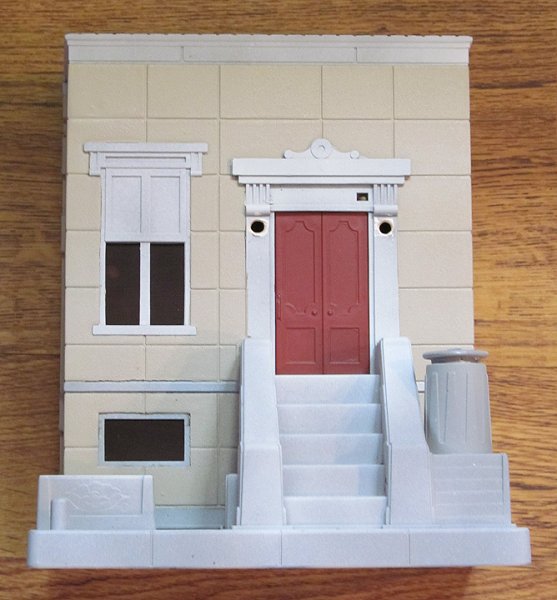
The Doors In these buildings, the doors are soft vinyl that pop out with a little cautious bending, so I can easily paint them separately. I sanded them lightly on both sides (because the vinyl is more resistant to paint), then primed them with "red" primer, since at least three out of four were going to be something close to that when I was done. After seeing how the four buildings in this batch came out, I decided to leave one storefront door in the "red" primer, to match that storefront. Then I painted the other storefront door Brick Red to match that building's color. I sprayed one townhouse door Brick Red and one Olive to give them some needed contrast. That step isn't shown, but I hope you can use your imagination. :-) In these buildings, the doors are soft vinyl that pop out with a little cautious bending, so I can easily paint them separately. I sanded them lightly on both sides (because the vinyl is more resistant to paint), then primed them with "red" primer, since at least three out of four were going to be something close to that when I was done. After seeing how the four buildings in this batch came out, I decided to leave one storefront door in the "red" primer, to match that storefront. Then I painted the other storefront door Brick Red to match that building's color. I sprayed one townhouse door Brick Red and one Olive to give them some needed contrast. That step isn't shown, but I hope you can use your imagination. :-)
The photo below shows all four buildings in this batch after the doors have been painted and reinstalled. Click to see a larger photo.
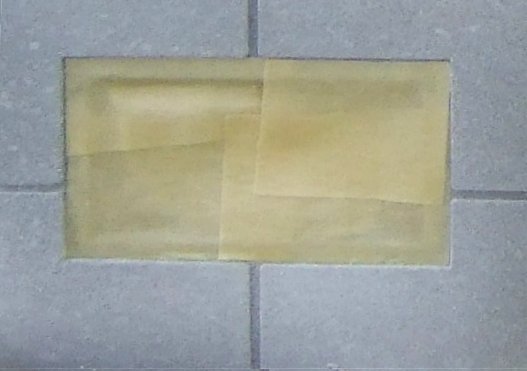
At this point, it might be worth noting that I have spent about $10 for the buildings (at flea markets and garage sales) and about another $10 for the paint and masking tape I've consumed doing the whole project so far. When was the last time you added four unique buildings to your railroad for about $20? Touching UpWhen you remove the masking tape, you will inevitably find little places where the tape didn't seal completely, or that you just forgot to mask. Don't worry, you can still fix that, even if you used spray paint. Get a cheap, cheap brush (the kind they sell in school supply departments ten for a dollar). Then take the color you need and the building you're touching up outside. Spray a little bit of the spray paint INTO the lid of the spray can, dip your brush in, and use that for the touchup. It will dry fast so you'll need to hurry, and the brush you're using won't last long, but you get the idea. Don't bother wasting a dollar's worth of paint thinner to save a 10-cent brush.GlazingAbout four months after I wrote the part above, I finally got around to cutting up some Lucite to make windows for all six Playskool buildings - the four new ones and the old ones I've had sitting out for 12 years. It's a little hard to see in photos because Lucite is, er, transparent. The oversized panes look great from the front and are easier to handle than cutting them exactly to size.
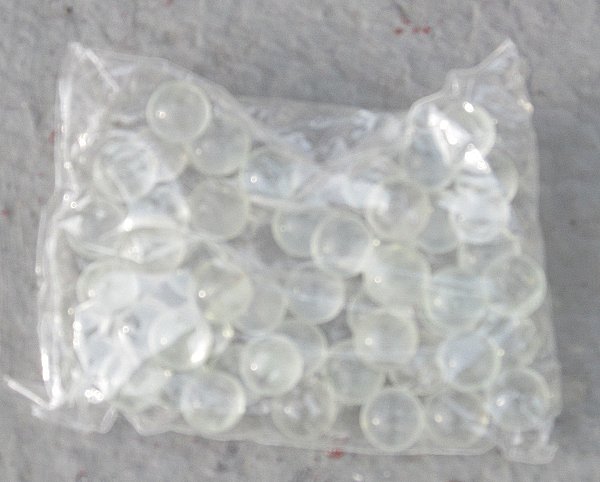
Instructions for this process are contained in our article Glazing Windows with Lucite(r) MarblesWhen I trashbashed my first Playskool set, I couldn't help noticing the little "lights" molded onto the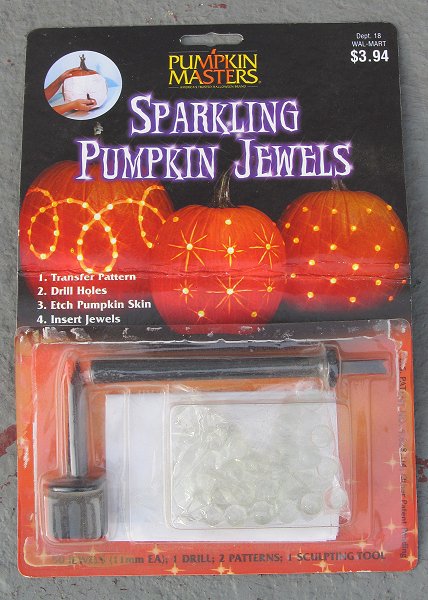 doorposts of the "townhouse" and wishing they were real lights. Then a few years later, looking at Halloween decorations in Walmart, I stumbled across what seemed to be the solution - a package of small marbles you were supposed to put into carved pumpkins to make them seem to be glistening. I bought the set and put it "away" for later (lost it in my workshop somewhere). doorposts of the "townhouse" and wishing they were real lights. Then a few years later, looking at Halloween decorations in Walmart, I stumbled across what seemed to be the solution - a package of small marbles you were supposed to put into carved pumpkins to make them seem to be glistening. I bought the set and put it "away" for later (lost it in my workshop somewhere).
By the way, you can see that the glazing keeps you from seeing inside inside the building as long as there is a "back" on it (in this case the kitchen floor is acting as a back). So even if I don't get the curtains installed, putting backs on the building will take away at last some of the "see-through" look. The following photo shows the three townhouses with the marbles installed, and with the sunlight (representing lighting) at the back. Hopefully when I get around to installing lighting (and backs) the effect will be this good at least.
Marbles Redux - After this photo was taken, I set these buildings on my railroad outside. Within a few weeks, one building still had both marbles, one had one marble, and one had lost both its marbles (I suppose some folks would say that I've lost mine as well). The two most likely scenarios are that: A. The glue didn't hold, or B. Crows picked them out. So using the nasty FixAll glue that I've been using to rebuilt some of my other buildings, I glued new marbles back where the marbles were missing. Then when that glue had dried overnight, I turned the buildings face down and added a big glob of glue on the back of the marble. Once that set, it provided more "surface area" for holding the marble (like palming a basketball). At the moment all six marbles are still in place, so that may have done the job. Detail PaintingIf you're good with acrylic paints and you have some other colors to add, wait until the top coats have been dry for at least a day, then do your "hand-painting." As an example, the Playskool storefronts have awnings that need to be painted.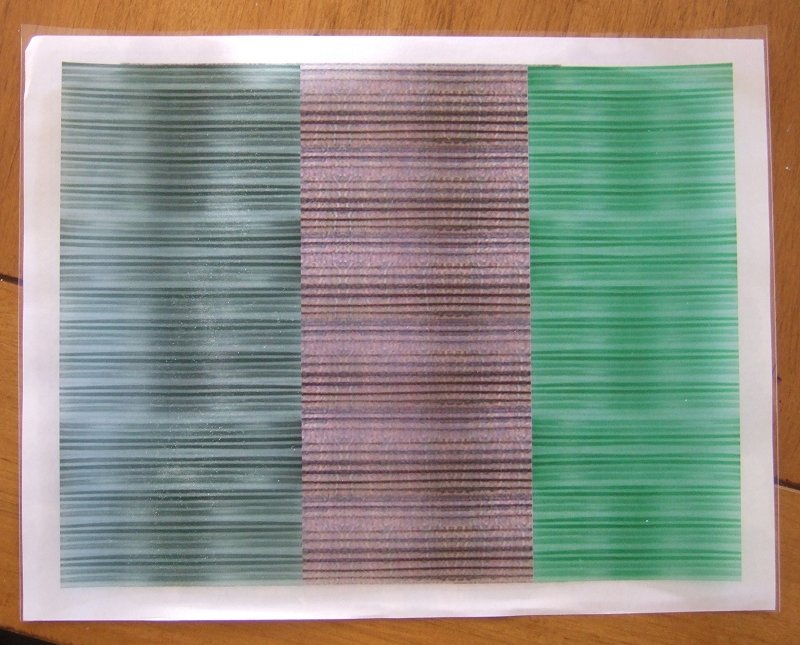
Windows and CurtainsBack in November, I printed curtain patterns on overhead projector film, using my color laser printer (some print shops will do this for you at $1 - $1.50 a page). The patterns I used are the pdf files from our Curtains and Shades resource page. Actually I wound up using this set of "curtains" on some other buildings, but I'll do up a set for these now that they're glazed. These curtains keep folks from seeing into the building and realizing there's nothing there, but allow dim interior lighting to shine through at night.
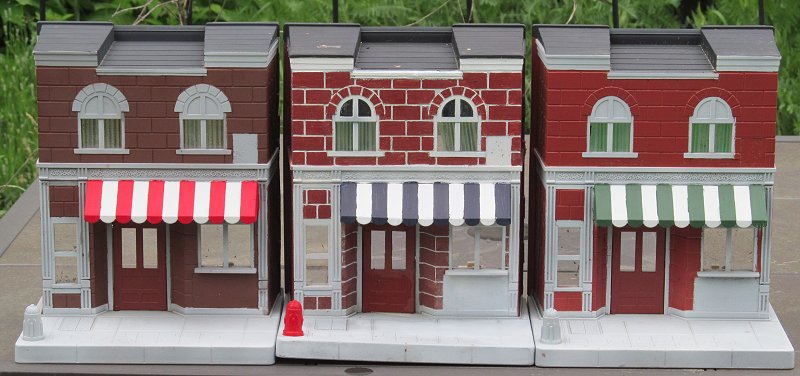
Awnings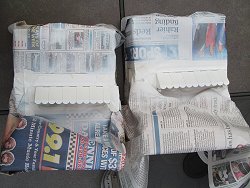 To give the storefronts a bit more interest, I wanted to lose the "cement" color of the awnings. I could have brush-painted them, but I prefer the durability and smoothness of spray paint. Using masking tape and lots of newspaper, I masked off everything but the awnings, then gave them two coats of flat white. To give the storefronts a bit more interest, I wanted to lose the "cement" color of the awnings. I could have brush-painted them, but I prefer the durability and smoothness of spray paint. Using masking tape and lots of newspaper, I masked off everything but the awnings, then gave them two coats of flat white.
My daughter Molly then used acrylic craft paint to paint the colors on the awnings. She also repainted the faded colors on the awning of the first Playskool store we trashbashed this way (in the middle of the photo below).
I never put signage on the old one, but we're thinking about making the one with the red and white awning into a barber shop, the one with green into a grocer, and the one with blue into a deli. All three businesses provide a wealth of detailing possibilities (although those may come later). We only painted one of the "fire hydrants" because I'm planning on using lampposts or something else to hide or replace the other ones.
BacksIf you're using buildings like this on a shelf railroad, you can just set them in a row somewhere, put figures on the sidewalk, and people will never realize that they're not as deep as they "should be." This is true of almost any storefront model - people who drive or walk by the real thing don't realize that the stores are usually five to ten times as deep as they are wide.If you're a stickler for architectural accuracy, you can always back your storefronts up with a plywood box or something to achieve a more realistic depth. But in my case, the main reason for putting backs on the buildings is so I can light them properly without light streaming out the back, or, during the day, being able to see right through the building's window glazing and/or "curtains" to the garden. My preferred material for this (because it's cheap and sturdy) is road spam, those fluted plastic signs that people from other states like to trash your neighborhood with, selling "credit restoration," overpriced off-brand mattresses, or whatever. There's nothing to fasten the road-spam to at the top or sides, but there's no reason I can't use two screws through pre-drilled holes on the bottom and electrical tape to hold the top and sides in place. I've also considered that setup where you use double-faced tape to stick velcro to something. LightingI've tried several different arrangements for interior lighting, using twelve-volt systems. One of our most popular articles on the subject is Lighting Buildings using 12-volt Garden Lighting Systems. The downside to the system described in that article is that it's hard to find bases for the wedge-shaped bulbs, and those bulbs are usually too bright for realistic building lighting (even if you can track down the 4-watt versions). For this project, I may try 12-volt bulbs from specialized Christmas strands. Right now (pre-Christmas season) the "naked" bulbs are available at Wal Mart (in several voltages, so be sure to get the 12-volt ones). I could solder leads right onto the "pigtails," though I'll try to see if I have a dying light strand with the right size sockets that I can cannabalize. We'll see. One advantage of this approach is that putting two or three dim lights in each building (wired in parallel, since they're already 12 volts) should give a more even lighting than one bright light. Plus, I can light the top AND bottom floors of the buildings that have floors more easily.ConclusionAs you can tell, I don't have these exactly "done" yet, but they'll look pretty good for now as soon as I get the signage, and eventually lighting.I hope seeing a blow-by-blow description gives you some ideas and encouragement. As you've probably figured out, nothing I do is rocket science or comes with a "do not try this at home" warning. On the other hand, as a former teenage model railroader now preparing for retirement,, I have been exercising some of these skills for over fifty years. So if your first project or three don't come out quite the way you wanted, don't worry, you'll get better with practice. In the meantime, I used these buildings AND my old ones for a Christmas-themed open railroad in December, 2012. Then I took the disintegrating buildings apart and cut plexiglass walls for them from an old restaurant sign I trashpicked. I don't have them back together yet, but one day . . . . Even knowing what to do and what not to do, will I ever reach a point where none of my structures needs work? I'd be very surprised if I did. Unlike an indoor railroad, a garden railroad is organic in every sense of the word, and our little houses face the same challenges outdoors as our big houses do. Please get in touch if you have anything to add, any questions, any corrections, or any photos you'd like to share. And let me know if you're heading toward Ohio any time between now and next July - I may be able to put trains on the track for you. Enjoy your hobbies, and especially any time you have to spend with your family in the coming months! Paul Race |


|
|
| 
|
|
 |
|
 |
 |
Note: Family Garden TrainsTM, Garden Train StoreTM, Big Christmas TrainsTM, BIG Indoor TrainsTM, and BIG Train StoreTM are trademarks of Breakthrough Communications (www.btcomm.com). All information, data, text, and illustrations on this web site are Copyright (c) 1999, 2000, 2001, 2002, 2003, 2004, 2005, 2006, 2007, 2008, 2009, 2010, 2011, 2012, 2013 by Paul D. Race. Reuse or republication without prior written permission is specifically
forbidden.
Family Garden Trains is a participant in the Amazon Services LLC Associates Program, an affiliate advertising program designed to provide a means for sites to earn advertising fees by advertising and linking to amazon.com.
For more information, please contact us

 |  |