| |||
 |
 |  | |
 |
 | ||
 |
 | ||
 |  | ||
 |  | ||
| |||
|
| | |
|
| ||
|
|
| ||
| | ||
| | ||
| Written by Paul D. Race for Family Garden Trains(tm) |
 |
|
|
Landscaping Hints for Garden RailroadsAs fun and attractive as garden trains are, they are far more fun to watch in an attractive, natural-looking setting. I say "natural-looking" because, in most back yards, it takes a lot of elbow-grease and "store-bought" materials to achieve what visitors will perceive as "natural beauty." Fortunately, many applicable resources about landscaping and gardening are available, including books on landscape design, rock gardening, and water features (ponds, waterfalls, etc.).The basic principles of landscaping apply to garden railroads as they do to any other kind of garden. This article is simply an overview of how a garden railroad can affect your overall landscaping plans and vice versa. Start By Knowing What You HaveAny landscaper worth his or her salt will start out by drawing a sort of scale map of your property, showing the location of your house and other buildings, your driveway and sidewalks, and any large trees you'll have to work around. If you have a septic tank, include that and the leach bed in your plans. This will come in handy when you're trying to determine:
If you're already computer-savvy, you might want to do this with a computer program. That said, most inexpensive or shareware "landscaping" programs are cumbersome and limited - if you rely on the program too much, you might wind up ruling out ideas that would have been easy to work out on paper. I do admit that I used a professional graphics program for my example pictures, but that's only because my drawing is so bad, you wouldn't have been able to tell what I was trying to show you. In other words, most folks would be better off with a piece of graph paper and a ruler. Then you can make a bunch of photocopies and draw all over them if you'd like. One professional landscaper/garden railroader I know starts out with a scale overhead drawing of the property, then lays transparencies over it as he works. One layer might have the water features, another layer the proposed vegetation, another layer the railroad, and so on. That way the homeowner can examine each aspect of the overall plan, both by itself, and also in context with the other aspects.
In addition, if you have a septic system, you should know where your septic tank and leach bed are. You need to keep anyone from driving over/into your septic system during construction, and you need to avoid setting up anything that would keep the guy with truck from getting to it when it needs service. You also don't want to try installing a pond in the middle of your leach bed. A Note About The Example Drawings - The little drawings in this article aren't meant to show an "optimum" installation - they're just meant to illustrate one point at a time, and to show how each aspect of your landscape design will affect all the other aspects. Hopefully your drawings will be entirely different, and probably better. Consider How Much Yard You Want To Leave in LawnNow that you have some idea of what the "non-negotiables" are in your domain, you may dream of having every other bit covered with trains. However, your family might also like having a place to set up a croquet game or play touch football or something once in a while. If nothing else, you need a place where people can sit and watch the trains. I've visited garden railroads that visitors couldn't really enjoy because, after the homeowners had crammed trains into every square foot of the back yard, there was only room for two people to sit down and watch/run the trains (and the homeowners sure weren't going to give up their seats). In the example above, it turns out that the leach bed area (which you don't really want to cover with landscaping) is a good place to keep in grass, anyway, so the logical places for a train garden and/or water features are probably along the fenceline somewhere. Consider WHERE Your Focus Point(s) Should BeWhen you're thinking about where the trains and other features should be, you also need to think about where you and/or visitors will be sitting to run or watch them. In addition, for many folks, the waterfall and pond are the largest non-railroad features, and you can enjoy them even when you're not running trains. So it makes sense to place them where they can be viewed comfortably. For some homeowners, this means placing your water features and some significant portion of your railroad close to the back porch or deck. In our example drawing above, a logical place might be along the left fence line. Know Your Trees and Know Your ShadeOn the other hand, if the house in our example is facing south, putting the railroad on the fence line nearest the deck would mean that you'd be staring into the sun in the afternoon. That doesn't mean you can't plan a railroad for that location, only that your plans might involve putting a shade tree in that corner your first year, or compensating in some other way.On the other hand, if you don't mind walking out to the railroad, the back fence has shade on both sides (unless the house is facing east). Once you've figured out where the shade is, determine whether it's safe to have your trains and towns right under the trees. Watch out for:
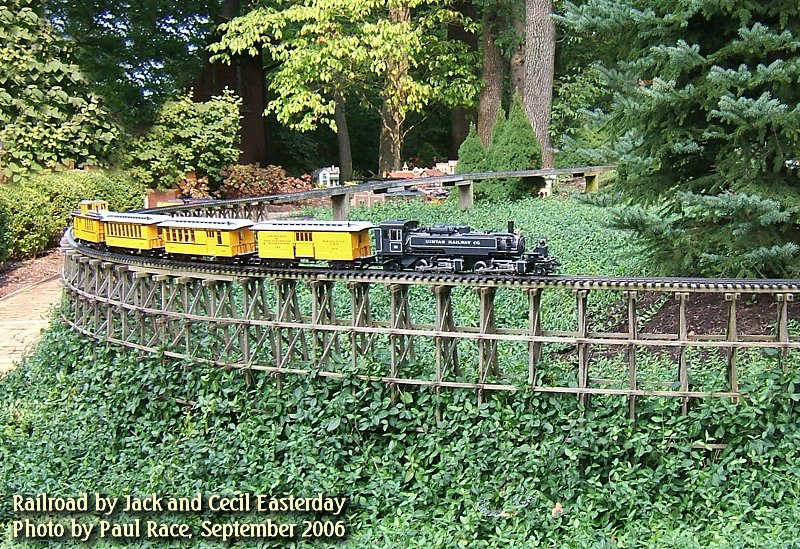
Consider the Yard's SlopeAlthough most beginning train gardeners tend to stick their track on the ground, trains and accessories are a lot more fun to view if they're raised a little in relation to the viewer. Frankly, it's more fun to see trains, towns, and little people from the side than from the top. You can probably tell that I'm going to recommend some sort of raised railroad anyway, but what if your yard has a significant slope?
Consider PrivacyIf you live on a well-traveled street, especially a street with a lot of foot traffic, you might want to consider screening the most obvious or expensive features of your garden railroad from passers-by. Fortunately, thefts almost never occur, and vandalism is rare. But you can reduce the attraction if the major features of your garden railroad aren't blatantly obvious to everyone who drives or walks by your house.If your "screen" is too obvious (like a privacy fence in open country), that can draw attention, too. But if you can obscure the view of your railroad from the street by a few well-placed bushes, take that into consideration. Consider Water RunoffEven if you live in a dry climate, you have to pay attention to how heavy rains affect your property. That doesn't necessarily affect the placement of your railroad, but it will affect how you install it. Also, some plants you might plan on using (like Thymes) don't like standing in water any more than your trains and towns do. The short version is, you'll need to think about raising the railroad and creating drainage opportunities (like "dry riverbeds") for any low spot that gets saturated or any place where the water streams through when it rains.By the way, don't consider installing a pond in the low part of the yard. Herbicides or insecticides you use in your yard wash into the pond and kill your fish and plants. Even less appealing, if you get high groundwater on a day your pond isn't filled to the brim, the pond can rise out of the ground like a blob from a horror movie, taking track and accessories with it. Decide HOW Your Focus Point(s) Should InterrelateA classical garden is structured so that, wherever you stand, your attention is drawn to a fountain, sculpture, or some other point of interest. Conversely, an English country garden may be structured so that you seem to be wandering through the various paths, but eventually you come across points of interest just the same. In the first case, you can often take in everything you need to know about the garden in a glance. But the second case invites you to explore, and maybe even get "lost."To my way of thinking, a garden railroad should be more like the latter. It should have multiple points of interest, at least some of which aren't obvious when you first enter the area. True, lots of folks who put trains in their garden don't think about points of interest at all. But technically a loop of track with a train running on it isn't a point of interest (unless it's a very small loop). More likely, the track will eventually connect multiple points of interest. Some of these, like a farm scene, might require close viewing, and others, like a waterfall, might be appreciated from a little further off. Except for water features (ponds, waterfalls, etc.), you don't have to install all of your points of interest right away, but your railroad will be better in the long run, if you at least think about them from the start. Balance Your FeaturesIn landscaping, balance refers to equal viewing attraction, not to symmetry. Unfortunately, many beginning train gardeners install the waterfall or pond dead center of their planned garden, so that it's obvious that it was planted there, like a gazebo. Yes, it's a major feature, but it looks far more natural if it's a little offset. I like to think in terms of thirds or fifths, which tend to seem more natural than halves when you're measuring off areas and placing features.
Some homeowners would prefer the first view because they think the second version looks "lopsided." But balance is NOT symmetry. Avoid rows of anything. Avoid putting your features all the same distance apart. Plan to put your shrubs and dwarf trees in clusters instead of evenly spaced. Regarding elevations, a broad medium-height area may balance out a narrower tall area. Fortunately, if you don't come up with the optimum setup when you're doing preliminary landscaping, you can help balance things visually later by adding brighter colors or other planting variations, as described further down. Provide Vertical InterestAs mentioned earlier, it's more fun to see trains, towns, and accessories from the side than from the top. But, even if you have mostly raised track, that doesn't mean that everything should be at the same level as the trains. For example, a pond that is just above ground level (to keep it safe from runoff) makes it easier to see the goldfish when you're sitting nearby. But a waterfall that you have to raise your eyes to see is more interesting than one that you can take in at a glance. Even if your mainline is raised to a comfortable viewing position (20-30" off the ground), that doesn't mean you can't have a town or a loop of track at ground level one place, and other features 2' above the track.
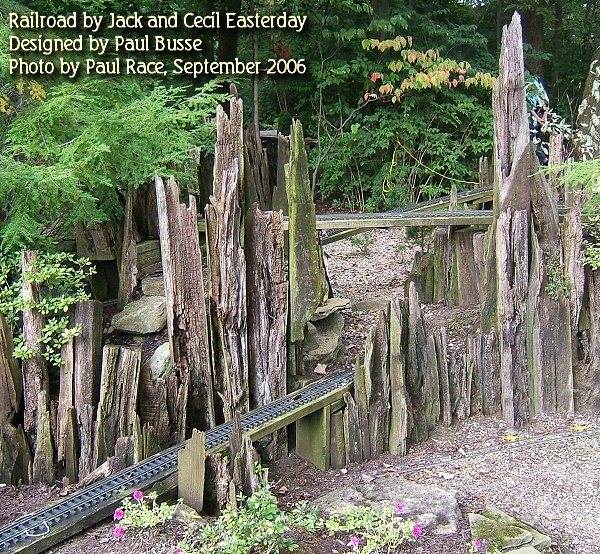
In our example to the right, I show some of the railroad at ground level, some of it raised (symbolized by a trestle), and the waterfall taller than both. In addition to those concerns, your waterfall will look more natural if you have other parts of the railroad area raised as well. Don't assume you have to haul in tons of rocks and dirt to accomplish this - there are ways around that. If you don't have room for bunch of big, real rocks-and-dirt mountains, you can use trestles or raise relatively small areas by using something like old railroad ties buried vertically (below left) or home-made concrete "outcroppings" fastened to lumber-and-hardware-cloth frames (below right). The point is not to worry about the logistics of building raised sections now. Just spend some time imagining how your garden railroad (and your back yard as a whole) will look with more impressive topography.
Plan Access to FeaturesGood access doesn't necessarily mean that you fall over a feature as soon as you enter the back yard, or that it's front and center. You may want to be able to enjoy it from the patio, or you may prefer to walk a short way and enjoy it from a little observation area away from the house.In our example, you would have a good view from the patio and a great view from the shaded center of the yard. But visitors coming through the side gate (to the right) would also be rewarded with a great view as they round the corner of the house. Once you've decided where you want the main feature and where folks will be able to relax and enjoy it, think about the other features and how folks will access them. Plan Routes Among FeaturesA big mistake that indoor railroaders frequently make when they move outside is to recreate a "train table" effect. That is, they install a loop of track somewhere that visitors can take in at first glance, and that everyone either stands on one side of or walks around just like they would a train table in someone's basement. Garden railroads are much more interesting if you can't take the whole thing in at a glance. Some folks use the term "interactive." This doesn't mean that the visitors actually run the trains (although that's a possibility, too ) but that the visitors have to move around to enjoy all aspects of the railroad. If you can help visitors feel "immersed" in your railroad, surrounded by the garden, they'll get into it that much more. So instead of a garden railroad that's shaped like a box or oval, what about one that's shaped like an E or an S? In an "interactive" garden railroad, visitors are guided from one feature to the next by paths or by barriers, such as plantings or raised sections. On your plans, sketch out a dozen different ways to arrange your features, and consider ways to require visitors to move around to see them all. In our example, parts of the larger railroad section are hidden from the "preferred viewing location" by the raised sections. If you add other features that can only be seen by walking around the pond, you force the visitor to take a more active role in viewing your railroad.
Use Lines to Draw AttentionWhile you're deciding where to place your most important features, consider how to draw the visitor's eye where you want. A landscape designer would tell you to consider the "lines" of your garden. For example, you can achieve a more natural look if you don't have straight borders or paths, or 90-degree angles. Use a broadly curved path to draw the viewer's eye to the waterfall, rather than a straight sidewalk.Vary Textures to Draw Attention Any landscaping material or plant that you use throughout your railroad will eventually become "background noise" to viewers. That's a good thing, because you can use relatively inexpensive products like railroad ties and clustered plantings of Dwarf Alberta Spruce to tie your railroad together visually. Any landscaping material or plant that you use throughout your railroad will eventually become "background noise" to viewers. That's a good thing, because you can use relatively inexpensive products like railroad ties and clustered plantings of Dwarf Alberta Spruce to tie your railroad together visually.
This, in turn, gives you the ability to provide contrast where you want to draw attention. You may want to include a "specimen plant" like a Threadleaf Japanese Maple near one feature, to draw attention to that corner; then use another specimen plant, such as a Boulevard Cypress trimmed to look like a deciduous tree, near another feature. Include TransitionsTo help your garden railroad look like part of the back yard, the landscaping around the railroad should "ease" the viewer's eys from the miniature world to the real world. Some folks move dwarf trees that have grown too large to be near the trains to the "transition area" - they have the same texture but larger size. Others plant small perennials like Finger Geranium or Threadleaf Coreopsis in the transition area - they have different textures but similar sizes.If your garden railroad's "hills" are very tall, you might want to add lower hills around the edges to ease the sense of vertical transition. However you plan your transition area, think of it as "easing you" into (or out of) the miniature or magical world you've created. Plan to Build in Stages Even though you should start your planning with the "big picture," you'll probably enjoy your garden railroad more in the long run if you build the railroad itself a bit at a time. In our example landscape/railroad project, it would be possible to do the waterfall and pond first, then install a relatively small ground-level garden railroad to the left of the pond. Once you have that much "under your belt" - and hopefully paid for - you can start with the railroad section on the right. And if you decide to tie them together with tracks along the back fence, you can do that even later. Even though you should start your planning with the "big picture," you'll probably enjoy your garden railroad more in the long run if you build the railroad itself a bit at a time. In our example landscape/railroad project, it would be possible to do the waterfall and pond first, then install a relatively small ground-level garden railroad to the left of the pond. Once you have that much "under your belt" - and hopefully paid for - you can start with the railroad section on the right. And if you decide to tie them together with tracks along the back fence, you can do that even later.
The point is that a plan that requires tearing the whole back yard up at once and having to wait months or years before you see the waterfall working or one train running is usually a bad plan. Our article Building a Garden Railroad on a Budget has some additional tips to help you avoid "biting off more than you can chew" when you're first starting out. ConclusionAll of these "hints" are just suggestions, based on things I've studied and things I've seen, not entirely on my own experiences. In fact my own garden railroad was mostly built before I knew about any of these principles. If you ever come to one of my open houses, you'll be able to tell that immediately.Some of these suggestions won't work in your yard, period. Some will conflict with each other, and you have to choose which is most important to you. Some of them will have to be adjusted when you create your track plan. In fact I have three articles on track planning that are just as important as this article:
I'd be delighted to hear about or see examples of anything you've tried to give your backyard railroad a compelling "natural" setting. As always, please contact us with suggestions, corrections, photos, etc. And, above all, enjoy your trains and any time you have to spend with your family in the coming months.
|


|
|
| 
|
 |
 |
|
 |
 |
Note: Family Garden Trains?, Garden Train Store?, Big Christmas Trains?, BIG Indoor Trains?, and BIG Train Store? are trademarks of Breakthrough Communications (www.btcomm.com). All information, data, text, and illustrations on this web site are Copyright (c) 1999, 2000, 2001, 2002, 2003, 2004, 2005, 2006, 2007, 2008, 2009, 2010, 2011, 2012, 2013 by Paul D. Race. Reuse or republication without prior written permission is specifically
forbidden.
Family Garden Trains is a participant in the Amazon Services LLC Associates Program, an affiliate advertising program designed to provide a means for sites to earn advertising fees by advertising and linking to amazon.com.
For more information, please contact us

 |  |