| |||
 |
 |
 | |
 |
 | ||
 |
 | ||
 |  | ||
 |  | ||
| |||
|
|
|
| |
|
|
| ||
|
| ||
| | ||
| | ||
| Written by Paul D. Race for Family Garden Trains(tm)
and New Boston and Donnels Creek: |
 |
|
|
Prepping for the 2013 Open Railroads
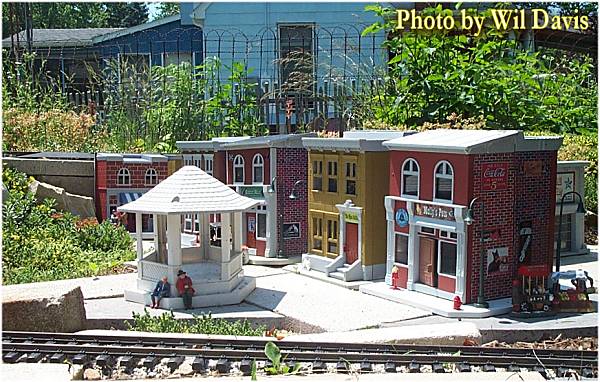
The New Boston and Donnels Creek RR is on the open house schedule for the Friday morning (June 7) bus and driving tour for the 2013 National Garden Railway Convention in Cincinnati. We will also be open Sunday afternoon, June 9 for folks heading north or east out of the area. As I reported in our article "The More Things Change", this presents special challenges for a garden railroad that has seen a lot of work in the last 14 years, but hasn't changed that dramatically since the last national convention.
|
 |  |
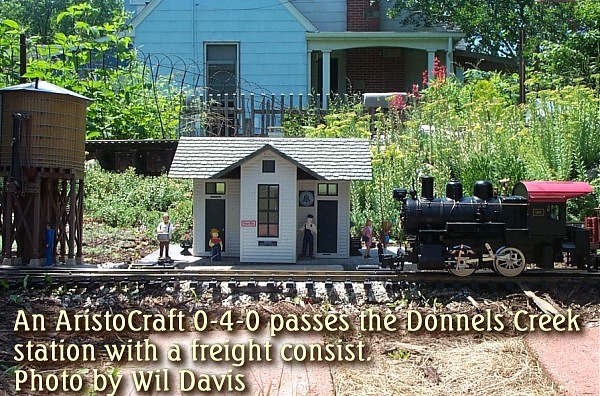 One Model Power "Garden City" station kit (#1603, made by POLA, no longer available) that I painted and built up. One "lesson learned" from this one is that I used white primer instead of gray or rust, and when it's lit from inside, the walls glow. Plus, this is one of the few Euro buildings on which I used the included plastic glazing. Unfortunately, this has crystalized and yellowed since this photo was taken. On our railroad, you can't really tell (unless you lay on the ground and try to look into the windows), but it does constitute a "lesson learned" for me.
A Fisher Price firehouse After the photo above was taken, I added glazing and "curtains".
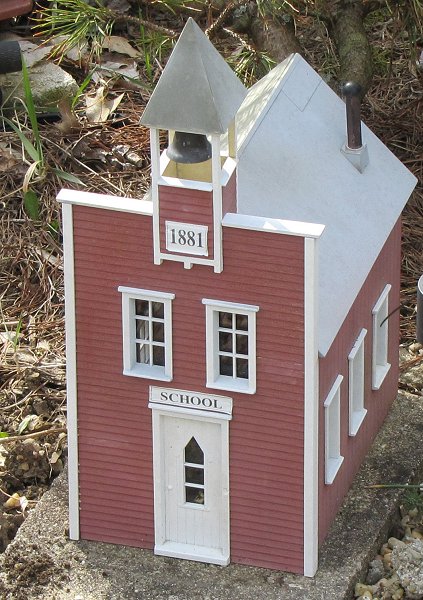 One Piko Pleasantown schoolhouse kit. The only problem with this one is that the red spray paint I used was not UV resistant. I painted over indoor/outdoor primer, so the building's structure is as solid as ever, but the walls have faded to something like dark pink. When I get time . . . .
 One Piko Gingerbread house kit (#62240). Details on how I painted this are in our "Painting a Piko Gingerbread House" article. It's been out year-round for several years and looks almost exactly like it did when I first set it out. Because I replaced the supplied plastic glazing with Lucite(r), its windows haven't even yellowed.
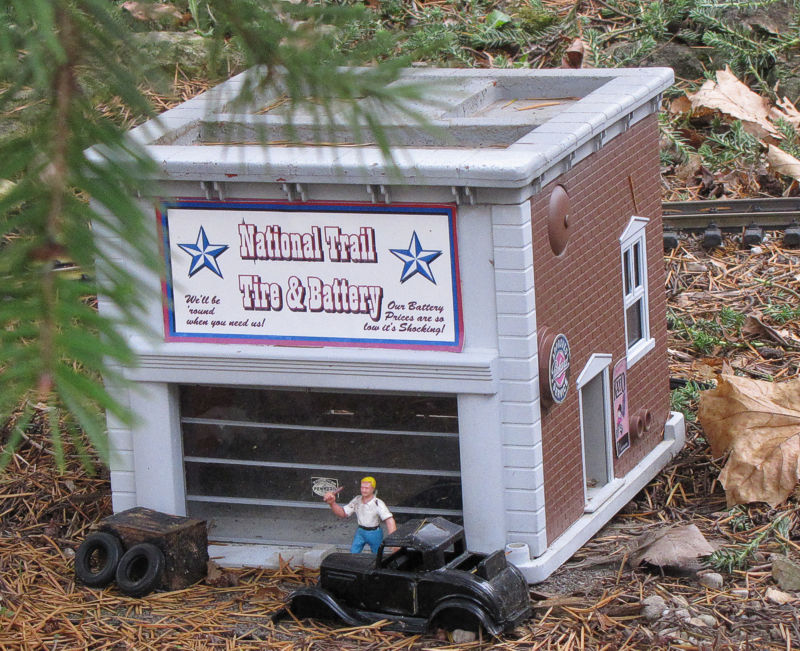 converted to a tire store. This was one of the trashbashed buildings that was 100% plastic. I filled the missing back panel with a bit of road spam, and that's held its own as well. The signage needed replaced, and some of the paint on the roof needed a refresh, but I still have the graphics on my computer so that's no big deal. Other than that, it has held up as well as my plastic kits.
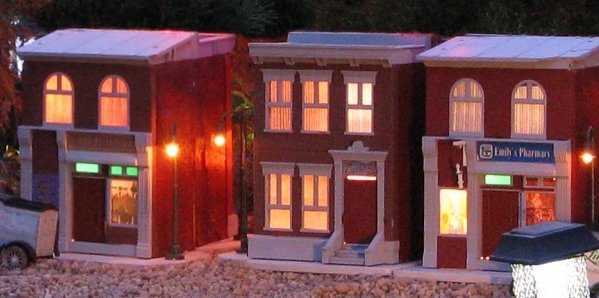
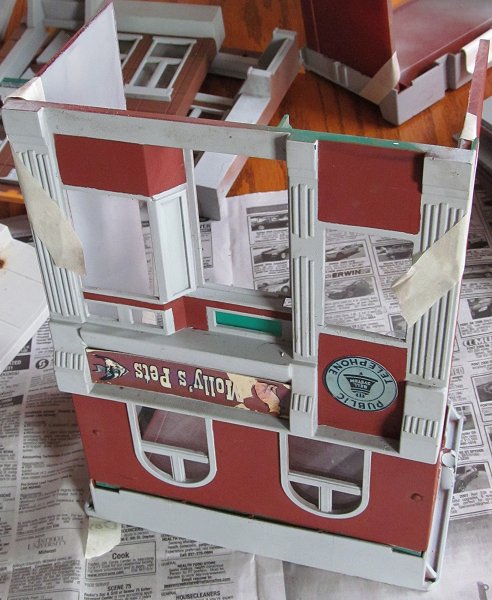
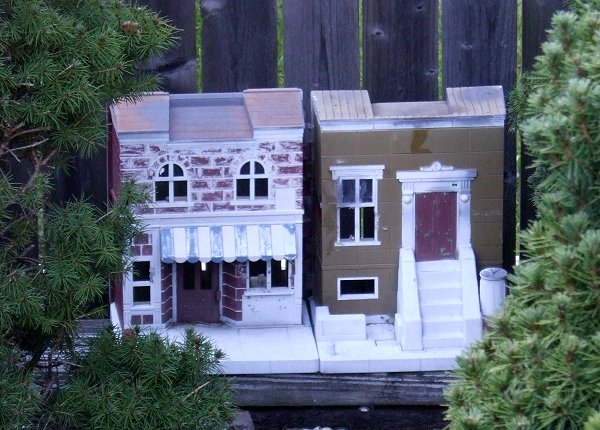 The Playskool Sesame Street storefront and townhouse are 100% plastic, and they've been out of doors since 2003. The spray-painted parts have held up except for the faded roofs and some areas on the townhouse that were damaged by proximity to conifers. I had also painted the bricks and awnings on the storefront with acrylic craft paint, and that faded. In both cases, there was gray or red primer underneath, so the plastic is still sound. The photo below shows the buildings with the gray trim, faded bricks, and black roofs touched up.
 In the photo of the townhouse, you can also see my experiment with drilling out the molded-in lamps on the townhouse with small clear marbles. The idea is that when the buildings are lit internally, the little marbles should glow. On the other hand, since my June open RRs will be during daylight hours, I've had to move internal building lighting to the back of the queue.
  The Artline Western Town was originally a bird feeder. Of all the buildings on my railroad, this has the thinnest plastic, and, in spite of multiple layers of paint, it has turned brittle. The "glazing" that came with the bird feeder has crystalized and yellowed, as well, though that's not so obvious because the windows are relatively small. For the open railroad, I needed only to refresh the signage.
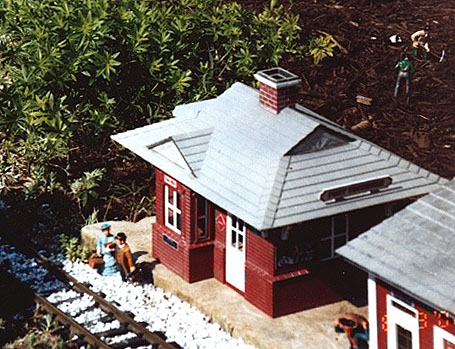
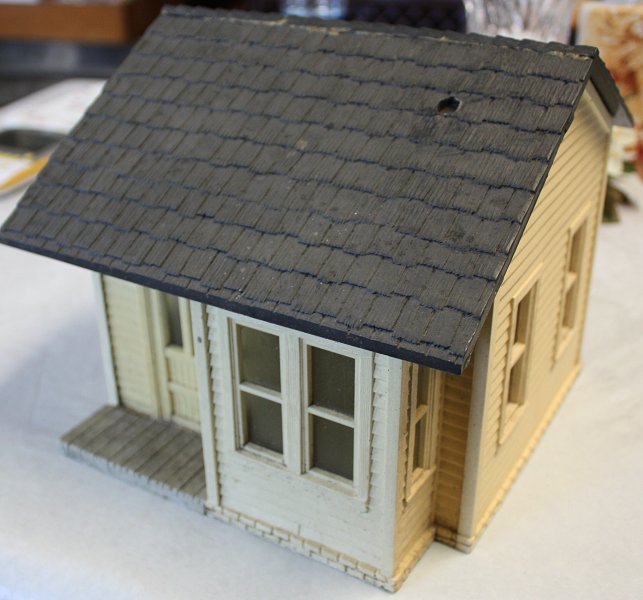
 I haven't gotten around to painting the North States Red Barn and White Church (not shown). You can tell - the barn's loooking a tad pink and the church is looking a tad yellow. That said, they've held up very well.
Buildings That Need(ed) a Repaint
 The white paint of the Artline gazebo that started out as a bird feeder has yellowed more than I would have expected. I don't remember now if I started with gray or white primer. It's possible that I used white primer, which would have allowed more UV to reach the plastic than the gray primer would have. If I have half a chance, I'll repaint the thing, which shouldn't take long. By the way, an article about how to chop and reassemble the bird feeder into your own attractive gazebo is here
 My Fisher Price Cape Cod has wooden ends that were initially covered with stickers. Although I attempted to seal over them with paint, the stickers peeled off eventually, exposing the wood. If I get time I'll repaint the wood and set the thing back out. A few of the details I added seem to have disappeared, including shutters and one windowframe (made from a fruit carton). If I can't find or replace those details, the house may have to stay in storage this spring. We'll see.
By the way, like the Fisher Price School House, the base of this structure was originally Masonite. The bugs really enjoyed tunneling through it, chewing as they went. So I replaced the base with a plexiglass slab some time back. That's still fine.
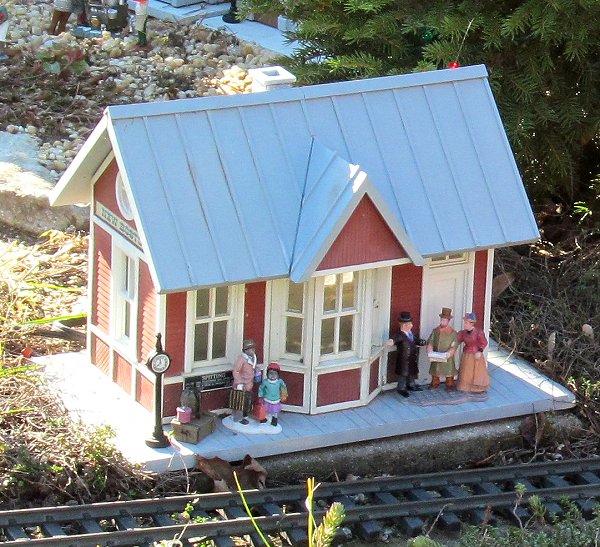
 A Korber "Centerville Station" that I once used as a house got reassembled this week. Korber was a small brand made in the 1980s. They only made a few small model buildings. Though the pieces were sturdy, they didn't have the "snap-together" features of the European companies, and Korber never had enough volume to get economies of scale. In the early 2000s, this building got smashed apart several times by falling tree branches. At one point, I put all the pieces into a shipping envelope with the idea of reassembling it later. Then I midlaid the envelope. Let's face it, a flat envelope is a lot easier to lose than an assembled buiding.
In April, I came across the envelope while I was looking for something else. I discovered that I had already cut some Lucite to use for glazing, but I never had time to put the building back together. This week, I glued the glazing in place, then glued the building back together using a glue that I hope will be less brittle than the glues I used before.
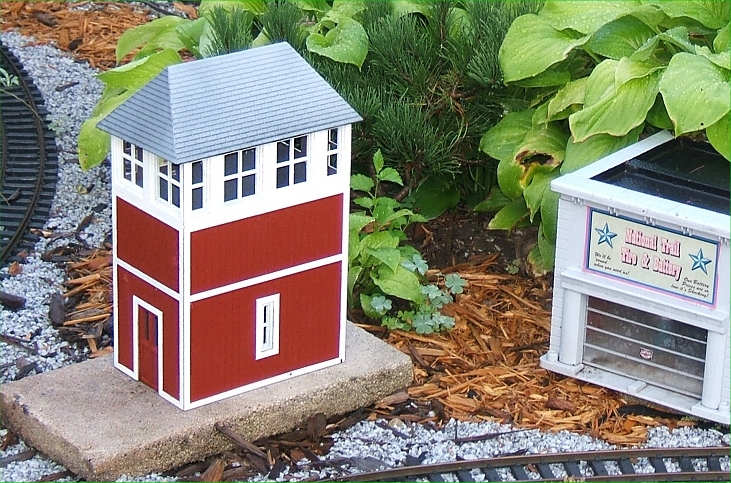
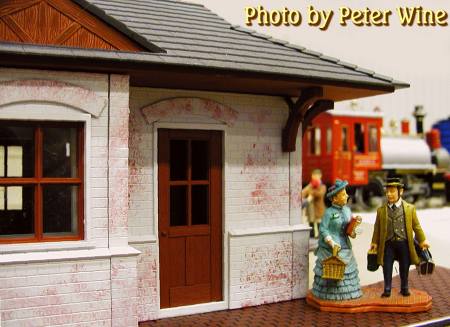
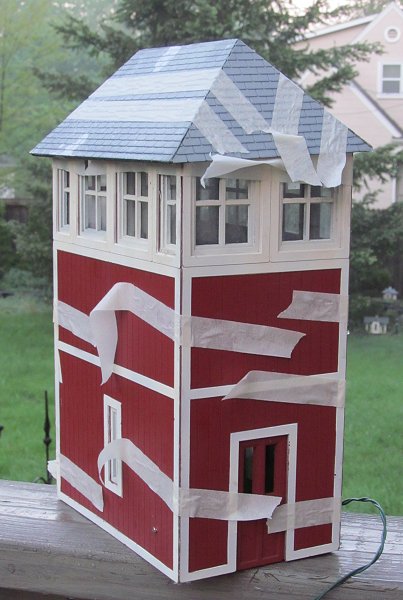 A couple of years ago, my Colorado Model Structures tower blew across the yard in a windstorm and broke into pieces against a tree trunk. Ooops. I had put it away until I had time to reglue it, then had trouble finding it as well. Since I had featured this building in an article, I wanted very much to include this structure in my open railroads this spring. So I tore my "odds and ends" boxes apart until I found it. On inspection, the paint job and glazing were as good as ever. But the Superglue I used to hold the thing together had turned brittle. So I broke the Superglue off and glued the building together using a nasty, slow-setting, but more flexible glue - "Fix-all" from Big Lots.
CMS makes remarkably inexpensive buildings, but some bits, like the roof of the tower, are a bit tricky to glue together. During the "gluing together process," I got enough glue onto the roof, that I should hit it with gray primer again before I set the building out. Plus I'll need to figure out how to keep it from blowing across the yard in the future.
 As I've mentioned elsewhere, my biggest building maintenance headaches came from a "shortcut" I took when I first trashbashed several Fisher Price buildings that had pressed wood components. All of those structures looked great for several years. But the pressed wood components eventually swelled and started to disintegrate.
Early this spring, I removed the gooseneck lamps I had installed and soaked all of the Fisher Price city buildings in a big plastic storage bin. It took days for the sidewalls to get really sloppy but once they did, I used pliers to pull the walls apart. The roof and foundation were not attached directly to the face of the building, so when the last bit of sloppy pressed wood came off of the last screw, the building's plastic pieces were also separated.
Why not just unscrew the little screws? Because they had rusted years ago to the point where they wouldn't come out period. On two sets that I had not yet converted, I tried drilling the screws out, but that didn't work either - the plastic roofs were too brittle to stand up even to that mild pressure. 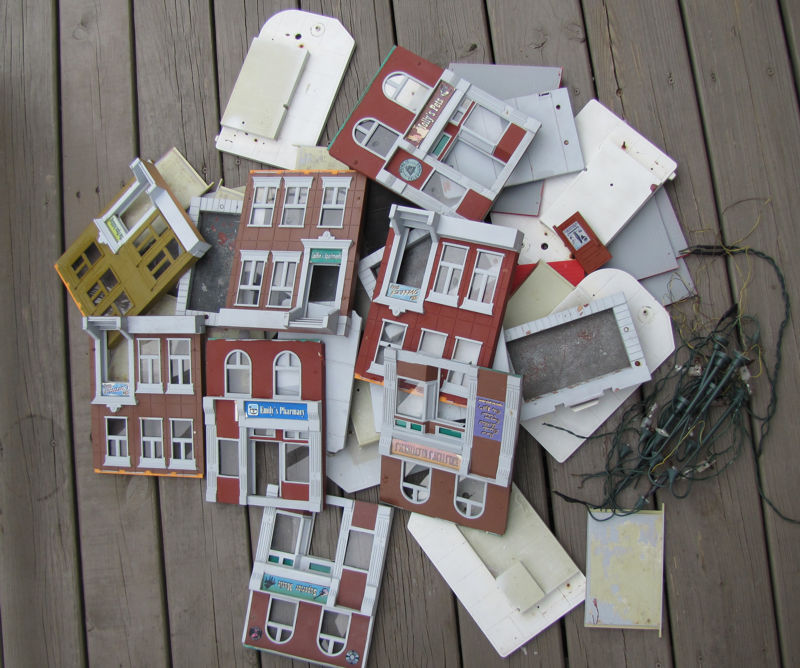
If you click on the photo to the right, you'll see that the 19-year-old paint job on the plastic pieces was almost as good as new.
Since I had eight of these buildings to reassemble and four to paint and assemble, I pulled out a big piece of scrap plexiglass that I had salvaged from a restaurant that used to discard big plexiglass menus every time their prices changed. I cut 24 pieces that would become the sidewalls. Then I spraypainted them twice with red primer on one side, then once with gray primer on the other side.
|
|
|
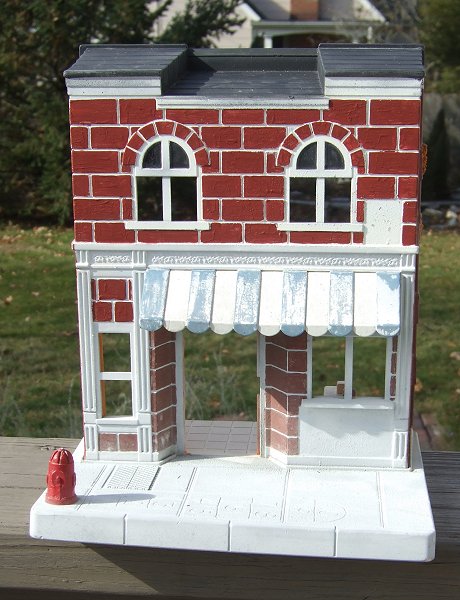
As the Fisher Price Sesame Street storefronts were originally assembled, the roof sloped down toward the street and protruded out a bit. I had been thinking about putting cornices on the storefronts. Once I had them apart, I realized that it wouldn't be that much more difficult to reassemble the storefronts with the roofs on "backwards" than with them on "forwards." I glued the face and walls to the roofs first using the noxious Fix-All glue from Big Lots.
 |
 |
 |
The plexiglass walls, being much thinner than the old pressed wood walls, did not fit snugly in the gaps where the old walls had fit. When I glued the roofs on, I used masking tape and little wadded up pieces of newspaper (sorry, you can't see them in the photo) to force the walls against the gluing surfaces until the glue set (pretty much overnight).
A couple weeks later, when I was sure that the Fix All had completely set, I added appropriately colored caulk to fill the gaps and to keep light from leaking through the cracks. I also drilled holes for wiring, in preparation for whenever I do get to rewire the buildings for internal lighting.
Using just a dab of Testor's nontoxic model cement on each corner, I glued in "curtains" that I made using a color laser and overhead projector film. On the storefronts, I put curtains on the top floor only, since I hope to get back to the store windows with some other treatment.
 I don't think I'll have time to make 3-d cornices on the storefronts, but I do plan to do graphics for them. In addition to adding graphics for the newly trashbashed storefronts, I will reprint the graphics that have deteriorated. Fortunately I have the source files on an old backup disk.
It's funny, but after years of seeing the roofs on the storefronts slope one way, now seeing them slope the other way, it's almost like the storefronts have gone from having "cabbie hats" to "gangsta hats" with the "bills" in the back. 
 Whenever I get around to putting cornices on the six Fisher Price storefronts, they will look more like conventional late 1800s-early 1900s storefronts. I'm just not sure that's going to happen between now and early June.
Finally, I glued the old Model Power gooseneck lamps back in place (except for one that has broken wires I'll have to fix). They'll remain unlit for now, though - there won't be enough time to reinstall the wiring and internal lighting before the open railroad. Besides, the only scheduled open railroad times in June are during daylight hours.
When I was preparing for last November's open railraoad, I trashbashed two all-plastic Playskool Sesame Street sets that I had accumulated in the meantime. I finished them early this spring. So in case my efforts to rebuild the larger Fisher Price sets failed, at least I'd have some city buildings to set out.
 The photo to the left shows one of the sets after the glazing and curtains were added. During that project, I kept a photo journal of the process. So if you want the details on how to make these buildings look as good on your railroad as well as a lot of expensive kits, check out our Trashbashing Step-by-Step article, which shows the steps and many photos of these buildings being prepped.
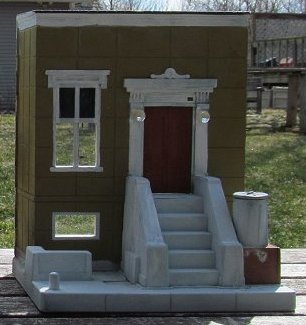
 I have also painted and assembled three of four Fisher Price Sesame Street buildings that I had taken apart but not painted and reassembled. The photo to the right shows them before the bases were installed. I have done that since, but I haven't glazed them yet, nor added curtains. As you can see, I got a little more creative with the colors. If I had to start all over, I think I would paint more of these buildings unusual colors. Sometimes authenticity is overrated.
Sadly, nobody has the gooseneck lamps I used on their predecessors (Model Power #6083) in stock. Since I now have enough other buildings for most of my other potential uses, these might not be used at all this spring. The fourth building, a townhouse, has not yet been painted. I may leave it undone until the convention to use as an example during a clinic.
If you've been a long-time reader, and you're attending the Convention this year, we'd love to meet you. We'd especially like to welcome you to our back yard. If nothing else, it's proof that a family working around day jobs and a limited budget can still assemble and maintain a garden railroad that is a pleasure to run and watch year after year after year.
And maybe that's the best "takeaway" we can offer.
If you're heading this way, drop us a line and we'll let you know if we get on the schedule.
To jump to the next articles in this series:
In the meantime, enjoy your hobbies, and especially enjoy any time you can spend with your family in the coming season.
Paul


|
| 
|
|
 |
|  |  |
Note: Family Garden Trains?, Garden Train Store?, Big Christmas Trains?, BIG Indoor Trains?, and BIG Train Store? are trademarks of Breakthrough Communications (www.btcomm.com). All information, data, text, and illustrations on this web site are Copyright (c) 1999, 2000, 2001, 2002, 2003, 2004, 2005, 2006, 2007, 2008, 2009, 2010, 2011, 2012, 2013 by Paul D. Race. Reuse or republication without prior written permission is specifically
forbidden.
Family Garden Trains is a participant in the Amazon Services LLC Associates Program, an affiliate advertising program designed to provide a means for sites to earn advertising fees by advertising and linking to amazon.com.
For more information, please contact us