 | |||
 |
 |
 | |
 |
 | ||
 |
 | ||
 |  | ||
 |  | ||
 | |||
 |
 |
 | |
 |
 | ||
 |
 | ||
 |  | ||
 |  | ||
| Written by Paul D. Race for Family Garden Trains(tm)
and New Boston and Donnels Creek: |
 |
|
|
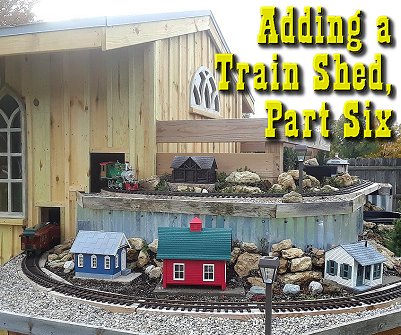
Adding a Train Shed Part 6By now, some of my readers are no doubt getting tired of me explaining for five segments how I added a train shed to the two-level outdoor railroad I started last year. Unless I get my metal roof on the shed soon, this will probably be the last article on that topic for now, since I've accomplished most of what I wanted to accomplish.An outdoor railroad that requires very little weeding, no bending over to speak of, and no dragging trains in and out - what's not to like? The truth is, there's a lot to like, and sometimes I run the trains when I'm working on other things in the yard just because I can. This installment describes how I installed the walls and windows of the train shed. It's not exactly the most waterproof, windproof, or weatherproof structure you'll ever see. But it keeps short trains out of the sun, reasonably dry, and ready to run at a moment's notice. And if I say so myself, it's as cute as a bunny besides. Starting the Siding BoardsAs mentioned earlier, I chose to use 5/8" by 5.5" x 8' fence boards for my siding. I also determined to slice some of the boards lengthwise in quarters to get the skinny "batten" pieces. When I went to Lowes to pick up enough boards to get started, the ones that were left were twisted and heavily mildewed. Then a Lowes worker told me there were more boards in another stack. Thank goodness. I bought a bunch and brought them home. I also made certain they were stored together flat in a reasonably dry location, since fencing boards that are separated from the pack can warp in a few days.
As luck would have it, the boards on either side of the door frame were just long enough to reach from the porch floor to the sheathing. So I didn't have to use the "dodge" you see on so many T1-11-paneled structures where they start a whole new layer of boards or paneling on the gable. Over the door itself, I'd be able to use short pieces (shown further down). You'll notice that there are gaps between the vertical boards and the porch floor. I'm going to put a piece of trim board there, but I wanted to reduce the chances of water standing on the porch wicking up into the walls.
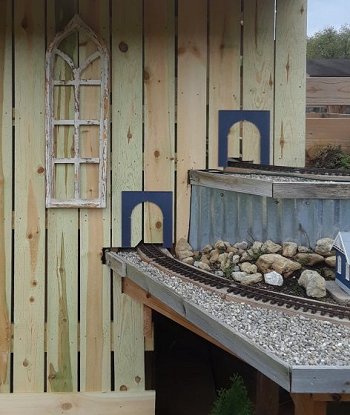
The photo to the left below shows the long boards installed on the south and west sides of the train shed. The flea market window is hanging there just as a "placeholder;" it's not installed yet. To the left of the window, several short boards will be added over and around the tunnel portals. The photo to the right below shows the trim beginning to be added. I used full-width fencing boards for the baseboard, "door posts" and lintel. Eventually I would use half-width fencing boards for the corners and quarter-width boards for the battens.
Compensating for Misaligned Frame - Because the post that formed the corner to the right of the door had warped since it was installed last year, I had to choose whether to have the boards on that bit exactly vertical, or to try to effect a transition between the vertical doorframe and the slanted corner. I chose the latter. If that part of the wall had been six feet long instead of 16", my ruse might have been more effective. In the photos so far, you can't see the slant of the corner and the adjacent boards all that well, but you'll see it in later photos. If anyone asks you, I planned it this way to add to the rustic look of the structure. (As Mile Davis used to say, "If you hit a note that's obviously wrong, hit it again, so folks think you did it on purpose.") Another reason to build this sort of thing in a single year if possible. Getting Ready for the WindowframesAs you'll recall, I had decided to mount the windowframes on the outside of the boards. This was in part because I thought I'd go insane trying to patch the boards around them.But I did install bracing that they could screw into once the boards were in place. After the boards were installed on the other three sides, I placed the windows where they would be and marked where the openings would need to be.
Of course, the boards would need to be cut back a little bit more all the way around, but this gave me a starting point. In the photo to the left below I have cut out the lower part of the opening (plus a half inch on either side to allow clearance for the opening). I used a hand jig saw to cut the curves. I have also added a windowsill, made by cutting a pressure-treated 2"x6" in half. (The windows on the sides were shallower, so the windowsill was cut from a 2"x4".) In the photo to the right below, I am holding the windowframe up against the completed opening to make certain that the boards don't show through the openings. But I'm not ready to install the windows just yet. Remember, the windowframes will be installed OVER the boards.
"Glazing" the WindowframesThe word "glazing" is in quotes, since I am not really glazing these in any traditional sense, just fastening pieces of plexiglass to the back before I screw them to the boards. The point isn't to make anything weatherproof, just to give the impression that you're looking at actual windows from the outside. The plexiglass I used was all leftovers from other projects, so I had it on hand. You can get what you need from a sufficiently large hardware store, of course.In the photo below you can see the back of the Hobby Lobby arched window with a piece of plexiglass that I scored-and-snapped until it was approximately the right shape to cover the openings. 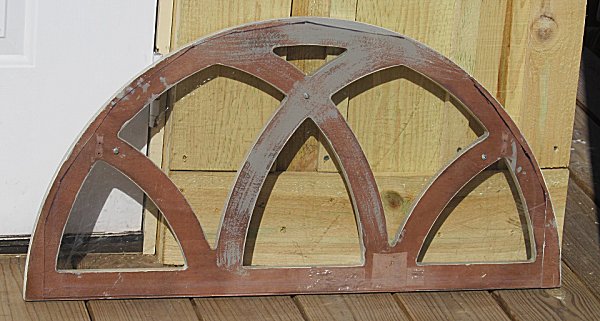 If you look at the blowup, you can see where I have drilled holes and added some tiny wood screws to hold the plexiglass in place while I mounted the window. ALWAYS drill holes bigger than the width of the screws for this kind of project, and never shoot screws directly into or through the plexiglass without pre-drilling. If you shatter the plexiglass, you may have to make another trip to the store. The photo to the left below shows one of the side windows with the plexiglass "glazing" in place. You can also see the scratches on the scrap plexiglass I used. Once the windows were installed, though, you don't notice it at all. If I add "curtains" or some such in the future, they'll be even less obvious. Below right is the east side window installed. You can also see where I started cutting holes for the trains to get in and out of the shed.
BTW, what I said about drilling holes applies to when you attach the windowframes, too. If there is ANY danger of a screw going through the plexiglass, predrill a hole all the way through before you shoot the screw. You won't want to trim a piece of plexiglass to fit a goofy window shape and have to go back to the store and start all over again. By the way, the flea market windows I used on the sides of the shed were not exactly symmetrical, so hanging those was more complicated than the Hobby Lobby windowframe I used on the back of the shed. It's no illusion that the windowsill under the window above right is at an angle - the windowframe wasn't square. In fact, I installed the one on the west side of the shed three times before it looked right, and I had to screw part of it back together after all that handling. Like everything else in these articles, your mileage will vary.
|
 |
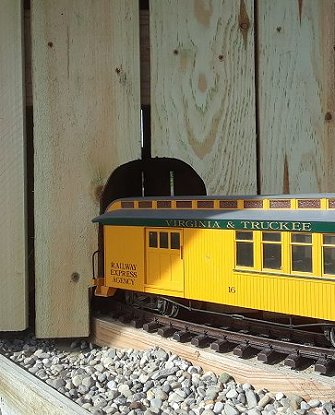 |
I also tried several different trains to make certain I wouldn't have a problem switching out between brands and scales. The holes got even bigger. Finally, I decided to cut them square and "frame" them with the same sort of wood pieces I'd be using for the battens. I wasn't going to get a consistent look with an arch, so I thought having a look that was consistent with the rest of the building construction might be "close enough" for this round. You'll see some photos later and decide if I was right.
 One thing I learned is that once you rip a fencing board into 1 1/4" strips, the resulting pieces begin to warp immediately. So never rip more than one board at a time, and never rip a board unless you know you'll have time to use all four pieces right now.
The photo to the right shows three of the battens installed on the south side of the train shed. The one furthest to the right warped badly before I even got it installed. I tried to straighten it out as I worked on it, but after I got more experience working on the other sides of the building, I came back and replaced this one altogether. Little bits of this one show up other places, so it wasn't entirely a waste.
Mounting the battens against the long boards was mostly just a question of cutting them to length and using screws long enough to sink into the crosspieces. And forcing pieces that were already starting to warp straight as I screwed them down. And working very fast.
As I installed the first several pieces, I realized that the baseboards would keep me from screwing the bottom end of the battens into the crosspieces there. And, considering the skinny battens' tendancy to warp, I knew I had to fasten those ends somhow.
I had some 1 5/8" screws from another project, so I tried using them at an angle to go into the board on one side or the other. This was a "dodge" I wound up using a number of other places eventually, as I installed battens around the windows, tunnel openings, etc.
Taking what I had learned from my initial effort on the south side, I did a "cleaner" job of installing the battens on the north side. I had already installed crosspieces, baseboard, the boards, and the window. So this went fairly fast.
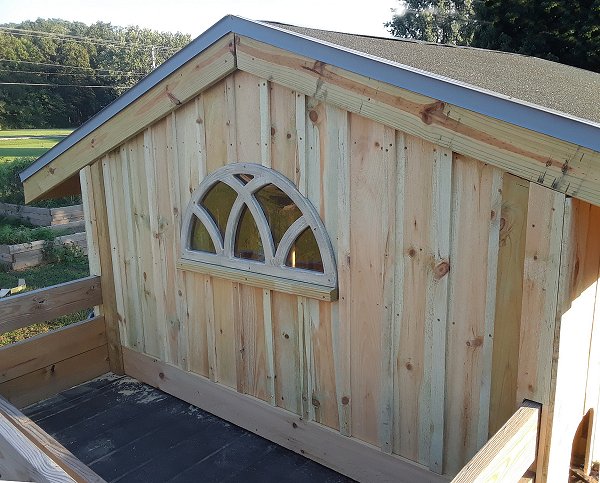
By the way, this is the end you see from the driveway, so it's the first part of the shed most visitors see. I'm glad it came out reasonably well.
A reader who saw this photo asked why wasn't a door to the "balcony." But this little platform is really much smaller than it seems in the photo. The "floor" is only about 72"x30", the "rails" are only about 20" high, and the highest peak of the wall there is only about 4'. I had originally planned to put rocks, dirt, and plants there to complete the "mountain" look on that part of the railroad below. But I realized that it would create a huge maintenance issue. Now I climb up occasionally to weed or futz with the wiring on the top layer of the railroad.
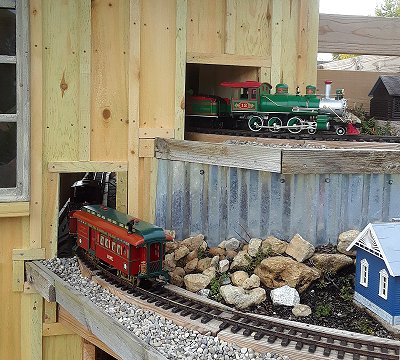 I used pieces of the batten material to trim a lot of goofy corners and gaps that could use dressing up, including the edges of the tunnel entrances.
A Baffling Problem - The upper tunnel entrances had to be cut very wide, because of the steep angle at which the trains came through. It was, frankly, too easy to see the entire top shelf and back window of the train shed through the opening. So I used some scrap lumber to add visual baffles inside two of the tunnel entrances. (Look at the right side of the upper right opening.)
I may add more baffles in time. And doors I can clamp into place when the railroad is not being used. But these solved the most obvious problem of the moment.
Weather or Not - By the way, if you question my claims that the building will weather quickly, the gray weathered-looking boards alongside the right-of-ways in the photo are the same material. The one closest to the bottom of the photo was brand new two years ago.
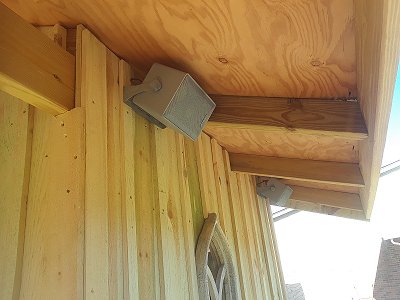 For this installation, I didn't have a good place to hide them, so I mounted them up where most people can't see or at least wouldn't notice them. I also spray-painted them gray to blend in better - they used to be black. Why gray? Because in a few years, most or all of the whole building will be gray - the same reason I used a gray base on the windowframes.
Audiophiles will note immediately that no one will hear the tweeters unless they're close to the building. (High frequencies don't go around corners.) Okay, that's a problem I'll address later.
Inside the train shed, which now has walls and a roof, is a very old stereo I used under cover near the garden at the other house. For now the combination will do the job, and it's fun to work on the railroad listening to my home-made mix CD of train songs.
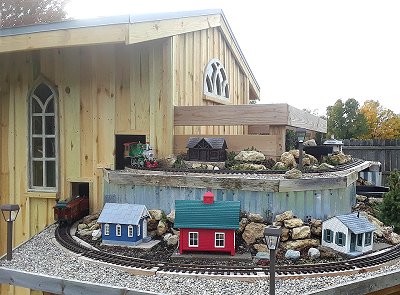 Though I have run the wires for building lighting, I probably won't have time to do that properly this fall. In the meantime, I had some $1 solar lights left over from another project. I drove the little stakes through the vinyl and wedged them between the underlying 2"x6" decking boards.
This time of year, of course, they only stay lit for an hour or two after dark, but that's all I need for the open railroad coming up.
In the meantime, though, I can do what N, HO, S, and O gaugers have always taken for granted. Go to the railroad, turn on the power, and run trains, without hours of weeding and ROW clearing first. Since I'm using only metal-wheeled rolling stock so far, I don't even have to wipe the track very often.
If the whole project seems like a great deal of work, keep in mind that the combination of a raised railroad and attached shed will save me over a hundred hours of maintenance a year as long as I have strength to hobble down to the shed and turn on the power. Even if I have time and resources to add my planned third, outer layer next summer, there will still be very little maintenance to speak of.
In the meantime the very next project is getting ready for our Christmas-themed open railroad, scheduled for Nov. 10, 2018.
Stay tuned.
As always, if I've helped you get any ideas at all for your next garden railroad construction, I will consider the time it took to document all of this time well spent.
Best of luck, all,
Enjoy your hobbies, and especially enjoy any time you can spend with your family in the coming season.
Paul
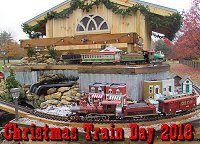 Proceed to Christmas Train Day, 2018 - After two years without our traditional Christmas Train Day (something we did from 2008 through 2015), we were anxious to get started again, even without a huge right of way to show off. The kids' trains, the extra Thomas railroad, the popcorn popper and two Bachmann Christmas trains got a big workout. And the visiting kids all loved it!
Click on the photo to see a lot of last-minute preparations and some photos of the November 10, 2018 event itself.
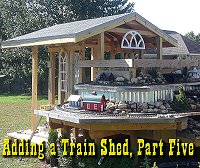 Return to "Adding a Train Shed Part 5" - Planning the doors, walls, and windows of our garden train shed.
Includes choosing the siding and windows, installing the door, painting the windowframes, and adding crosspieces to support the vertical siding boards.
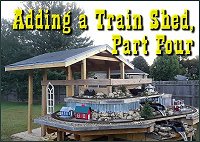 Return to "Adding a Train Shed Part 4" - Choosing and installing underlayment and drip edge to protect the sheathing until I can get the final roof installed.
Now the roof is waterproof enough to get us through the next couple of months at least, maybe more.
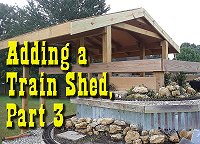 Return to "Adding a Train Shed Part 3" - Adding fascia, sheathing, and end trim to the in-progress train shed.
I thought about bringing in helpers for this part, but a reader commented on how helpful it was to see how one person could do this sort of thing by himself, so I just kept plugging away.
Click on the photo to see our progress as of September 13, 2018
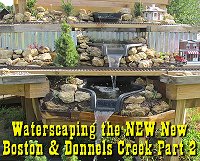 Return to "Waterscaping Part 2" - Getting this year's waterscaping project done (for now at least). Installing and dirtscaping the third level of the waterfall. Installing pump and filter, adding an extra container and modifying the ones we already had installed to keep the water running smoothly. And lots of other tweaking. Includes tips about introducing fish and plants, as well as other information about water features in general that you may find helpful.
Click on the photo to see our status as of August 5, 2018.
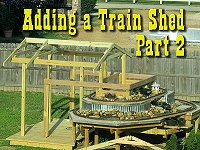 Return to "Adding a Train Shed Part 2" - Adding rafters to the frame of the in-progress train shed. Now it's starting to look like it might actually be a structure and not just a crazy collection of posts.
The way we got the rafters and ridge board up wouldn't work for everybody, but it worked for us, and hopefully will help other folks to "think outside the box" - literally in this case.
Click on the photo to see our progress as of July 14, 2018.
 Return to "Adding a Train Shed Part 1" - What started out as a simple addition of a deck to stand on when putting trains on the track got a little more ambitious when I realized that JUST installing the deck this year would require more work next year. So we framed out what we planned to be a train shed attached to the railroad. If it ever gets finished, I can easily put trains on the track at a moment's notice instead of schlepping them out from the garage.
Click on the photo to see our status as of July 9, 2018.
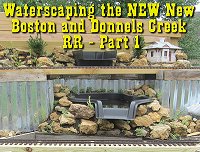 Return to "Waterscaping the NEW New Boston and Donnels Creek Part 1," our article on getting the top two layers of the waterfall on solid footing and getting the third layer framed. After we finish decking and dirtscaping the third layer, we will probably add a washbasin or something for the water to flow into, then add a pump to get the waterfall flowing. No big pond until next year at least - too many other projects.
Click on the photo to see our progress as of June 13, 2018.
 Return to "Dirtscaping the NEW New Boston and Donnels Creek RR, Part 2. - Adding barriers to keep the rocks, dirt, and plants where they're supposed to go, placing platforms and running wiring for buildings, adding rocks, dirt, and plants to the upper level of the railroad.
Click on the photo to see our status as of June 1, 2018.
 Return to "Adding Raised Roadbed to the NEW New Boston and Donnels Creek, Part 2" - Trimming the corners off the roadbed on the upper layer and cutting the pieces that will support the curves on the middle layer. We need to get the upper two tiers of the pond installed before we totally complete this step, so the article doesn't quite show the finished product. You'll see it later as part of other articles.
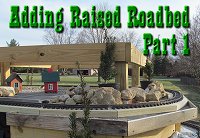 Return to "Adding Raised Roadbed to the NEW New Boston and Donnels Creek RR, Part 1" - Sorting out our priorities for the spring and summer of 2018. There a lot of little chores we really should get done before we start on the next big addition. Click to see our plans as of February 27, 2018.
Click on the photo to see our status as of February 20, 2018
 Return to "2018: Springing into Spring on the NEW New Boston & Donnels Creek RR." - Sorting out our priorities for the spring and summer of 2018. There a lot of little chores we really should get done before we start on the next big addition. Click to see our plans as of February 27, 2018.
Click on the photo to see our status as of February 20, 2018
 Return to "Dirtscaping the NEW New Boston and Donnels Creek RR, Part 1. - Putting edging around the existing "layers" of the new railroad, and beginning to add gravel and rocks. There were a few test runs, but we got stopped early by bad weather before we could dump the rest of the rocks, gravel, and dirt, much less plant the plants we hoped to get in before snowfall.
Click on the photo to see our status as of November 21, 2017
 Return to "Decking the NEW New Boston and Donnels Creek RR - Decking the 'middle layer' of our proposed three-tier outdoor railroad. Prepping more track, laying out track and decking to make certain we have measurements correct, installing most of the remaining decking for this layer.
Click on the photo to see our status as of October 25, 2017
 Return to "Framing the NEW New Boston and Donnels Creek RR, Part 6" - Modifying and finishing the framing on the second layer, cantilevering, using R3 track versus all other pre-curved track formats, finalizing the track plan, why painting the track makes old and new track blend better, and more. This will be the last bit of "framing" in 2017, and it worked out well, considering.
Click on the photo to see our status as of October 15, 2017
 Return to "Framing the NEW New Boston and Donnels Creek RR, Part 5" - Spreading the billboard-sourced vinyl underlayment on the top layer. Prepping used Aristo track for (hopefully) many more years of service. Laying the first loop of track, attaching power wires with spade terminals, and testing conductivity with a Bachmann streetcar.
Click on the photo to see our status as of October, 10, 2017
 Return to "Framing the NEW New Boston and Donnels Creek RR, Part 4" - Planning and running the decking for the top layer, testing the track plan, checking clearances, prepping used track with new railjoiners, examining the vinyl I ordered to go over the decking, and more.
Click on the photo to see our status as of September 26, 2017
 Return to "Framing the NEW New Boston and Donnels Creek RR, Part 3" -
Getting the frame finished on the top layer, ordering other things I'd need eventually, deciding on materials for the decking on the top layer (at least).
Click on the photo to see our status as of September 17, 2017
 Return to "Framing the NEW New Boston and Donnels Creek RR, Part 2" -
Once I had the overall frame relatively solid, I hooked up the underground power lines to two GFI plugs that should be in easy reach once everything is finished. I also decided to frame out the top railroad layer while I could still access the center of the railroad easily. Because I was running out of vertical space, I reconfigured that layer. Then after I got the "core" pieces on, I changed my plan again. But the whole thing is getting easier and easier to visualize, and is getting closer to complete with every board I cut and fasten on.
Click on the photo to see our status as of September 7, 2017
 Return to "Framing the NEW New Boston and Donnels Creek RR, Part 1" -
Once I started dropping posts in the holes and screwing things together, I didn't want to stop before I had the basic frame built (for one thing, the wood warps less once it's fastened in place). Now the folks driving down the street past our house (we're on a corner lot) probably wonder if I'm building an elaborate chicken coop, but that's fine with me. I still need to make a few more lumber runs and do a lot more cutting and sawing, but having the basic frame in place should make the next bits a lot easier.
Click on the photo to see our status as of August 10, 2017
 Return to "Breaking Ground on the NEW New Boston and Donnels Creek" -
Okay, in case you wondered if we'd ever get started on the thing, we broke ground in July, using a manual post-hole digger. Well two manual post-hole diggers. But by the end of this article, we're ready for the posts to start going in.
Click on the photo to see our status as of the end of July, 2017
 Return to "Planning the NEW New Boston and Donnels Creek, Part 4" -
Well, the rented post-hole digger fell through, so we dug our vegetable garden with a manual post-hole digger (the scissors kind). In addition, I stake out where the railroad was going to be. Twice. And tweaked the plans again. Sorry about the redo's, but sometimes just walking around the yard trying to visualize things makes me reconsider something that seemed "settled" only a few days before.
Click on the photo to see what we were considering as of late May, 2017
 Return to "Planning the NEW New Boston and Donnels Creek, Part 3" -
We have still not broken ground. In part because we plan to rent a post-hole digger and dig the post holes for our raised vegetable garden and the first phase of the garden railroad at the same time, and we don't have enough lumber on hand yet. (If we didn't break it down into multiple trips, we'd be blowing out the shocks on our minivan.) In the meantime, we used a line level to see if the slope of the back yard was as bad as we thought it was (it's worse), and we did other site preparation, including planting a whole bunch of spruce tree seedlings to eventually give us some privacy in our side and back yard. Plus, I'm still wavering a little on the "where-to-start-first" issue.
Click on the photo to see what we were considering as of late April, 2017
 Return to "Planning the NEW New Boston and Donnels Creek, Part 2" -
More plans. We've moved on from the 2"x6" roadbed-on-posts to a sort of "train-table-outside" plan. Our goals include low-maintenance, high interest, and high reliability. We're also trying to get around having a thousand dollars' worth of dirt hauled into the back yard. If you want to get some idea of what our planning process looks like, reading these through in sequence may help. Or it may drive you crazy.
Click on the photo to see what we were considering in early April, 2017
 Return to "Planning the NEW New Boston and Donnels Creek, Part 1" -
If you're subscribed to our newsletter, you know that we moved just after Thanksgiving in 2016, leaving behind most of the track, a few of the bird feeders, and one Bachmann train set for the new owners. We also left behind a high-maintenance garden that we do not intend to replicate at the new place. This is the first chapter of a new chapter in our lives, which we hope will include a lot of "lessons learned." But first, some serious landscaping had to take place.
Click on the photo to see what we were considering in March, 2017
 Return to the New Boston and Donnels Creek RR Page - This is the page describing Paul Race's progress and frequent rework on his own garden railroad, started on a shoe-string budget in 1998, later expanded, and later refurbished several times as issues arose. Issues that Paul hopes to avoid by building the next iteration above ground.
Click on the photo to see the home page of Paul's railroad.
 Return to Family Garden Trains' Home Page - The home page with links to all the other stuff, including design guidelines, construction techniques, structure tips, free graphics, and more.




Note: Family Garden Trains?, Garden Train Store?, Big Christmas Trains?, BIG Indoor Trains?, and BIG Train Store? are trademarks of
Breakthrough Communications (www.btcomm.com). All information, data, text, and illustrations on this web site are
Copyright (c) 1999, 2000, 2001, 2002, 2003, 2004, 2005, 2006, 2007, 2008, 2009, 2010, 2011, 2012, 2013, 2014, 2015, 2016, 2017, 2018 by
Paul D. Race. Reuse or republication without prior written permission is specifically
forbidden.
Family Garden Trains is a participant in the Amazon Services LLC Associates Program,
an affiliate advertising program designed to provide a means for sites to earn advertising
fees by advertising and linking to amazon.com.
For more information, please contact us
 |  |
| Visit related pages and affiliated sites: | |||||
| - Trains and Hobbies - | |||||
 |  |
 |
 |
 |  |
 |

|

|  |
 |

|
| - Christmas Memories and Collectibles - | |||||
 |

|
 |

|
 |

|
| - Family Activities and Crafts - | |||||
 |

|

|

|

|

|
| - Music - | |||||

|
 |
 |

|

|

|

|

|

|

|

|

|

|

|

|

|

|

|