 | |||
 |
 |  | |
 |  | ||
 |  | ||
 |  | ||
 |  | ||

| Please Read: How to Help Our Site at No Cost to You - Some of our articles contain recommendations for products we like and vendors we personally trust. Some of those vendors may pay us a very small commission if you click on a link and buy their products. This costs you nothing at all and helps offset the costs of what we do. So if we point you to something you decide to buy later, please make certain you come back through our site and click on the link directly. Thanks. |


|
Waterscaping the NEW New Boston and Donnels Creek RR - Part 3Due to long work hours and bad weather when I did have time to work outdoors, most of 2019 got by me without anything significant happening on my garden railroad. Fortunately, the way the new railroad is constructed, I can still run trains whenever people come over. In the old days, I'd have to know about visitors a week in advance, just to get control over the weeds, shifting roadbed, etc.Now that I'm back in "retirement mode" (maybe for good this time), I've been working on some of the glitches that were left over from my first two years' effort on this railroad, and If you've been following my efforts, you know that my overall plan was to have three layers of railroad and four layers of waterfall. The drawing to the right is a not-to-scale cross section showing my overall plan for the water feature. By Spring of 2018, I had the weir and the top two connecting pools installed and "dirtscaped."
This year I wanted to install a real in-ground pond. Turns out Menards charges about 60% of what everyone else does for the MacCourt ponds, so I ordered one early this spring, to get a "jump" on the installation.
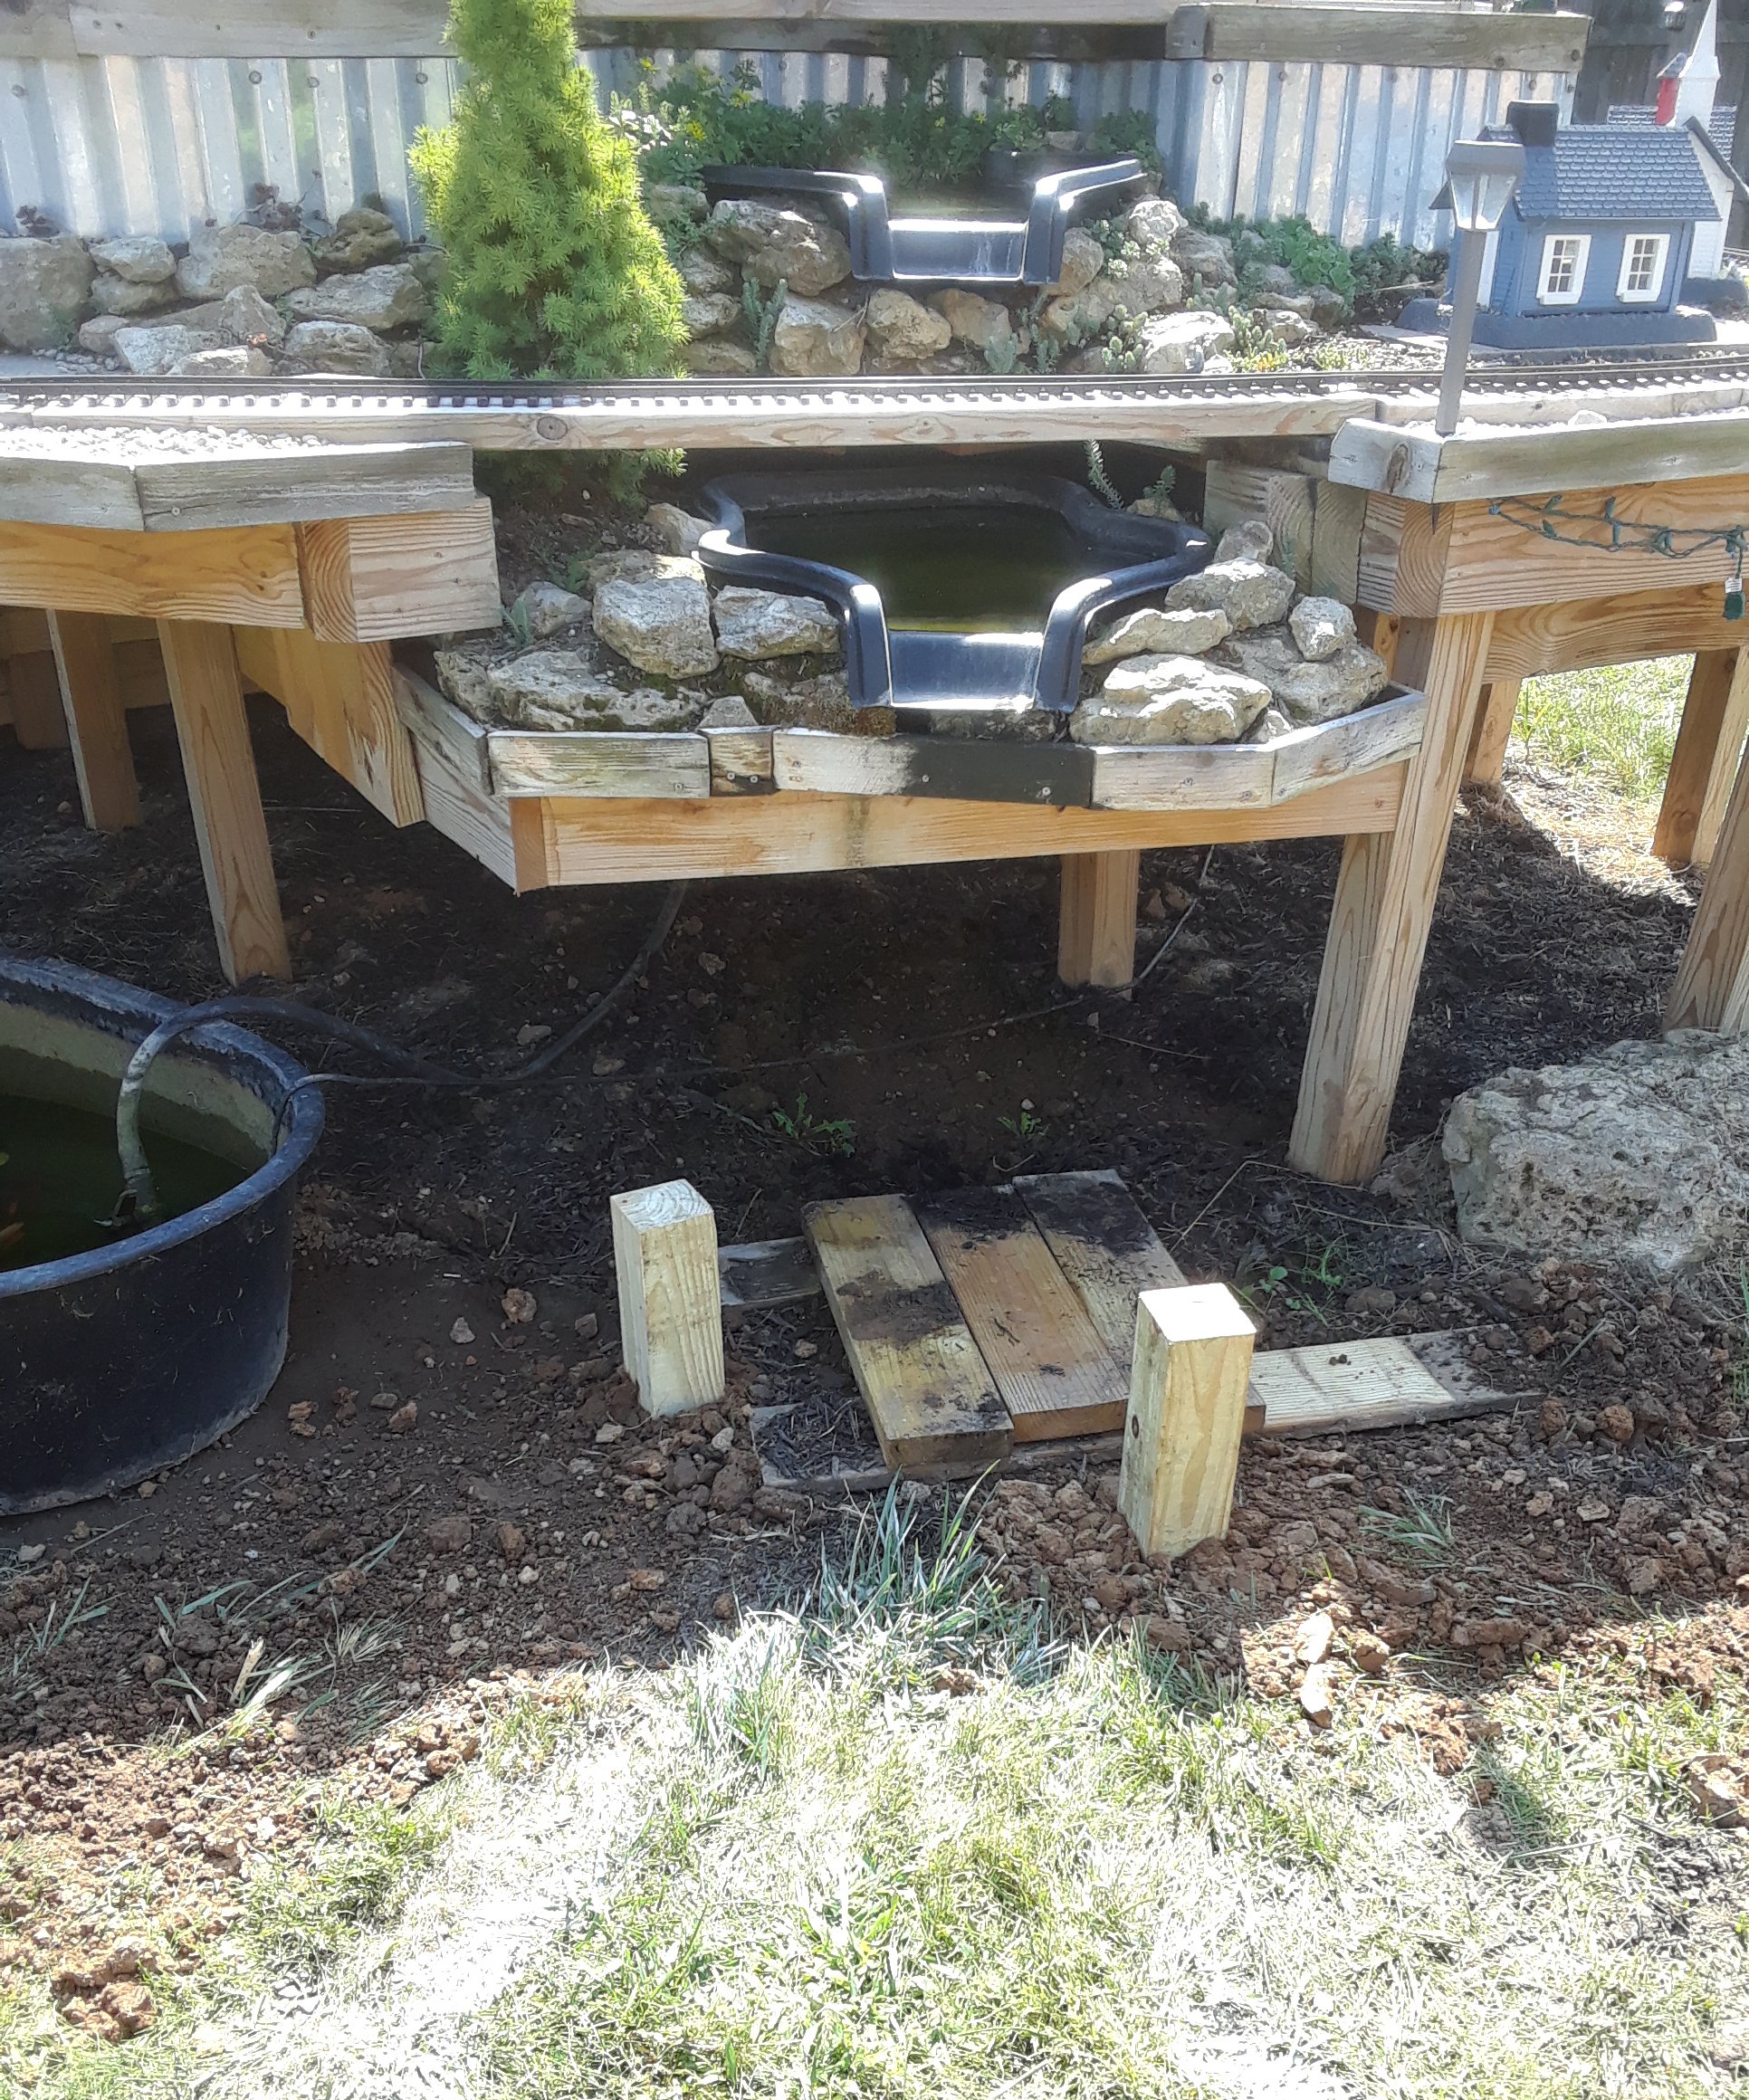
This year I chose a "Grand Cayman" pond liner, about 165 gallons. The downside, of course, is that I have that much more dirt to move. :-) Unforseen Delays - Regarding that "jump" on the installation, my job began requiring many more hours away from the house than before, and when I was home, the weather was brutal. For example, the wettest June ever was followed by the hottest July ever, and the second hottest August ever. My contract ran out at the end of August, so I've been working outside more consistently, even though many days are still hitting 90F in mid-September. By the way, never tell a gardener who's been planting and tending all sorts of plants for nigh on to 60 years that climate change is a hoax. Where to Put the Dirt - Another I had some leftover boards and 4"x4" posts from last year, so when I finally got a chance, I cut the posts and installed the boards, the same way I did the first three in April, 2017. (Click here to see that account.) Now I have a big empty "garden bed" that is ready to receive as much dirt as I can pull out of the hole for the pond, and likely then some. Leftover Construction Issues To be honest, I cheated a little when I installed the second connecting pool, since I knew I'd be installing the third one eventually. Because I had determined to make the raised structure of my railroad as solid as a deck you would walk on, there should have been a post at one corner of the little platform I built for it. (The corner hanging out over open air in the lower left of the photo to the right.) To be honest, I cheated a little when I installed the second connecting pool, since I knew I'd be installing the third one eventually. Because I had determined to make the raised structure of my railroad as solid as a deck you would walk on, there should have been a post at one corner of the little platform I built for it. (The corner hanging out over open air in the lower left of the photo to the right.)
But I knew I would be adding a post further out eventually, so for the meantime, I had cantilevered the thing by fastening a long supporting board to two posts further back. It would stick straight out and support one corner of the little platform as long as I didn't try to stand on it or something. The photo to the right shows that framework before I put the deck boards across it. (For more information on how I built that layer, click here.) Counting nine gallons of water and 2-3 cubic feet of rocks and dirt (shown in the photo further up), I imagine that the structure is holding over 140 pounds. It's shown no sign of bowing yet, but the next bit of construction will include something to shore it up.
I include this drawing because it will help rest of the article make more sense. Where to Dig HolesI had a pretty good idea where I wanted the big, inground pond to go, and I also knew I wanted the third MacCourt connecting pool to drain into it.I also knew that I needed to install the supports for the connecting pool before I dug the big hole for the pond. So I skootched the third pool around to help me estimate where those supports would have to be. The posts will only stick out of the ground about 11", but the supports and decking will add height, so hopefully the third pool will be vertically about halfway between the middle pool and the big pond.
I hope you realize that this part all falls under the "don't try this at home" category. Many other folks would have planned this all out from the beginning and proceeded in a more orderly fashion. But since I've been "breaking new ground" in any number of ways, each new sub-feature is a sort of experiment, and I pause to see if it is working before I add on to it. I dragged the big pond liner out from behind the garage and kept turning it around to figure out which part the "waterfall" should pour into. The most logical places were over the relatively shallow "plant shelves" in the "corners." But I thought the waterfall would cause less churning if it poured right into a deep part, so that was the way I oriented the big pool.
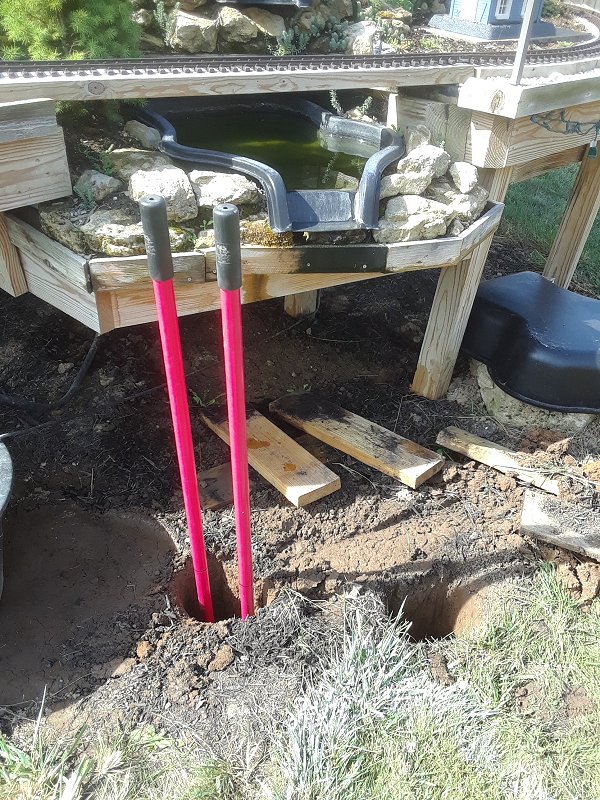
Once I had a pretty good idea where the posts supporting the lowest connecting pool needed to go, I marked the positions with two of the flags that the utility company left in our yard the last time they were thinking about doing some sort of repairs they never did. I also painted a "chalk circle" around what would become the deepest part of the big pond form and pulled it back out of the way. Then I half-emptied the basin and utility tub I've been using to represent a pond and pulled them out of the way.
"Staking Out" the Platform for the Last Connecting PoolFortunately, the soil where the posts were going was only clay, instead of rocks and old broken up concrete, which I've encountered in other parts of the yard. And the clay had been kept moist by splashing from the water feature. So both post holes went in pretty quickly with my manual post hole digger. The boards laying on the ground in the photos below are the boards that the "wine barrel liner" sits on. I had to move some of them out of the way temporarily, too.
Once I had the posts firmly in place, I put the temporary pieces of the water feature (the "wine barrel liner" and "utility tub") back in place so the fish could keep getting aerated. Then I got out the shovel. Digging down the first few inches was like chiseling through concrete. I guess that's what twelve weeks of mostly dry weather with most days hitting 85-93 will do to your back yard. On the off chance that it would help, I turned the hose on and filled the shallow hole with water and let it sit overnight. There was always the danger that it would just make a big muddy mess, but I thought that might still be better than what I had. As it turned out, the soil absorbed the water fairly evenly. The first several inches were damp enough to dig easily, but not muddy. Again, your mileage may vary.
That said, there was still a lot of dirt to move, and it was still 90F. So I kept digging and dumping a few wheelbarrows full at a time, then coming in to cool down. At my age there's a delicate balance between not getting enough exercise and getting too much. :-) Once the hole was deep enough to drop the pond in most of the way, I marked where I would need the bumpouts for the plant shelves (above right). Because the new soil I would be digging through at the edges was still as hard as concrete, after I removed and repurposed the sod, I filled the hole with water again. By the time I got back to digging a day and a half later, the water had drained and the new digging areas were soft enough to dig through. Again, I wouldn't recommend filling the hole twice if you are paying for water, or if you haven't had a 12-week drought with record-breaking temperatures. From that point on I stopped shoveling the dirt into the wheelbarrow, knowing I would need some for backfill.
Then I filled the pond most of the way. It still may shift a bit as the dirt continues to settle, but I'll worry about that if it happens. When the pond was more-or-less stable, I turned the round "wine-barrel liner" so the spillway was facing the pond. It dumped water into it just fine. So when I move the pump and filter to the big pond, I can just turn the other piece for now, until I get the rest of the platform for the third spillway built. I haven't done that yet because - as it turns out - the tube going from the pump to the top of the waterfall doesn't reach all the way to the big pond. Ooops. The pond sits further out than I had expected when I bought the original hose. Most stores have a 20' length of a different style that should work. We'll see. I'll resume this series when I have more lumber and a longer hose. Stay tuned. In the meantime, here's a photo of the big pond mostly full of water: Keep in TouchFinally, please let us know about your ongoing projects. Ask questions, send corrections, suggest article ideas, send photos, whatever you think will help you or your fellow railroaders. In the meantime, enjoy your trains, and especially enjoy any time you have with your family in the coming weeks, Paul Race
The process included checking the pump, extending the hoses, rescuing toads, building the platform, trimming the platform, testing the pool's location, etc. Click the photo to go to the article.
Click on the photo to see a lot of last-minute preparations and some photos of the November 10, 2018 event itself.
By the way, going over lumber receipts in early 2019, I couldn't believe I was still siding the train shed in late October, and managed to have an open railroad in mid-November. It is a little crazy how fast things can go together if you have a deadline and a lot of gift cards. Click on the photo to see our progress as of late October, 2018.
Includes choosing the siding and windows, installing the door, painting the windowframes, and adding crosspieces to support the vertical siding boards.
Now the roof is waterproof enough to get us through the next couple of months at least, maybe more.
I thought about bringing in helpers for this part, but a reader commented on how helpful it was to see how one person could do this sort of thing by himself, so I just kept plugging away. Click on the photo to see our progress as of September 13, 2018
Click on the photo to see our status as of August 5, 2018.
The way we got the rafters and ridge board up wouldn't work for everybody, but it worked for us, and hopefully will help other folks to "think outside the box" - literally in this case. Click on the photo to see our progress as of July 14, 2018.
Click on the photo to see our status as of July 9, 2018.
Click on the photo to see our progress as of June 13, 2018.
Click on the photo to see our status as of June 1, 2018.
Click on the photo to see our status as of February 20, 2018
Click on the photo to see our status as of February 20, 2018
Click on the photo to see our status as of November 21, 2017
Click on the photo to see our status as of October 25, 2017
Click on the photo to see our status as of October 15, 2017
Click on the photo to see our status as of October, 10, 2017
Click on the photo to see our status as of September 26, 2017
Click on the photo to see our status as of September 17, 2017
Click on the photo to see our status as of September 7, 2017
Click on the photo to see our status as of August 10, 2017
Click on the photo to see our status as of the end of July, 2017
Click on the photo to see what we were considering as of late May, 2017
Click on the photo to see what we were considering as of late April, 2017
Click on the photo to see what we were considering in early April, 2017
Click on the photo to see what we were considering in March, 2017
Click on the photo to see the home page of Paul's railroad.
To read more, or to look at recommended Garden Railroading and Big Indoor Train products, please click on the index pages below.
|

 
|


 The in-ground pond on our old railroad was a "Jamaica," which was only about 18" deep and held 100 gallons. I learned from buying a small pond that it's easier to keep a large pond regulated than a small one.
 The actual footprint isn't that much larger than the footprint of the Jamaica, but the pond is deeper, so the whole ecosystem should be more stable. And the goldfish should be safer from the raccoons and neighborhood cats. MacCourt also claims that the deeper ponds help fish survive the winter better. Your mileage on that one will vary - certainly mine has.


 Proceed to Waterscaping Part 4.
 Return to Christmas Train Day, 2018
 Return to "Adding a Train Shed Part 6"
 Return to "Adding a Train Shed Part 5"
 Return to "Adding a Train Shed Part 4"
 Return to "Adding a Train Shed Part 3"
 Return to "Waterscaping Part 2"
 Return to "Adding a Train Shed Part 2"
 Return to "Adding a Train Shed Part 1"
 Return to "Waterscaping the NEW New Boston and Donnels Creek Part 1,"
  Return to "Dirtscaping the NEW New Boston and Donnels Creek RR, Part 2.
 Return to "Adding Raised Roadbed to the NEW New Boston and Donnels Creek, Part 2"
 Return to "Adding Raised Roadbed to the NEW New Boston and Donnels Creek RR, Part 1"
 Return to "2018: Springing into Spring on the NEW New Boston & Donnels Creek RR."
 Return to "Dirtscaping the NEW New Boston and Donnels Creek RR, Part 1.
 Return to "Decking the NEW New Boston and Donnels Creek RR
 Return to "Framing the NEW New Boston and Donnels Creek RR, Part 6"
 Return to "Framing the NEW New Boston and Donnels Creek RR, Part 5"
 Return to "Framing the NEW New Boston and Donnels Creek RR, Part 4"
 Return to "Framing the NEW New Boston and Donnels Creek RR, Part 3"
 Return to "Framing the NEW New Boston and Donnels Creek RR, Part 2"
 Return to "Framing the NEW New Boston and Donnels Creek RR, Part 1"
 Return to "Breaking Ground on the NEW New Boston and Donnels Creek"
 Return to "Planning the NEW New Boston and Donnels Creek, Part 4"
 Return to "Planning the NEW New Boston and Donnels Creek, Part 3"
 Return to "Planning the NEW New Boston and Donnels Creek, Part 2"
 Return to "Planning the NEW New Boston and Donnels Creek, Part 1"
 Return to the New Boston and Donnels Creek RR Page
 Return to Family Garden Trains' Home Page
Note: Family Garden TrainsTM, Garden Train StoreTM, Big Christmas TrainsTM, BIG Indoor TrainsTM, and BIG Train StoreTM are trademarks of
Breakthrough Communications (btcomm.com). All information, data, text, and illustrations on this web site are
Copyright (c) 1999, 2000, 2001, 2002, 2003, 2004, 2005, 2006, 2007, 2008, 2009, 2010, 2011, 2012, 2013, 2014, 2015, 2016, 2017, 2018, 2019 by
Paul D. Race. Reuse or republication without prior written permission is specifically
forbidden.
Family Garden Trains is a participant in the Amazon Services LLC Associates Program,
an affiliate advertising program designed to provide a means for sites to earn advertising
fees by advertising and linking to amazon.com.
For more information, please contact us
 |  |
| Visit related pages and affiliated sites: | |||||
| - Trains and Hobbies - | |||||
|  |
|
 |
|  |
 |

|

|  |
|

|
| - Christmas Memories and Collectibles - | |||||
 |

|
 |

|

|
|
| - Family Activities and Crafts - | |||||
 |

|

|

|

|

|
| - Music - | |||||

|
 |
 |

|

|

|

|

|

|

|

|

|

|

|

|

|

|

|