 | |||
 |
 |  | |
 |  | ||
 |  | ||
 |  | ||
 |  | ||

| Please Read: How to Help Our Site at No Cost to You - Some of our articles contain recommendations for products we like and vendors we personally trust. Some of those vendors may pay us a very small commission if you click on a link and buy their products. This costs you nothing at all and helps offset the costs of what we do. So if we point you to something you decide to buy later, please make certain you come back through our site and click on the link directly. Thanks. |


|
Framing the NEW New Boston and Donnels Creek RR, Part 7This is a followup to Part Five of our series "Planning the NEW New Boston and Donnels Creek RR," being written in conjunction with other construction and planning articles that tell the story of our "new" railroad in chronological sequence, beginning with planning efforts in early 2017.At the end of the last article, I had finalized plans for half of the last and lowest layer of the planned right-of-way. If you've been following us from the start, you know that the lowest layer of the railroad will wrap completely around the right-of-ways I've built so far. However, the way it is designed, it can be built in two parts. In this article, I began building the extension on the east side of the railroad. I can build the other extension later, since the only things connecting them will be a storage track running through the shed and a bridge across the third connecting pool.
Digging Again - Last spring I bought a gas-powered post-hole digger/auger from Harbor Freight and used it to dig eight post-holes in a part of the yard that has a great deal of gravel, etc. The "Predator Gas-Powered Earth Auger" worked fine. Then. Though I followed the instructions for maintenance and storage scrupulously, it won't start now. Here's something else to know - When I gave this a low rating on the Harbor Freight web page, they deleted my review. Now you know how they manage all "four-star" and "five-star" reviews on their products. Anyway, that one is going back. (I have bought other tools from them that work fine, but sometimes you do get what you pay for.) Fortunately, the ground where the next holes needed to be dug is just clay with very few rocks or other obstacles. I got out my manual post-hole digger and a ditch shovel and got started. The ground was so hard from the drought that after I went down a few inches, I filled the holes with water and went back later to finish, just as I had on the hole for the in-ground pond. It softened the clay enough so that the five new post holes were no real problem to dig. Posts Installed Because our frost line is reputed to be 24" deep, I cut 4"x4"x8" posts in half and sank them into the new post holes. In the photo to the lower left, you can see that the post closest to the waterfall seems to be shorter than the others. That's because the ground is lower there. All the posts are a tad longer than they will need to be because it's much easier to shave a few inches off a post that is installed than to make one taller. The photo to the lower right shows the hole I cut into the side of the train shed to allow a joist to reach a post just inside the wall.
Joists Installed - Next I installed the joists (lower left photo). For the most part, I attached them between new and old posts. When planning a structure like this, remember that the joists usually run the same direction that the decking runs. (The frame that supports the decking will run perpendicular to the joists, and the decking will run perpendicular to the frame.) The maximum span recommended for a 2"x6" deck joist in this part of the country is usually 6'. I used that span on the longest joists, but I also ran the joists past the posts about 11" so that part of the frame could extend a bit farther out. You may also notice that I ran the two center joists farther back under the railroad than I "technically" needed to, just to provide a little more stability and strength to the structure. Notching the ends of the joists isn't necessary. To me it just dresses them up a little. By the way, getting the joists level and level with each other is the hardest part of doing this by yourself. But once you've done that, the rest of the project is relatively simple. Once the joists were installed, I cut off the top of the posts, leaving about 4" on each (lower right photo). That would be enough to attach some of the frame bits to if I wanted to, but would allow the decking to go over them without interference. If you accidentally forget to do this until after the frame is installed, you will find yourself doing some difficult cuts or overusing your reciprocating saw.
Framing Considerations - When room allows, I run the frame pieces 2' apart, since that's the maximum recommendation for frame that will be supporting 2"x6" decking. The decking will run perpendicular to the long frame pieces, of course. It will also hang out over the end a bit. Note: If you use ordinary "5/4" decking you should consider running the frame boards 16" apart. Again your state may have different recommendations. Because of having to fit the new platform around existing structures, I couldn't do the framing exactly the way I would do it for a freestanding structure. So there are several places where the frame boards that will support the decking are less than 24" apart. But of course, that just adds to the strength of the platform.
Eventually (when the other expansion is installed):
The little 4' circle is there because:
I realize that a more precise planner and builder would have seen that ahead of time and avoided the "last-minute" correction. But, again, things like that are a lot easier for me to see as the structure is taking place. Depending on how things work out when the next extension goes on, I may build a trestle to cross the third connecting pool. But in the meantime, there will be some simple plantings and mulching around the pond to make things look a little more established before the next open railroad. The following photo shows the rest of the frame installed and ready for decking. Yes, I put the track away again before I started that effort. 
A Note About Temperatures - You may have noticed that the clock in some photos is never showing a time that makes sense considering what else is going on. That's because three straight months of 90 degree temperatures have destroyed the batteries in it twice, and I'm not putting new batteries in until it cools down. Also you may have noticed that the bird feeders I set on the railroad for the winter are still out and my nice custom buildings are nowhere to be seen. Again, even though I have protected my custom buildings against reasonable UV and temperatures, three straight months of 90 degree temperatures would have caused so much damage I would have had to repair or repaint them before my next open railroad anyway. At this time (early October) we are still getting temperatures in the 90s, at a time I would ordinarily be thinking about being ready to protect my tomatoes from killing frosts. Please let me repeat what I have said earlier - never tell a gardener that global climate change is a hoax. ConclusionI actually got started on the decking the same day I finished the framing, but this article was getting long enough. Plus I ran out of lumber before I had enough of the platform decked to make it worth photographing. Stay tuned. In the meantime, I hope I've given you enough information to inspire you to think "outsided of the retaining wall" for your next garden railroad endeavor.Keep in TouchFinally, please let us know about your ongoing projects. Ask questions, send corrections, suggest article ideas, send photos, whatever you think will help you or your fellow railroaders. In the meantime, enjoy your trains, and especially enjoy any time you have with your family in the coming weeks, Paul Race
Click on the photo to see our status as of late October, 2019.
Click on the photo to see our plans for the next addition, as of late September, 2019.
The process included checking the pump, extending the hoses, rescuing toads, building the platform, trimming the platform, testing the pool's location, etc. Click the photo to go to the article.
Click on the photo to see our progress as of mid-September, 2019.
Click on the photo to see a lot of last-minute preparations and some photos of the November 10, 2018 event itself.
By the way, going over lumber receipts in early 2019, I couldn't believe I was still siding the train shed in late October, and managed to have an open railroad in mid-November. It is a little crazy how fast things can go together if you have a deadline and a lot of gift cards. Click on the photo to see our progress as of late October, 2018.
Includes choosing the siding and windows, installing the door, painting the windowframes, and adding crosspieces to support the vertical siding boards.
Now the roof is waterproof enough to get us through the next couple of months at least, maybe more.
I thought about bringing in helpers for this part, but a reader commented on how helpful it was to see how one person could do this sort of thing by himself, so I just kept plugging away. Click on the photo to see our progress as of September 13, 2018
Click on the photo to see our status as of August 5, 2018.
The way we got the rafters and ridge board up wouldn't work for everybody, but it worked for us, and hopefully will help other folks to "think outside the box" - literally in this case. Click on the photo to see our progress as of July 14, 2018.
Click on the photo to see our status as of July 9, 2018.
Click on the photo to see our progress as of June 13, 2018.
Click on the photo to see our status as of June 1, 2018.
Click on the photo to see our status as of February 20, 2018
Click on the photo to see our status as of February 20, 2018
Click on the photo to see our status as of November 21, 2017
Click on the photo to see our status as of October 25, 2017
Click on the photo to see our status as of October 15, 2017
Click on the photo to see our status as of October, 10, 2017
Click on the photo to see our status as of September 26, 2017
Click on the photo to see our status as of September 17, 2017
Click on the photo to see our status as of September 7, 2017
Click on the photo to see our status as of August 10, 2017
Click on the photo to see our status as of the end of July, 2017
Click on the photo to see what we were considering as of late May, 2017
Click on the photo to see what we were considering as of late April, 2017
Click on the photo to see what we were considering in early April, 2017
Click on the photo to see what we were considering in March, 2017
Click on the photo to see the home page of Paul's railroad.
To read more, or to look at recommended Garden Railroading and Big Indoor Train products, please click on the index pages below.
|

 
|


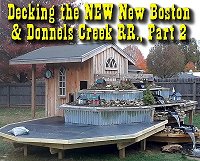 Proceed to Decking the NEW New Boston and Donnels Creek Part 2
 Return to "Planning the NEW New Boston and Donnels Creek RR - Part 5"
 Return to Waterscaping Part 4.
 Return to "Waterscaping, Part 3"
 Return to Christmas Train Day, 2018
 Return to "Adding a Train Shed Part 6"
 Return to "Adding a Train Shed Part 5"
 Return to "Adding a Train Shed Part 4"
 Return to "Adding a Train Shed Part 3"
 Return to "Waterscaping Part 2"
 Return to "Adding a Train Shed Part 2"
 Return to "Adding a Train Shed Part 1"
 Return to "Waterscaping the NEW New Boston and Donnels Creek Part 1,"
  Return to "Dirtscaping the NEW New Boston and Donnels Creek RR, Part 2.
 Return to "Adding Raised Roadbed to the NEW New Boston and Donnels Creek, Part 2"
 Return to "Adding Raised Roadbed to the NEW New Boston and Donnels Creek RR, Part 1"
 Return to "2018: Springing into Spring on the NEW New Boston & Donnels Creek RR."
 Return to "Dirtscaping the NEW New Boston and Donnels Creek RR, Part 1.
 Return to "Decking the NEW New Boston and Donnels Creek RR
 Return to "Framing the NEW New Boston and Donnels Creek RR, Part 6"
 Return to "Framing the NEW New Boston and Donnels Creek RR, Part 5"
 Return to "Framing the NEW New Boston and Donnels Creek RR, Part 4"
 Return to "Framing the NEW New Boston and Donnels Creek RR, Part 3"
 Return to "Framing the NEW New Boston and Donnels Creek RR, Part 2"
 Return to "Framing the NEW New Boston and Donnels Creek RR, Part 1"
 Return to "Breaking Ground on the NEW New Boston and Donnels Creek"
 Return to "Planning the NEW New Boston and Donnels Creek, Part 4"
 Return to "Planning the NEW New Boston and Donnels Creek, Part 3"
 Return to "Planning the NEW New Boston and Donnels Creek, Part 2"
 Return to "Planning the NEW New Boston and Donnels Creek, Part 1"
 Return to the New Boston and Donnels Creek RR Page
 Return to Family Garden Trains' Home Page
Note: Family Garden TrainsTM, Garden Train StoreTM, Big Christmas TrainsTM, BIG Indoor TrainsTM, and BIG Train StoreTM are trademarks of
Breakthrough Communications (btcomm.com). All information, data, text, and illustrations on this web site are
Copyright (c) 1999, 2000, 2001, 2002, 2003, 2004, 2005, 2006, 2007, 2008, 2009, 2010, 2011, 2012, 2013, 2014, 2015, 2016, 2017, 2018, 2019 by
Paul D. Race. Reuse or republication without prior written permission is specifically
forbidden.
Family Garden Trains is a participant in the Amazon Services LLC Associates Program,
an affiliate advertising program designed to provide a means for sites to earn advertising
fees by advertising and linking to amazon.com.
For more information, please contact us
 |  |
| Visit related pages and affiliated sites: | |||||
| - Trains and Hobbies - | |||||
|  |
|
 |
|  |
 |

|

|  |
|

|
| - Christmas Memories and Collectibles - | |||||
 |

|
 |

|

|
|
| - Family Activities and Crafts - | |||||
 |

|

|

|

|

|
| - Music - | |||||

|
 |
 |

|

|

|

|

|

|

|

|

|

|

|

|

|

|

|