 | |||
 |
 |  | |
 |  | ||
 |  | ||
 |  | ||
 |  | ||

| Please Read: How to Help Our Site at No Cost to You - Some of our articles contain recommendations for products we like and vendors we personally trust. Some of those vendors may pay us a very small commission if you click on a link and buy their products. This costs you nothing at all and helps offset the costs of what we do. So if we point you to something you decide to buy later, please make certain you come back through our site and click on the link directly. Thanks. |


|
Train Storage Solutions, January 2020
In the meantime, while the weather's too cold to work outside, but not too cold to work in the (mostly unheated) garage, I've been trying to make sense of the boxes and bins of stuff that came over from the other house willy-nilly. I used to do a lot of clinics and demonstrations, so I always had backup items besides the trains I actually ran at home. A few years back, that slowed down for a time, and I sold or gave away a lot of stuff I figured I'd never need again. Then we moved a couple of years later, and I discovered more pieces I'm not likely to need again. But since almost none of my pieces are in production these days, I do want to sort it first to make certain I'm not getting rid of things I'll need eventually. And a place to store it in the meantime is critical for that. Which for me means shelves and bins. Home-Grown ShelvesThe commercial shelves from Menards and Home Depot all had a litany of customer complaints about missing and damaged pieces and lack of store and manufacturer support. I couldn't decide if they would be worth the money. Then an auto parts store in the area went out of business and the building's new owners tore the shelves out. Many were too damaged to use, but I brought home over 20 11"x5/8"x8' boards I could use as shelves. Later I bought some 2"x4"s to use as frames. The 2"x4"s and the screws I needed to fasten them to the wall and each other probably ran about $50. That and some time were all it cost to wind up with a 16'x8'x22" shelf system. Construction The wall the shelf was going up against was concrete block, but the previous owner had put furring strips and drywall on the inside. Fortunately, I was able to screw my vertical supports right through the drywall and furring strips into the concrete block, using leftover decking screws.An 11" board sandwiched between two 2"x4"s facing parallel to the wall would create a shelf system that was just over 14" deep, not deep enough for many of the things I needed to store. Two 11" boards would have created a shelf system that was 25" deep, so deep that it would keep people from getting their car door open in that part of the garage. So I slit several of the boards in half and put an 11" board with a 5.5" board. So my total depth is just under 20", big enough for anything I need to store on the shelves, but not quite making that side of the garage useless. The drawing to the right shows the basic construction of the first 8' set of shelves. As you'll see, the long 2"x4"s are installed parallel to the wall. They are connected by short boards that support the shelves (only one of which is shown for simplicity). Thankfully, I had the foresight to attach the cross-pieces to the inside of the first and third set of supports. That way the 8' boards had some "wiggle room" at the end, in case one was a couple inches short. Each set of supports is 4' from its neighbors, so each set of shelf boards spans two 4' spans. Since most of what I'm putting on those shelves isn't THAT heavy, they are supporting the weight nicely. After I got that much done and screwed together, I extended it by attaching crosspieces on the other side of the far support, then adding two more sets of supports further down.
You'll notice that I left a large space between two of the shelves. That's because some things I needed to store at that level require more height. Also, the third shelf from the bottom is about 40" off the ground, which makes it about workbench height for me, so I can operate certain pieces of equipment there more easily. Also, I didn't put a top shelf on yet. As it is now, I don't need one, since I can stack the bins I'm using up there. I have enough of the original boards to add a top shelf eventually if I want to. Train Storage and SchlepI run trains. That may seem like a stupid statement, but many of my fellow hobbyists seem to collect trains more than they run them. And a large part of their hobby time seems to be taken up with getting their trains in and out of their store boxes. I do keep a couple hard-to-find pieces in their original containers for safekeeping, but I gave the packages for the vast majority of my trains away years ago, because they were just too time-consuming to use. And ironically, the packaging on some of those was so ill-conceived that the pieces are more likely to be damaged getting them in and out of the box than they are from running and handling.The railroad at our old house was about 160' away from the garage where I stored most of the trains. So to get my trains out of the garage and onto the track with the least hassle, I started using those semi-clear Sterilite containers. I could easily fit four full-sized freight cars in each container. Usually I would put them in two layers, the trucks of each car facing each other, and a piece of cardboard separating the two. As long as I didn't kick the bins all the way to the railroad or something, that was safe enough for storage and transport within the back yard, or even to the clinics I used to do. Smaller pieces could be packed more creatively, usually with a bit of fine bubble-wrap. (Be careful doing this with locomotives - many have whistles and bells that can be snapped off with very little pressure.) The trains were light enough to carry two containers at a time, so I could hoist a pretty long train out to the railroad in a few easy trips. I have yet to find a solution that is cheaper or easier. Unfortunately, Sterilite has changed the shape of their bins several times, which makes matching lids to bins more complicated than it needs to be. Nowadays when I need new bins, I make a point of buying one specific size - the 56qt - which has kept the same dimensions for several years.
As you can see, the bins fit nicely on my new shelves. The photo to the right may give the wrong impression, as not all of those bins are full of runnable models. Once things are in their place and time allows, I'll be revisiting several of those bins, fixing pieces that need help, and earmarking some for eventual liquidation. I have to confess, though, that when it comes to getting rid of stuff I "won't ever need," I have to take into account that almost all of the pieces I own are permanently out of production, and parts for them will never be available again. So keeping backup pieces, and even a few incomplete pieces for parts, is not necessarily "hoarding" in the popular sense. There may be some articles about bringing damaged, but hard-to-find pieces back to life in future installments. Other Schlep SolutionsWhile I'm at it, I'll add some other schlep solutions I've seen.
Even if none of these suggestions work for you, they may give you some ideas. One solution I won't recommend is something a family with more money than sense did in the early days of Bachmann's entry into the hobby - they left their trains out on storage tracks all year long. They swore that being buried in snow off and on several times that winter didn't hurt them at all. I inadvertently did this once with one short train when a blizzard covered the tracks just after a day's running. Lots of rusting springs and brittle or broken handrails greated me in the spring. So don't try this at home. These trains can handle being outside any day you enjoy running them, but they're not like picnic tables - they need shelter when you need shelter. Keep in TouchMany folks I know have already stumbled on storage and schlepp solutions that work better for them than any of my examples or suggestions. Not to mention, many of my readers are far better carpenters than I. But I'm sharing my efforts and these suggestions in case anyone else is facing similar issues and looking for inspiration, or at least a low-cost solution. Though my own train shed/station that is attached to the railroad is too small to store more than a few pieces, at least it allows me to keep one or two trains ready to go at all times. Yes, I still have to shlep out rolling stock when I want to run longer trains, but that's not hard either. So if you're headed toward or past Springfield, Ohio, please let me know, and I'll see if we can work out a quick visit. Finally, please let us know about your ongoing projects. Ask questions, send corrections, suggest article ideas, send photos, whatever you think will help you or your fellow railroaders. In the meantime, enjoy your trains, and especially enjoy any time you have with your family in the coming weeks, Paul Race
Click on the following link to see our status as of late September, 2020. https://familygardentrains.com/newbost/20_09_western_expansion_1/20_09_30_western_expansion1.htm
Click on the photo to see the options we are reviewing for the next and last expansion.
Click on the following link to see our status as of early December, 2019. https://familygardentrains.com/newbost/19_11_24_winter_prep/19_11_24_winter_prep.htm
Click on the photo to see a brief record of our busiest weekend in November, 2019.
Click on the following link to see our progress of mid-November, 2019.
Click on the photo to see our status as of late October, 2019.
Click on the following link to see our progress of early October, 2019.
Click on the photo to see our plans for the next addition, as of late September, 2019.
The process included checking the pump, extending the hoses, rescuing toads, building the platform, trimming the platform, testing the pool's location, etc. Click the photo to go to the article.
Click on the photo to see our progress as of mid-September, 2019.
Click on the photo to see a lot of last-minute preparations and some photos of the November 10, 2018 event itself.
By the way, going over lumber receipts in early 2019, I couldn't believe I was still siding the train shed in late October, and managed to have an open railroad in mid-November. It is a little crazy how fast things can go together if you have a deadline and a lot of gift cards. Click on the photo to see our progress as of late October, 2018.
Includes choosing the siding and windows, installing the door, painting the windowframes, and adding crosspieces to support the vertical siding boards.
Now the roof is waterproof enough to get us through the next couple of months at least, maybe more.
I thought about bringing in helpers for this part, but a reader commented on how helpful it was to see how one person could do this sort of thing by himself, so I just kept plugging away. Click on the photo to see our progress as of September 13, 2018
Click on the photo to see our status as of August 5, 2018.
The way we got the rafters and ridge board up wouldn't work for everybody, but it worked for us, and hopefully will help other folks to "think outside the box" - literally in this case. Click on the photo to see our progress as of July 14, 2018.
Click on the photo to see our status as of July 9, 2018.
Click on the photo to see our progress as of June 13, 2018.
Click on the photo to see our status as of June 1, 2018.
Click on the photo to see our status as of February 20, 2018
Click on the photo to see our status as of February 20, 2018
Click on the photo to see our status as of November 21, 2017
Click on the photo to see our status as of October 25, 2017
Click on the photo to see our status as of October 15, 2017
Click on the photo to see our status as of October, 10, 2017
Click on the photo to see our status as of September 26, 2017
Click on the photo to see our status as of September 17, 2017
Click on the photo to see our status as of September 7, 2017
Click on the photo to see our status as of August 10, 2017
Click on the photo to see our status as of the end of July, 2017
Click on the photo to see what we were considering as of late May, 2017
Click on the photo to see what we were considering as of late April, 2017
Click on the photo to see what we were considering in early April, 2017
Click on the photo to see what we were considering in March, 2017
Click on the photo to see the home page of Paul's railroad.
To read more, or to look at recommended Garden Railroading and Big Indoor Train products, please click on the index pages below.
|

 
|


 Proceed to "Westward Expansion, 2020, Part 1"
 Return to "Winter Preparation, 2019"
 Return to "Christmas Train Day, 2019"
 Return to "Preparing for Christmas Train Day 2019"
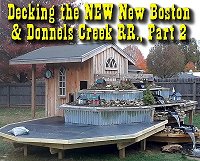 Return to Decking the NEW New Boston and Donnels Creek Part 2
 Return to "Framing the NEW New Boston and Donnels Creek RR - Part 7"
 Return to "Planning the NEW New Boston and Donnels Creek RR - Part 5"
 Return to Waterscaping Part 4.
 Return to "Waterscaping, Part 3"
 Return to Christmas Train Day, 2018
 Return to "Adding a Train Shed Part 6"
 Return to "Adding a Train Shed Part 5"
 Return to "Adding a Train Shed Part 4"
 Return to "Adding a Train Shed Part 3"
 Return to "Waterscaping Part 2"
 Return to "Adding a Train Shed Part 2"
 Return to "Adding a Train Shed Part 1"
 Return to "Waterscaping the NEW New Boston and Donnels Creek Part 1,"
  Return to "Dirtscaping the NEW New Boston and Donnels Creek RR, Part 2.
 Return to "Adding Raised Roadbed to the NEW New Boston and Donnels Creek, Part 2"
 Return to "Adding Raised Roadbed to the NEW New Boston and Donnels Creek RR, Part 1"
 Return to "2018: Springing into Spring on the NEW New Boston & Donnels Creek RR."
 Return to "Dirtscaping the NEW New Boston and Donnels Creek RR, Part 1.
 Return to "Decking the NEW New Boston and Donnels Creek RR
 Return to "Framing the NEW New Boston and Donnels Creek RR, Part 6"
 Return to "Framing the NEW New Boston and Donnels Creek RR, Part 5"
 Return to "Framing the NEW New Boston and Donnels Creek RR, Part 4"
 Return to "Framing the NEW New Boston and Donnels Creek RR, Part 3"
 Return to "Framing the NEW New Boston and Donnels Creek RR, Part 2"
 Return to "Framing the NEW New Boston and Donnels Creek RR, Part 1"
 Return to "Breaking Ground on the NEW New Boston and Donnels Creek"
 Return to "Planning the NEW New Boston and Donnels Creek, Part 4"
 Return to "Planning the NEW New Boston and Donnels Creek, Part 3"
 Return to "Planning the NEW New Boston and Donnels Creek, Part 2"
 Return to "Planning the NEW New Boston and Donnels Creek, Part 1"
 Return to the New Boston and Donnels Creek RR Page
 Return to Family Garden Trains' Home Page
Note: Family Garden TrainsTM, Garden Train StoreTM, Big Christmas TrainsTM, BIG Indoor TrainsTM, and BIG Train StoreTM are trademarks of
Breakthrough Communications (btcomm.com). All information, data, text, and illustrations on this web site are
Copyright (c) 1999, 2000, 2001, 2002, 2003, 2004, 2005, 2006, 2007, 2008, 2009, 2010, 2011, 2012, 2013, 2014, 2015, 2016, 2017, 2018, 2019 by
Paul D. Race. Reuse or republication without prior written permission is specifically
forbidden.
Family Garden Trains is a participant in the Amazon Services LLC Associates Program,
an affiliate advertising program designed to provide a means for sites to earn advertising
fees by advertising and linking to amazon.com.
For more information, please contact us
 |  |
| Visit related pages and affiliated sites: | |||||
| - Trains and Hobbies - | |||||
|  |
|
 |
|  |
 |

|

|  |
|

|
| - Christmas Memories and Collectibles - | |||||
 |

|
 |

|

|
|
| - Family Activities and Crafts - | |||||
 |

|

|

|

|

|
| - Music - | |||||

|
 |
 |

|

|

|

|

|

|

|

|

|

|

|

|

|

|

|