Westward Expansion, 2020, Part 3
This is a follow-up to our article  "Westward Expansion, 2020, Part 2" "Westward Expansion, 2020, Part 2"
In that article, we finished installing the joists and started building the frame that will support the decking.
In this article, we finish the frame and begin installing the decking.
In these activities, I try to fulfill most of the local construction requirements for the sort of decks people put in their back yard to host parties on, etc. For one thing I know that with the 10'-diameter curves I'll eventually be using on the broadest level of my three-tier railroad, there will be areas I cannot reach without climbing onto the platform.
Folks whose platforms are narrow enough to reach across easily don't have that concern. Neither do folks who use a bridge or some such to get into the middle of their track loops. Such folks don't necessarily need their construction to be as rigorous as mine is. In my case, I've learned to avoid approaches that will "probably" work and stick to those I know will work. Generally they save me some money and much time in the long run.
Completing the Framing
The day before Halloween, 2020 was the first partially dry day in weeks. Thankfully, I was able to finish the frame, including a lot of extra bracing on the corners and edges just to be certain it won't collapse there if someone even heavier than me climbs up on it.

I may have started on the decking right then, but we were going to have visitors, and I wouldn't have enough lumber to complete it until next week anyway.
 That evening, a family we know brought over their two very young grandchildren to trick-or-treat and to see the trains running. That evening, a family we know brought over their two very young grandchildren to trick-or-treat and to see the trains running.
Because this was going to be a quick visit, I just put on the LGB handcar, a Lehmann 0-4-0T pulling a string of ore cars, and a Santa Fe Eggliner, rather putting out long trains. That said, it's time to get a lighted passenger train or two on standby, since it's getting dark so early.
BTW, the LGB handcar didn't seem to like the cold weather (high 40s) very much but the Lehmann 0-4-0T and the Eggliner handled it just fine.
Building the Decking
The next day, Halloween 2020, I started on the decking, using 2"x6"s I had picked up a week earlier.
I also had a few pieces of 2"x10" cedar that used to be steps on our back deck. (We moved the stairs around to a more useful position when we had other work done on the deck this summer.) It looks bad, but it's very solid and will save me money on pressure-treated lumber that no one will see anyway.
 Here's a weird safety note. For some reason Ohio's yellow jackets are more active in autumn, even late autumn, than they are in the summer. While I was cutting lumber for the new extension's deck, two kept landing on the lumber. They were not aggressive toward me at all; I think they were attracted to the scent. So I didn't pay them much attention until I put my hand down on a board without looking and got stung on my palm between my thumb and forefinger. I can't really blame a wasp for stinging me if I crush it accidentally, so swatting and killing the other one the next time I saw him was probably unjustified. Still hurts, though, so I guess they have their revenge. Here's a weird safety note. For some reason Ohio's yellow jackets are more active in autumn, even late autumn, than they are in the summer. While I was cutting lumber for the new extension's deck, two kept landing on the lumber. They were not aggressive toward me at all; I think they were attracted to the scent. So I didn't pay them much attention until I put my hand down on a board without looking and got stung on my palm between my thumb and forefinger. I can't really blame a wasp for stinging me if I crush it accidentally, so swatting and killing the other one the next time I saw him was probably unjustified. Still hurts, though, so I guess they have their revenge.
Time to Rework the Timers Once my boards started to get close to the previous border, I had to unplug and move the garden lighting posts and timers, which would have been unreachable once the deck was completed. That's okay; they weren't intended to be permanent. Most of them went up in a hurry right before an open RR or some such. Now I have no excuse to avoid putting better timers on the lighting, pond pump, aeration system, and so on. Theoretically, the rope lights around the railroad and the lights at the bottom of the pond should all come on when it gets dark and stay on for a few hours. But the aeration system and the pond pump should be on (separate) actual timers, controlled by the time of day instead of how dark it is. The pond pump's timer should also allow me to switch it on or off regardless of the time, in case of visitors or deep freezes. Time to dig through my collection of plugs and timers to find something appropriate.
In the meantime, the pond pump's cord is a foot too short to reach the timers' new location. Don't worry, I'll plug in an extension cord if visitors come over.
First Pass - The photo below shows the deck about half done, using the lumber I picked up on my last trip to the store. I was running out of screws, too, so some of the boards are only screwed down a couple places, but I kept laying the boards because I wanted to figure out how much more lumber I would need.

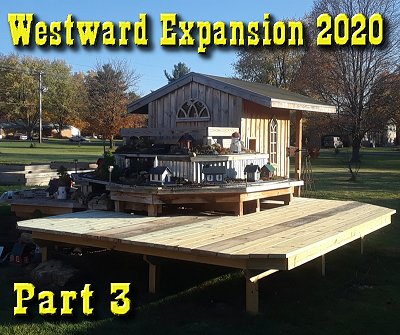
Second Pass The photo below shows the deck screwed down and finished. I left about 8" of overhang on the sides where the 2"x6" boards stick out, something you wouldn't do on a deck people will be standing on. I wouldn't dream of doing that with 5/4" boards. I'll let you know if it causes any problems further down the road. In the meantime, I need to remember never to step up on the railroad from those ends. On the sides, the deck only protrudes about 2-2.5".
The height of the new deck averages about 26" above ground. The side facing the house is about 24", the side facing the property line/privacy fence is about 28". The final right-of-way will be a tad higher, since I'll lay it on 2"x6" roadbed. In the meantime, I will lay a temporary loop or two of track to run trains on for visitors during the holiday season.

Installing Vinyl - As mentioned in earlier chapters, I bought a huge piece of vinyl that had been intended to be part of a billboard but was apparently rejected for being a misprint. It's substantially cheaper than similar tarp material you buy from other sources.
The more I use the lighter the remaining bundle gets. At this point I suppose I have about 140 square feet left, enough for any future addition I would be considering.
I pieced the tarp together as I worked around the irregular shapes, being certain to overlap a few inches at each joint. It doesn't have to be watertight. In fact, I poke holes once it's installed to make certain I don't get standing water in any areas. You would do the same in any flowerbox.
I used almost a whole box of staples tacking it down. Then I trimmed the edges.
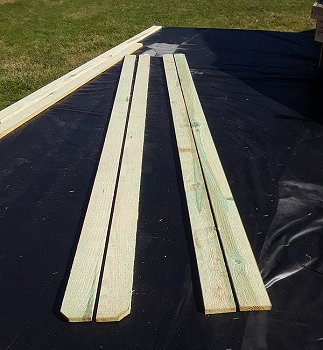 Trim Boards - For me the next step is picking up some pressure-treated 8' fence boards, and slicing them in half on my table saw. The trim boards hide the staples and vinyl on the edge of the deck, but more importantly, they keep the gravel and dirt I put on top from sliding off. (Not to mention, it makes it harder for the neighbor's cat to knocking things off the railroad. Yes, that has happened.) Trim Boards - For me the next step is picking up some pressure-treated 8' fence boards, and slicing them in half on my table saw. The trim boards hide the staples and vinyl on the edge of the deck, but more importantly, they keep the gravel and dirt I put on top from sliding off. (Not to mention, it makes it harder for the neighbor's cat to knocking things off the railroad. Yes, that has happened.)
These boards gray up quickly, so I use gray 1 5/8" screws to hold them in place. They're not really meant for this sort of abuse, but the trim boards I installed in 2017 are still doing the job, so I have no reason to swap out materials now.
I suppose if you had round edges instead of corners, you could choose from an array of vinyl products to do the same thing. The main thing would be to use the same materials for the same function throughout. Even if they're not "realistic," any material you use consistently throughout your railroad eventually becomes "invisible" to visitors. Using different structural materials in different parts of your railroad draws attention to the materials and away from the trains.

If this was June instead of November, I would keep moving forward with my plan to connect the two lower platforms with a bridge and install wide-radius track. After cutting and installing 2"x6" roadbed to support that track, I would add dirt, gravel, plants, and rocks to bring the garden to life, as well as towns and industries.
But there's no way we'd finish all that before it becomes too cold to work on such projects. So anything we do in the next few days will be a temporary setup to entertain visitors between now and Christmas. That will most likely include a loop or two of 4' or 5' radius track and a bunch of buildings temporarily set in pea gravel to camouflage the tarp, like we did on the platform we installed last year.
Keep in Touch
If you're headed toward or past Springfield, Ohio, please let me know, and I'll see if we can work out a quick visit.
Finally, please let us know about your ongoing projects. Ask questions, send corrections, suggest article ideas, send photos, whatever you think will help you or your fellow railroaders. In the meantime, enjoy your trains, and especially enjoy any time you have with your family in the coming weeks,
Paul Race
FamilyGardenTrains.com
Note: The following page is a detour to show what we've been working on inside when the weather was too brutal to work outside.
 Proceed to "Garage to Train Station, Part 1" - fixing up one end of my garage to resemble a Victorian train station interior. The initial steps included demolition, patching the ceiling and walls, moving electrical outlets, adding wainscotting and baseboard, and planning for windowframes with painted backgrounds. Proceed to "Garage to Train Station, Part 1" - fixing up one end of my garage to resemble a Victorian train station interior. The initial steps included demolition, patching the ceiling and walls, moving electrical outlets, adding wainscotting and baseboard, and planning for windowframes with painted backgrounds.
Click on the picture to see our status as of early December, 2020.
Alternatively: If you want to see the "next steps" of our outdoor efforts:
 Proceed to "Christmas Preparations and Operations" - Usually we have a single big Christmas-themed open railroad, and we prepare for it much of the fall. But for safety's sake this year, we decided to scale things back and spread them out. Thanks to the new platform, we were able to have five running trains for visitors to watch, including actual model trains and Thomas and Friends trains. We also had three trains for kids to run, including a Hogwarts Express circling a castle where a dragon is pursuing Harry Potter and his friends. Proceed to "Christmas Preparations and Operations" - Usually we have a single big Christmas-themed open railroad, and we prepare for it much of the fall. But for safety's sake this year, we decided to scale things back and spread them out. Thanks to the new platform, we were able to have five running trains for visitors to watch, including actual model trains and Thomas and Friends trains. We also had three trains for kids to run, including a Hogwarts Express circling a castle where a dragon is pursuing Harry Potter and his friends.
Click on the picture to see our status as of late December, 2020.
 Return to "Westward Expansion, 2020, Part 2" - We had to be careful leveling the last joists so the frame, decking, and right-of-way would be as level as possible. Fortunately we were able to get enough lumber to get a good start on the frame. Return to "Westward Expansion, 2020, Part 2" - We had to be careful leveling the last joists so the frame, decking, and right-of-way would be as level as possible. Fortunately we were able to get enough lumber to get a good start on the frame.
We also added one last tweak to the frame design to make it easier to extend this platform to its originally planned size, if and when we get a chance to do so.
 Return to "Westward Expansion, 2020, Part 1" - With a lumber shortage and warm weather running out, we revised our plans for the next addition, bought what decent lumber we could find, dug holes, installed posts, and attached joists. Return to "Westward Expansion, 2020, Part 1" - With a lumber shortage and warm weather running out, we revised our plans for the next addition, bought what decent lumber we could find, dug holes, installed posts, and attached joists.
We were hoping to get the lumber we need to finish the platform before cold weather set in. Click on the link to see our status as of late September, 2020.
 Return to "Train Storage Solutions, 2020" - Using periods of cold weather to get things sorted in the garage, including shelf building and tips for schlepping trains from storage to the tracks. Return to "Train Storage Solutions, 2020" - Using periods of cold weather to get things sorted in the garage, including shelf building and tips for schlepping trains from storage to the tracks.
Click on the following link to see our status as of late January, 2020.
https://familygardentrains.com/newbost/20_1_19_shelves/shelves.htm
 Return to "Expansion Planning, 2020" - Three years after starting a garden railroad in our new home, we are trying to figure out the best way to finish the last loop of our raised platform railroad. How to make room for 10'-diameter curves and more towns and industries, but still keeping things manageable requires some thinking and rethinking. Return to "Expansion Planning, 2020" - Three years after starting a garden railroad in our new home, we are trying to figure out the best way to finish the last loop of our raised platform railroad. How to make room for 10'-diameter curves and more towns and industries, but still keeping things manageable requires some thinking and rethinking.
Click on the photo to see the options we were reviewing for the next and last expansion.
 Return to "Winter Preparation, 2019" - After the big open railroad event, we try to prepare the railroad for the cold months, including populating the railroad with North States bird feeders so it doesn't look empty, adding an air pump and bubblers to the pond, and more. Return to "Winter Preparation, 2019" - After the big open railroad event, we try to prepare the railroad for the cold months, including populating the railroad with North States bird feeders so it doesn't look empty, adding an air pump and bubblers to the pond, and more.
Click on the following link to see our status as of early December, 2019.
https://familygardentrains.com/newbost/19_11_24_winter_prep/19_11_24_winter_prep.htm
 Return to "Christmas Train Day, 2019" - Three years after starting a garden railroad in our new home, we host another Christmas-themed open railroad, giving many families a jump start on Christmas celebrations and sharing the experience of running trains with lots of kids. Return to "Christmas Train Day, 2019" - Three years after starting a garden railroad in our new home, we host another Christmas-themed open railroad, giving many families a jump start on Christmas celebrations and sharing the experience of running trains with lots of kids.
Click on the photo to see a brief record of our busiest weekend in November, 2019.
 Return to "Preparing for Christmas Train Day 2019" - Wrapping up construction projects for 2019 and getting ready for our annual Christmas-themed open railroad. Includes new lighting and other features, providing a temporary home for a Hogwarts Express train, weather issues, and more. Click to go to article. Return to "Preparing for Christmas Train Day 2019" - Wrapping up construction projects for 2019 and getting ready for our annual Christmas-themed open railroad. Includes new lighting and other features, providing a temporary home for a Hogwarts Express train, weather issues, and more. Click to go to article.
Click on the following link to see our progress of mid-November, 2019.
 Return to Decking the NEW New Boston and Donnels Creek Part 2 - Getting the next part of the railroad ready to install trains. Includes installing 2"x6" decking, vinyl sheeting, edges to hold back the gravel, and corrugated steel panels. It's not done, but it will give us another place to set up trains for our next Christmas-themed open railroad. Return to Decking the NEW New Boston and Donnels Creek Part 2 - Getting the next part of the railroad ready to install trains. Includes installing 2"x6" decking, vinyl sheeting, edges to hold back the gravel, and corrugated steel panels. It's not done, but it will give us another place to set up trains for our next Christmas-themed open railroad.
Click on the photo to see our status as of late October, 2019.
 Return to "Framing the NEW New Boston and Donnels Creek RR - Part 7" - Installing posts, joists, framing, and decking for the eastern expansion of the NEW New Boston and Donnels Creek. Although this installation was complicated by having to fit into an existing framework, the methods used could work for any raised-platform railroad. Return to "Framing the NEW New Boston and Donnels Creek RR - Part 7" - Installing posts, joists, framing, and decking for the eastern expansion of the NEW New Boston and Donnels Creek. Although this installation was complicated by having to fit into an existing framework, the methods used could work for any raised-platform railroad.
Click on the following link to see our progress of early October, 2019.
 Return to "Planning the NEW New Boston and Donnels Creek RR - Part 5" - Once the major components of the water feature were installed and tested, we decided to add one more bit of railroad proper before our "Christmas Train Day," this November. The addition, about 5'x11', will allow us to put a small train and some scenery closer to eye level for youngsters. Eventually it will be part of the larger plan that will allow us to run our bigger cars and locomotives. Return to "Planning the NEW New Boston and Donnels Creek RR - Part 5" - Once the major components of the water feature were installed and tested, we decided to add one more bit of railroad proper before our "Christmas Train Day," this November. The addition, about 5'x11', will allow us to put a small train and some scenery closer to eye level for youngsters. Eventually it will be part of the larger plan that will allow us to run our bigger cars and locomotives.
Click on the photo to see our plans for the next addition, as of late September, 2019.
 Return to Waterscaping Part 4. - Installing the last connecting pool, so the whole planned waterfall is complete except for dirtscaping and planting. Return to Waterscaping Part 4. - Installing the last connecting pool, so the whole planned waterfall is complete except for dirtscaping and planting.
The process included checking the pump, extending the hoses, rescuing toads, building the platform, trimming the platform, testing the pool's location, etc.
Click the photo to go to the article.
 Return to "Waterscaping, Part 3" - After seven months of crazy long work hours, I finally got some free time to continue working on the railroad. Weather permitting, I often worked all the live-long day. This article describes installing two posts that will eventually support the last connecting pool, then digging the big hole for the in-ground pond, complicated by a three-month drought that turned the ground to concrete. Return to "Waterscaping, Part 3" - After seven months of crazy long work hours, I finally got some free time to continue working on the railroad. Weather permitting, I often worked all the live-long day. This article describes installing two posts that will eventually support the last connecting pool, then digging the big hole for the in-ground pond, complicated by a three-month drought that turned the ground to concrete.
Click on the photo to see our progress as of mid-September, 2019.
 Return to Christmas Train Day, 2018 - After two years without our traditional Christmas Train Day (something we did from 2008 through 2015), we were anxious to get started again, even without a huge right of way to show off. The kids' trains, the extra Thomas railroad, the popcorn popper and two Bachmann Christmas trains got a big workout. And the visiting kids all loved it! Return to Christmas Train Day, 2018 - After two years without our traditional Christmas Train Day (something we did from 2008 through 2015), we were anxious to get started again, even without a huge right of way to show off. The kids' trains, the extra Thomas railroad, the popcorn popper and two Bachmann Christmas trains got a big workout. And the visiting kids all loved it!
Click on the photo to see a lot of last-minute preparations and some photos of the November 10, 2018 event itself.
 Return to "Adding a Train Shed Part 6" - Installing the board and batten siding on our train shed, installing the windows, installing the trim, testing the "tunnel entrances," and more. Return to "Adding a Train Shed Part 6" - Installing the board and batten siding on our train shed, installing the windows, installing the trim, testing the "tunnel entrances," and more.
By the way, going over lumber receipts in early 2019, I couldn't believe I was still siding the train shed in late October, and managed to have an open railroad in mid-November. It is a little crazy how fast things can go together if you have a deadline and a lot of gift cards.
Click on the photo to see our progress as of late October, 2018.
 Return to "Adding a Train Shed Part 5" - Planning the doors, walls, and windows of our garden train shed. Return to "Adding a Train Shed Part 5" - Planning the doors, walls, and windows of our garden train shed.
Includes choosing the siding and windows, installing the door, painting the windowframes, and adding crosspieces to support the vertical siding boards.
 Return to "Adding a Train Shed Part 4" - Choosing and installing underlayment and drip edge to protect the sheathing until I can get the final roof installed. Return to "Adding a Train Shed Part 4" - Choosing and installing underlayment and drip edge to protect the sheathing until I can get the final roof installed.
Now the roof is waterproof enough to get us through the next couple of months at least, maybe more.
 Return to "Adding a Train Shed Part 3" - Adding fascia, sheathing, and end trim to the in-progress train shed. Return to "Adding a Train Shed Part 3" - Adding fascia, sheathing, and end trim to the in-progress train shed.
I thought about bringing in helpers for this part, but a reader commented on how helpful it was to see how one person could do this sort of thing by himself, so I just kept plugging away.
Click on the photo to see our progress as of September 13, 2018
 Return to "Waterscaping Part 2" - Getting this year's waterscaping project done (for now at least). Installing and dirtscaping the third level of the waterfall. Installing pump and filter, adding an extra container and modifying the ones we already had installed to keep the water running smoothly. And lots of other tweaking. Includes tips about introducing fish and plants, as well as other information about water features in general that you may find helpful. Return to "Waterscaping Part 2" - Getting this year's waterscaping project done (for now at least). Installing and dirtscaping the third level of the waterfall. Installing pump and filter, adding an extra container and modifying the ones we already had installed to keep the water running smoothly. And lots of other tweaking. Includes tips about introducing fish and plants, as well as other information about water features in general that you may find helpful.
Click on the photo to see our status as of August 5, 2018.
 Return to "Adding a Train Shed Part 2" - Adding rafters to the frame of the in-progress train shed. Now it's starting to look like it might actually be a structure and not just a crazy collection of posts. Return to "Adding a Train Shed Part 2" - Adding rafters to the frame of the in-progress train shed. Now it's starting to look like it might actually be a structure and not just a crazy collection of posts.
The way we got the rafters and ridge board up wouldn't work for everybody, but it worked for us, and hopefully will help other folks to "think outside the box" - literally in this case.
Click on the photo to see our progress as of July 14, 2018.
 Return to "Adding a Train Shed Part 1" - What started out as a simple addition of a deck to stand on when putting trains on the track got a little more ambitious when I realized that JUST installing the deck this year would require more work next year. So we framed out what we planned to be a train shed attached to the railroad. If it ever gets finished, I can easily put trains on the track at a moment's notice instead of schlepping them out from the garage. Return to "Adding a Train Shed Part 1" - What started out as a simple addition of a deck to stand on when putting trains on the track got a little more ambitious when I realized that JUST installing the deck this year would require more work next year. So we framed out what we planned to be a train shed attached to the railroad. If it ever gets finished, I can easily put trains on the track at a moment's notice instead of schlepping them out from the garage.
Click on the photo to see our status as of July 9, 2018.
 Return to "Waterscaping the NEW New Boston and Donnels Creek Part 1," our article on getting the top two layers of the waterfall on solid footing and getting the third layer framed. After we finish decking and dirtscaping the third layer, we will probably add a washbasin or something for the water to flow into, then add a pump to get the waterfall flowing. No big pond until next year at least - too many other projects. Return to "Waterscaping the NEW New Boston and Donnels Creek Part 1," our article on getting the top two layers of the waterfall on solid footing and getting the third layer framed. After we finish decking and dirtscaping the third layer, we will probably add a washbasin or something for the water to flow into, then add a pump to get the waterfall flowing. No big pond until next year at least - too many other projects.
Click on the photo to see our progress as of June 13, 2018.
 Return to "Dirtscaping the NEW New Boston and Donnels Creek RR, Part 2. - Adding barriers to keep the rocks, dirt, and plants where they're supposed to go, placing platforms and running wiring for buildings, adding rocks, dirt, and plants to the upper level of the railroad. Return to "Dirtscaping the NEW New Boston and Donnels Creek RR, Part 2. - Adding barriers to keep the rocks, dirt, and plants where they're supposed to go, placing platforms and running wiring for buildings, adding rocks, dirt, and plants to the upper level of the railroad.
Click on the photo to see our status as of June 1, 2018.
 Return to "Adding Raised Roadbed to the NEW New Boston and Donnels Creek, Part 2" - Trimming the corners off the roadbed on the upper layer and cutting the pieces that will support the curves on the middle layer. We need to get the upper two tiers of the pond installed before we totally complete this step, so the article doesn't quite show the finished product. You'll see it later as part of other articles. Return to "Adding Raised Roadbed to the NEW New Boston and Donnels Creek, Part 2" - Trimming the corners off the roadbed on the upper layer and cutting the pieces that will support the curves on the middle layer. We need to get the upper two tiers of the pond installed before we totally complete this step, so the article doesn't quite show the finished product. You'll see it later as part of other articles.
 Return to "Adding Raised Roadbed to the NEW New Boston and Donnels Creek RR, Part 1" - Sorting out our priorities for the spring and summer of 2018. There a lot of little chores we really should get done before we start on the next big addition. Click to see our plans as of February 27, 2018. Return to "Adding Raised Roadbed to the NEW New Boston and Donnels Creek RR, Part 1" - Sorting out our priorities for the spring and summer of 2018. There a lot of little chores we really should get done before we start on the next big addition. Click to see our plans as of February 27, 2018.
Click on the photo to see our status as of February 20, 2018
 Return to "2018: Springing into Spring on the NEW New Boston & Donnels Creek RR." - Sorting out our priorities for the spring and summer of 2018. There a lot of little chores we really should get done before we start on the next big addition. Click to see our plans as of February 27, 2018. Return to "2018: Springing into Spring on the NEW New Boston & Donnels Creek RR." - Sorting out our priorities for the spring and summer of 2018. There a lot of little chores we really should get done before we start on the next big addition. Click to see our plans as of February 27, 2018.
Click on the photo to see our status as of February 20, 2018
 Return to "Dirtscaping the NEW New Boston and Donnels Creek RR, Part 1. - Putting edging around the existing "layers" of the new railroad, and beginning to add gravel and rocks. There were a few test runs, but we got stopped early by bad weather before we could dump the rest of the rocks, gravel, and dirt, much less plant the plants we hoped to get in before snowfall. Return to "Dirtscaping the NEW New Boston and Donnels Creek RR, Part 1. - Putting edging around the existing "layers" of the new railroad, and beginning to add gravel and rocks. There were a few test runs, but we got stopped early by bad weather before we could dump the rest of the rocks, gravel, and dirt, much less plant the plants we hoped to get in before snowfall.
Click on the photo to see our status as of November 21, 2017
 Return to "Decking the NEW New Boston and Donnels Creek RR - Decking the 'middle layer' of our proposed three-tier outdoor railroad. Prepping more track, laying out track and decking to make certain we have measurements correct, installing most of the remaining decking for this layer. Return to "Decking the NEW New Boston and Donnels Creek RR - Decking the 'middle layer' of our proposed three-tier outdoor railroad. Prepping more track, laying out track and decking to make certain we have measurements correct, installing most of the remaining decking for this layer.
Click on the photo to see our status as of October 25, 2017
 Return to "Framing the NEW New Boston and Donnels Creek RR, Part 6" - Modifying and finishing the framing on the second layer, cantilevering, using R3 track versus all other pre-curved track formats, finalizing the track plan, why painting the track makes old and new track blend better, and more. This will be the last bit of "framing" in 2017, and it worked out well, considering. Return to "Framing the NEW New Boston and Donnels Creek RR, Part 6" - Modifying and finishing the framing on the second layer, cantilevering, using R3 track versus all other pre-curved track formats, finalizing the track plan, why painting the track makes old and new track blend better, and more. This will be the last bit of "framing" in 2017, and it worked out well, considering.
Click on the photo to see our status as of October 15, 2017
 Return to "Framing the NEW New Boston and Donnels Creek RR, Part 5" - Spreading the billboard-sourced vinyl underlayment on the top layer. Prepping used Aristo track for (hopefully) many more years of service. Laying the first loop of track, attaching power wires with spade terminals, and testing conductivity with a Bachmann streetcar. Return to "Framing the NEW New Boston and Donnels Creek RR, Part 5" - Spreading the billboard-sourced vinyl underlayment on the top layer. Prepping used Aristo track for (hopefully) many more years of service. Laying the first loop of track, attaching power wires with spade terminals, and testing conductivity with a Bachmann streetcar.
Click on the photo to see our status as of October, 10, 2017
 Return to "Framing the NEW New Boston and Donnels Creek RR, Part 4" - Planning and running the decking for the top layer, testing the track plan, checking clearances, prepping used track with new railjoiners, examining the vinyl I ordered to go over the decking, and more. Return to "Framing the NEW New Boston and Donnels Creek RR, Part 4" - Planning and running the decking for the top layer, testing the track plan, checking clearances, prepping used track with new railjoiners, examining the vinyl I ordered to go over the decking, and more.
Click on the photo to see our status as of September 26, 2017
 Return to "Framing the NEW New Boston and Donnels Creek RR, Part 3" -
Getting the frame finished on the top layer, ordering other things I'd need eventually, deciding on materials for the decking on the top layer (at least). Return to "Framing the NEW New Boston and Donnels Creek RR, Part 3" -
Getting the frame finished on the top layer, ordering other things I'd need eventually, deciding on materials for the decking on the top layer (at least).
Click on the photo to see our status as of September 17, 2017
 Return to "Framing the NEW New Boston and Donnels Creek RR, Part 2" -
Once I had the overall frame relatively solid, I hooked up the underground power lines to two GFI plugs that should be in easy reach once everything is finished. I also decided to frame out the top railroad layer while I could still access the center of the railroad easily. Because I was running out of vertical space, I reconfigured that layer. Then after I got the "core" pieces on, I changed my plan again. But the whole thing is getting easier and easier to visualize, and is getting closer to complete with every board I cut and fasten on. Return to "Framing the NEW New Boston and Donnels Creek RR, Part 2" -
Once I had the overall frame relatively solid, I hooked up the underground power lines to two GFI plugs that should be in easy reach once everything is finished. I also decided to frame out the top railroad layer while I could still access the center of the railroad easily. Because I was running out of vertical space, I reconfigured that layer. Then after I got the "core" pieces on, I changed my plan again. But the whole thing is getting easier and easier to visualize, and is getting closer to complete with every board I cut and fasten on.
Click on the photo to see our status as of September 7, 2017
 Return to "Framing the NEW New Boston and Donnels Creek RR, Part 1" -
Once I started dropping posts in the holes and screwing things together, I didn't want to stop before I had the basic frame built (for one thing, the wood warps less once it's fastened in place). Now the folks driving down the street past our house (we're on a corner lot) probably wonder if I'm building an elaborate chicken coop, but that's fine with me. I still need to make a few more lumber runs and do a lot more cutting and sawing, but having the basic frame in place should make the next bits a lot easier. Return to "Framing the NEW New Boston and Donnels Creek RR, Part 1" -
Once I started dropping posts in the holes and screwing things together, I didn't want to stop before I had the basic frame built (for one thing, the wood warps less once it's fastened in place). Now the folks driving down the street past our house (we're on a corner lot) probably wonder if I'm building an elaborate chicken coop, but that's fine with me. I still need to make a few more lumber runs and do a lot more cutting and sawing, but having the basic frame in place should make the next bits a lot easier.
Click on the photo to see our status as of August 10, 2017
 Return to "Breaking Ground on the NEW New Boston and Donnels Creek" -
Okay, in case you wondered if we'd ever get started on the thing, we broke ground in July, using a manual post-hole digger. Well two manual post-hole diggers. But by the end of this article, we're ready for the posts to start going in. Return to "Breaking Ground on the NEW New Boston and Donnels Creek" -
Okay, in case you wondered if we'd ever get started on the thing, we broke ground in July, using a manual post-hole digger. Well two manual post-hole diggers. But by the end of this article, we're ready for the posts to start going in.
Click on the photo to see our status as of the end of July, 2017
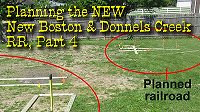 Return to "Planning the NEW New Boston and Donnels Creek, Part 4" -
Well, the rented post-hole digger fell through, so we dug our vegetable garden with a manual post-hole digger (the scissors kind). In addition, I stake out where the railroad was going to be. Twice. And tweaked the plans again. Sorry about the redo's, but sometimes just walking around the yard trying to visualize things makes me reconsider something that seemed "settled" only a few days before. Return to "Planning the NEW New Boston and Donnels Creek, Part 4" -
Well, the rented post-hole digger fell through, so we dug our vegetable garden with a manual post-hole digger (the scissors kind). In addition, I stake out where the railroad was going to be. Twice. And tweaked the plans again. Sorry about the redo's, but sometimes just walking around the yard trying to visualize things makes me reconsider something that seemed "settled" only a few days before.
Click on the photo to see what we were considering as of late May, 2017
 Return to "Planning the NEW New Boston and Donnels Creek, Part 3" -
We have still not broken ground. In part because we plan to rent a post-hole digger and dig the post holes for our raised vegetable garden and the first phase of the garden railroad at the same time, and we don't have enough lumber on hand yet. (If we didn't break it down into multiple trips, we'd be blowing out the shocks on our minivan.) In the meantime, we used a line level to see if the slope of the back yard was as bad as we thought it was (it's worse), and we did other site preparation, including planting a whole bunch of spruce tree seedlings to eventually give us some privacy in our side and back yard. Plus, I'm still wavering a little on the "where-to-start-first" issue. Return to "Planning the NEW New Boston and Donnels Creek, Part 3" -
We have still not broken ground. In part because we plan to rent a post-hole digger and dig the post holes for our raised vegetable garden and the first phase of the garden railroad at the same time, and we don't have enough lumber on hand yet. (If we didn't break it down into multiple trips, we'd be blowing out the shocks on our minivan.) In the meantime, we used a line level to see if the slope of the back yard was as bad as we thought it was (it's worse), and we did other site preparation, including planting a whole bunch of spruce tree seedlings to eventually give us some privacy in our side and back yard. Plus, I'm still wavering a little on the "where-to-start-first" issue.
Click on the photo to see what we were considering as of late April, 2017
 Return to "Planning the NEW New Boston and Donnels Creek, Part 2" -
More plans. We've moved on from the 2"x6" roadbed-on-posts to a sort of "train-table-outside" plan. Our goals include low-maintenance, high interest, and high reliability. We're also trying to get around having a thousand dollars' worth of dirt hauled into the back yard. If you want to get some idea of what our planning process looks like, reading these through in sequence may help. Or it may drive you crazy. Return to "Planning the NEW New Boston and Donnels Creek, Part 2" -
More plans. We've moved on from the 2"x6" roadbed-on-posts to a sort of "train-table-outside" plan. Our goals include low-maintenance, high interest, and high reliability. We're also trying to get around having a thousand dollars' worth of dirt hauled into the back yard. If you want to get some idea of what our planning process looks like, reading these through in sequence may help. Or it may drive you crazy.
Click on the photo to see what we were considering in early April, 2017
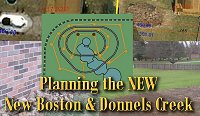 Return to "Planning the NEW New Boston and Donnels Creek, Part 1" -
If you're subscribed to our newsletter, you know that we moved just after Thanksgiving in 2016, leaving behind most of the track, a few of the bird feeders, and one Bachmann train set for the new owners. We also left behind a high-maintenance garden that we do not intend to replicate at the new place. This is the first chapter of a new chapter in our lives, which we hope will include a lot of "lessons learned." But first, some serious landscaping had to take place. Return to "Planning the NEW New Boston and Donnels Creek, Part 1" -
If you're subscribed to our newsletter, you know that we moved just after Thanksgiving in 2016, leaving behind most of the track, a few of the bird feeders, and one Bachmann train set for the new owners. We also left behind a high-maintenance garden that we do not intend to replicate at the new place. This is the first chapter of a new chapter in our lives, which we hope will include a lot of "lessons learned." But first, some serious landscaping had to take place.
Click on the photo to see what we were considering in March, 2017
 Return to the New Boston and Donnels Creek RR Page - This is the page describing Paul Race's progress and frequent rework on his own garden railroad, started on a shoe-string budget in 1998, later expanded, and later refurbished several times as issues arose. Issues that Paul hopes to avoid by building the next iteration above ground. Return to the New Boston and Donnels Creek RR Page - This is the page describing Paul Race's progress and frequent rework on his own garden railroad, started on a shoe-string budget in 1998, later expanded, and later refurbished several times as issues arose. Issues that Paul hopes to avoid by building the next iteration above ground.
Click on the photo to see the home page of Paul's railroad.
 Return to Family Garden Trains' Home Page - The home page with links to all the other stuff, including design guidelines, construction techniques, structure tips, free graphics, and more. Return to Family Garden Trains' Home Page - The home page with links to all the other stuff, including design guidelines, construction techniques, structure tips, free graphics, and more.
To read more, or to look at recommended Garden Railroading and Big Indoor Train products, please click on the index pages below.
| 







 "Westward Expansion, 2020, Part 2"
 Here's a weird safety note. For some reason Ohio's yellow jackets are more active in autumn, even late autumn, than they are in the summer. While I was cutting lumber for the new extension's deck, two kept landing on the lumber. They were not aggressive toward me at all; I think they were attracted to the scent. So I didn't pay them much attention until I put my hand down on a board without looking and got stung on my palm between my thumb and forefinger. I can't really blame a wasp for stinging me if I crush it accidentally, so swatting and killing the other one the next time I saw him was probably unjustified. Still hurts, though, so I guess they have their revenge.


 Proceed to "Garage to Train Station, Part 1"
 Proceed to "Christmas Preparations and Operations"
 Return to "Westward Expansion, 2020, Part 1"
 Return to "Train Storage Solutions, 2020"
 Return to "Expansion Planning, 2020"
 Return to "Winter Preparation, 2019"
 Return to "Christmas Train Day, 2019"
 Return to "Preparing for Christmas Train Day 2019"
 Return to Decking the NEW New Boston and Donnels Creek Part 2
 Return to "Framing the NEW New Boston and Donnels Creek RR - Part 7"
 Return to "Planning the NEW New Boston and Donnels Creek RR - Part 5"
 Return to Waterscaping Part 4.
 Return to "Waterscaping, Part 3"
 Return to Christmas Train Day, 2018
 Return to "Adding a Train Shed Part 6"
 Return to "Adding a Train Shed Part 5"
 Return to "Adding a Train Shed Part 4"
 Return to "Adding a Train Shed Part 3"
 Return to "Waterscaping Part 2"
 Return to "Adding a Train Shed Part 2"
 Return to "Adding a Train Shed Part 1"
 Return to "Waterscaping the NEW New Boston and Donnels Creek Part 1,"
  Return to "Dirtscaping the NEW New Boston and Donnels Creek RR, Part 2.
 Return to "Adding Raised Roadbed to the NEW New Boston and Donnels Creek, Part 2"
 Return to "Adding Raised Roadbed to the NEW New Boston and Donnels Creek RR, Part 1"
 Return to "2018: Springing into Spring on the NEW New Boston & Donnels Creek RR."
 Return to "Dirtscaping the NEW New Boston and Donnels Creek RR, Part 1.
 Return to "Decking the NEW New Boston and Donnels Creek RR
 Return to "Framing the NEW New Boston and Donnels Creek RR, Part 6"
 Return to "Framing the NEW New Boston and Donnels Creek RR, Part 5"
 Return to "Framing the NEW New Boston and Donnels Creek RR, Part 4"
 Return to "Framing the NEW New Boston and Donnels Creek RR, Part 3"
 Return to "Framing the NEW New Boston and Donnels Creek RR, Part 2"
 Return to "Framing the NEW New Boston and Donnels Creek RR, Part 1"
 Return to "Breaking Ground on the NEW New Boston and Donnels Creek"
 Return to "Planning the NEW New Boston and Donnels Creek, Part 4"
 Return to "Planning the NEW New Boston and Donnels Creek, Part 3"
 Return to "Planning the NEW New Boston and Donnels Creek, Part 2"
 Return to "Planning the NEW New Boston and Donnels Creek, Part 1"
 Return to the New Boston and Donnels Creek RR Page
 Return to Family Garden Trains' Home Page